Jump to:
1. How to book a space using the map view #
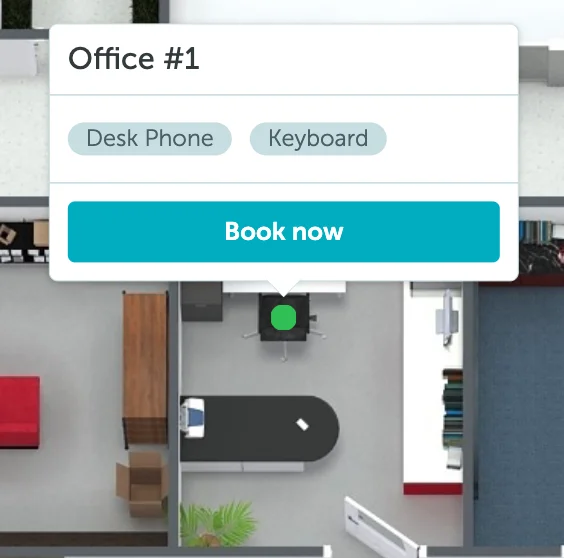
To book a desk, workstation, or a parking space straight from the map, select the available space (green circle) and press “Book now”.
Then, select your booking date(s) by pressing on them. You can use either daily or calendar view:
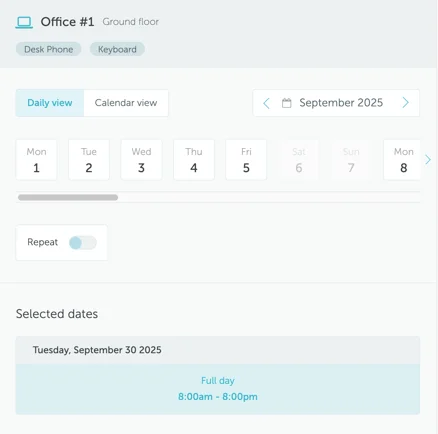
Daily View
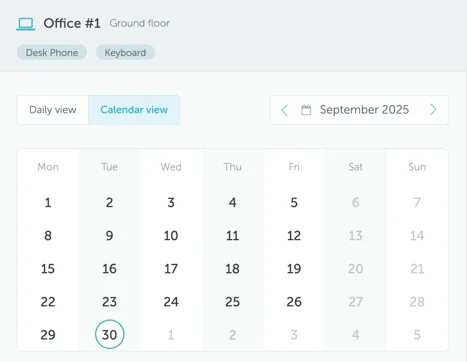
Calendar View
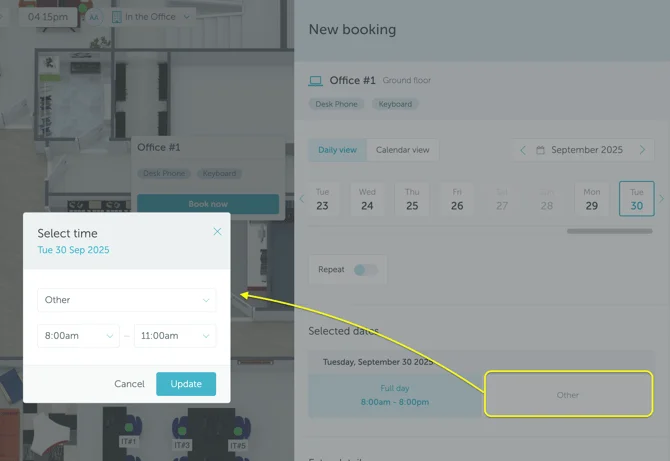
Define your booking timeframe. If you want to reserve a space for a custom time period, use the “Other” option to adjust it. From the drop-down menu, select the time from the predefined intervals or enter your own. Click “Update”.
Finish by adding booking details (optional step, only if applicable) in the “Notes” field, event type, and press “Book now”, and you’re all set. The confirmation will be sent via email. You can check your booking at Workplace → Bookings.
What is an event type? “Event types function like a color-coding system for different bookings (events).” For example, blue for 1:1 meetings, green for team stand-ups, and red for conferences. It’s a straightforward way to keep your organization’s schedule clear and visually coordinated.
If you select the event type while booking a space, a corresponding color will be assigned to your booking in the timeline view, just like this:
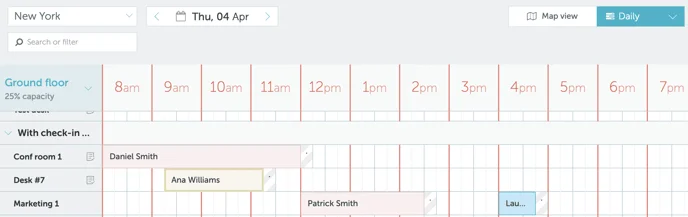
2. How to book a space using the timeline view #
To make a booking via the timeline view, press any empty time slot in the row of your desired available space:
You will be directed to the date selector. Proceed by following the same steps as in booking via the map view. The booking will be confirmed via email.
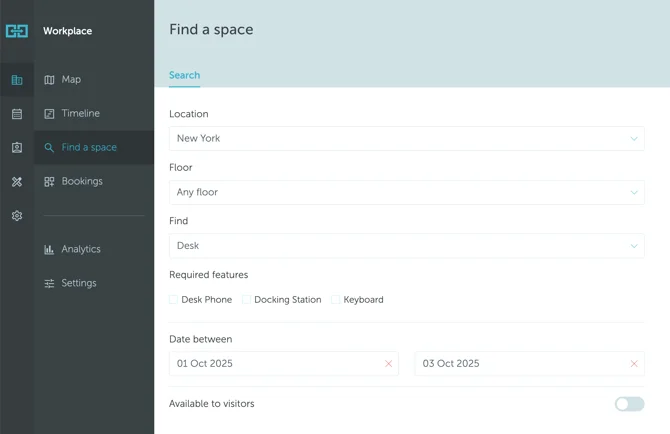
3. How to book a space using “Find a space” option #
To book a space, access the “Find a space” search and specify your requirements:
The system will offer you a list of spaces that match your criteria. Pick one, and proceed with the booking process, just as in Map or Timeline view.
As always, we will send you an email with the booking confirmation.
4. How to book a space using the calendar view #
If you want to book a space using the Calendar view, go to Workplace → Calendar and press the + button which will appear when you hover on the selected day (if you are using the weekly or monthly calendar views) or your name (if you are using the daily view). Then, press “Book”. Proceed with the booking process, just as in the Map or Timeline view.
We will send you an email with booking confirmation. The booking will also appear on your Calendar.
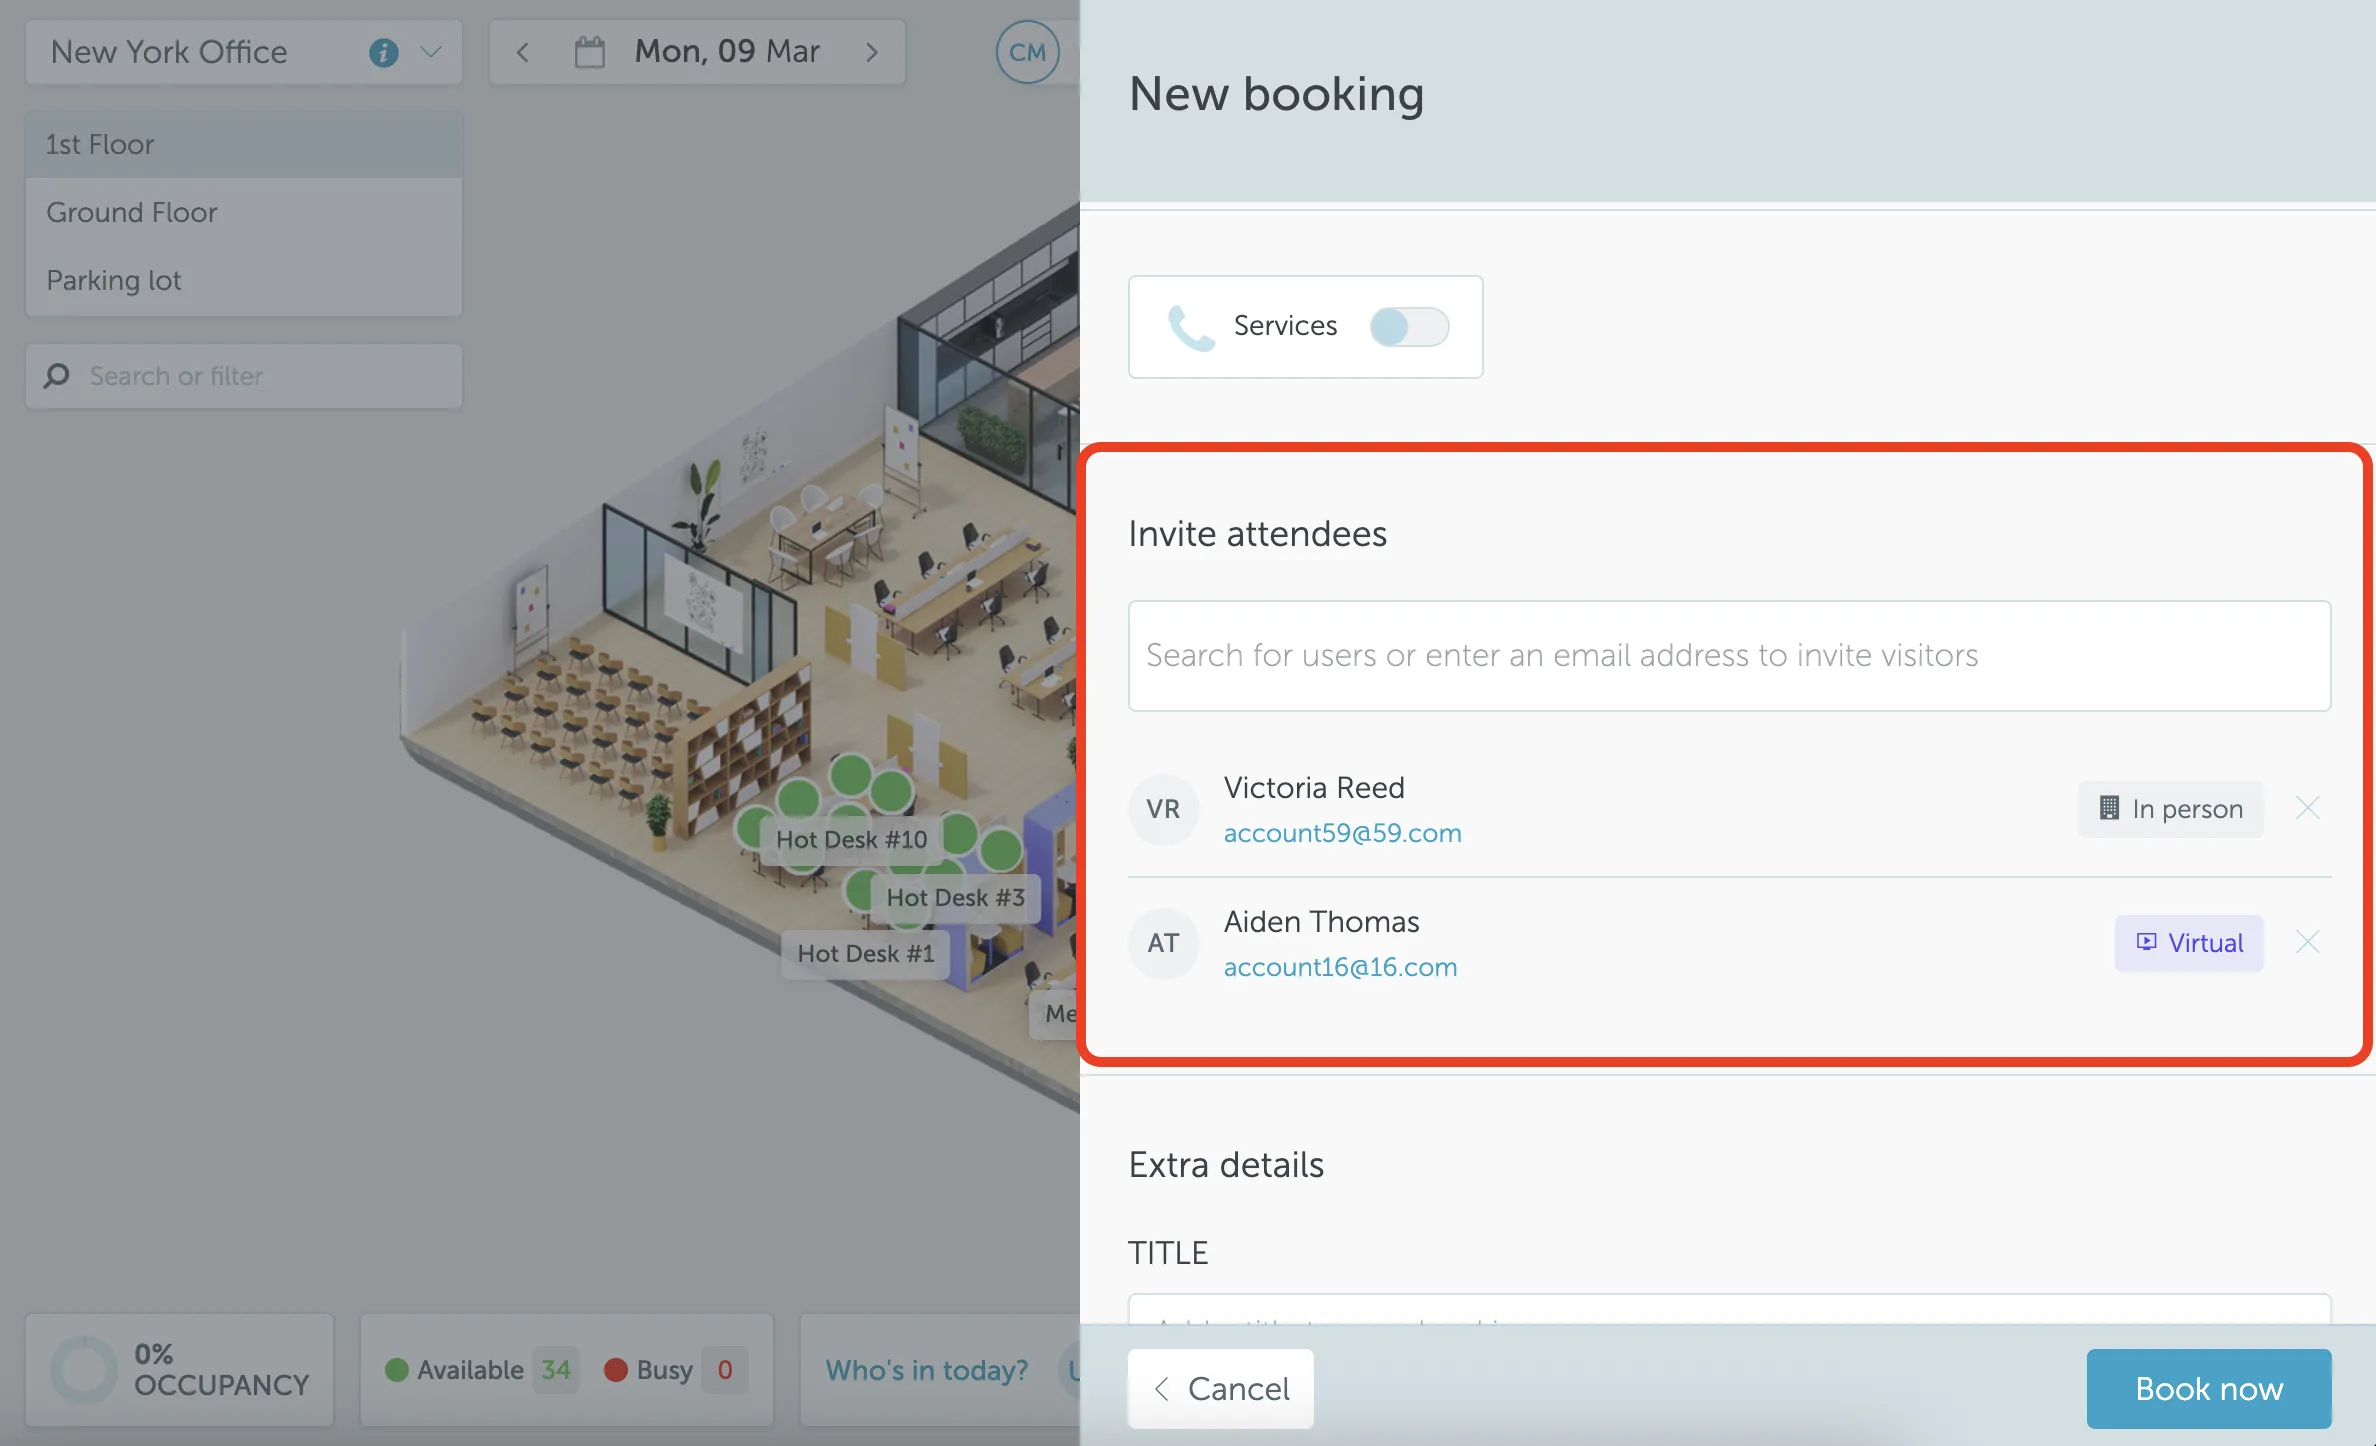
5. How to invite attendees #
When booking a room or another space that supports invites, you can add attendees directly from the booking form. Use the “Invite attendees” field to search for users by name or enter an email address to invite external visitors.
Each attendee can be marked as “In person” or “Virtual”. This tells the system whether the person will be physically present or joining remotely.
After the booking is created, each attendee receives an email with options to confirm their attendance: “Attending in person”, “Attending virtually”, or “Decline”. No login is required, it is a one-click confirmation.
If your organization uses Visitor Management, only attendees who confirm physical attendance will receive a visitor registration invitation (QR code, registration link). Virtual attendees and those who have not responded will not receive visitor management emails.
6. How to create a recurrent booking #
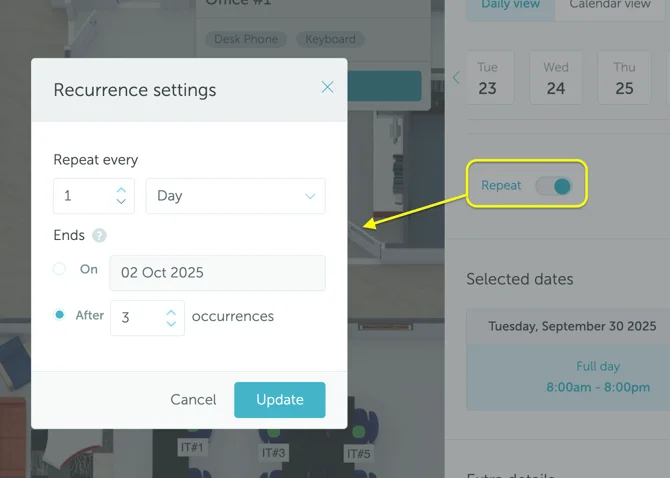
To do it, simply activate the “Repeat” field below the date selector. You will be requested to describe the recurrence settings (repeats every X day; week; month by day; month by week day), and its end time (at a specific date or after a number of occurrences).
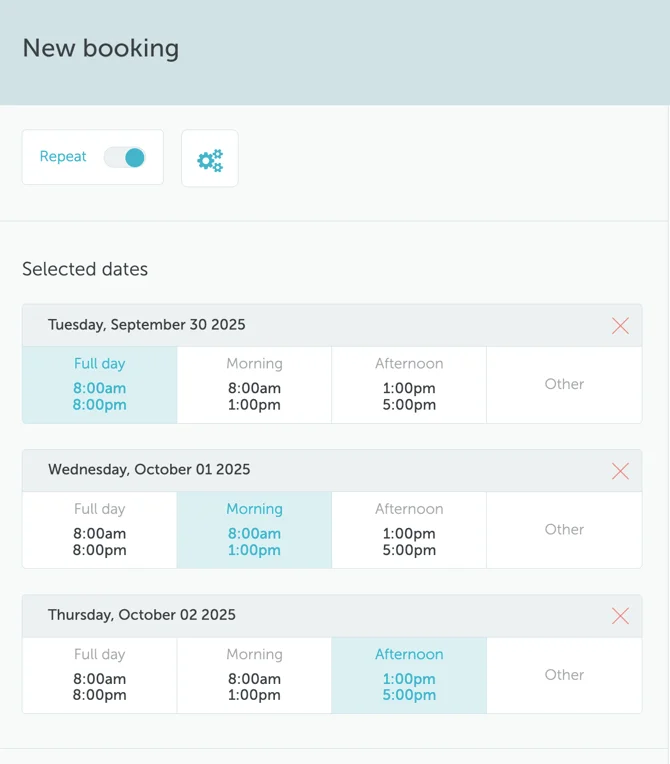
You can define unique timeframes for each recurrent booking. For example, one booking can be made for a full day, another - for morning only.
7. Private bookings #
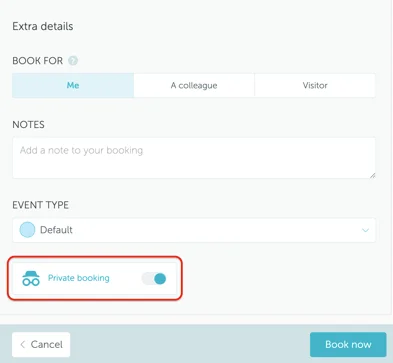
Private bookings hide several information of the booking - their details (booker’s name and profile image, meeting title, etc.) are not visible to other users (except Administrators, Supervisors and Managers).