Jump to:
1. What are “space types” and “space groups”
In YAROOMS, you can organize spaces into TYPES (desks, rooms, offices, parking spaces) and GROUPS (Manager desks, IT desks, Private Offices, Free Offices).
One Space Type can have multiple Space Groups. Space Groups enable:
- Setting up specific user access (example: desk group available only for Sales Team)
- Enforcing different settings for separate space groups (check-in methods, booking options, meeting limits)
Example scenario:
- Space Type: DESK
- Space Groups: IT Desks (IT department only), Sales Desks (Sales department only), Free Desks (everyone)
2. How to create Space TYPES
Go to Settings → Space types → Add+
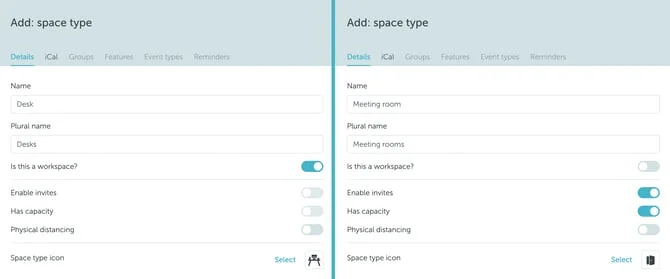
Details Tab
- Name the space type and define its settings
- “Is workspace” setting: When activated, spaces act as single-unit bookings (desks, parking lots). When inactive, spaces act as shared units like meeting rooms with “Enable invites” and “Has capacity” options
- Select a “Space Type Icon” for identification
iCal Tab
Configure how bookings appear in calendars:
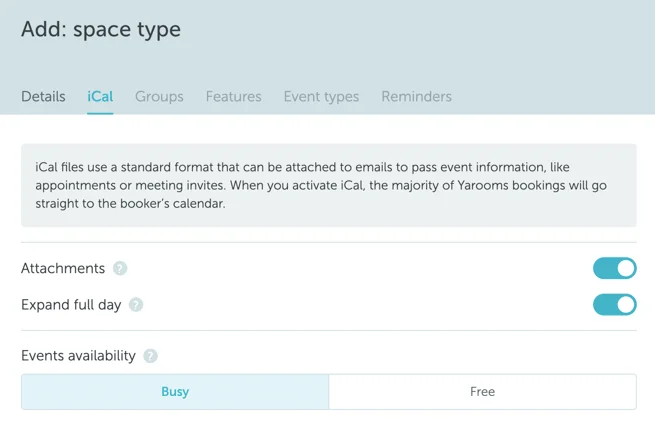
- Attachments: Disable to prevent iCal files in booking confirmations
- Expand full day: Shows events as full-day calendar items regardless of specific intervals
- Events availability: Set calendar events as BUSY or FREE
Additional Tabs
After saving, access:
- Groups tab: Organize spaces into space groups
- Features tab: Add applicable features (audio conference, flipchart, double screen, etc.)

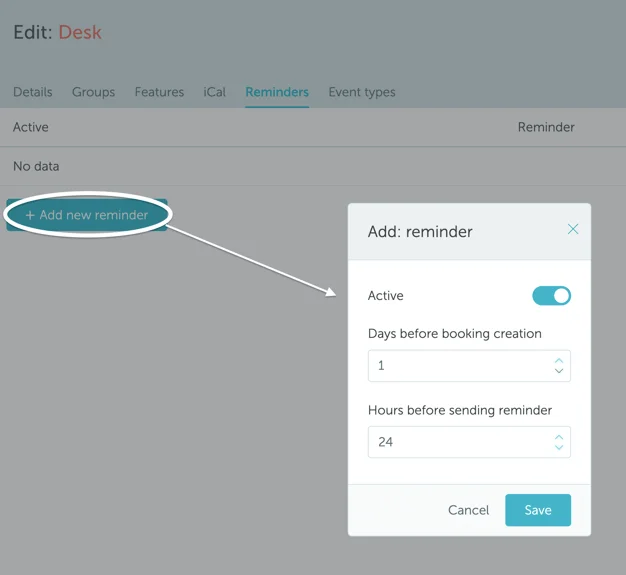
- Reminders tab: Configure multiple advance booking reminders by days and hours
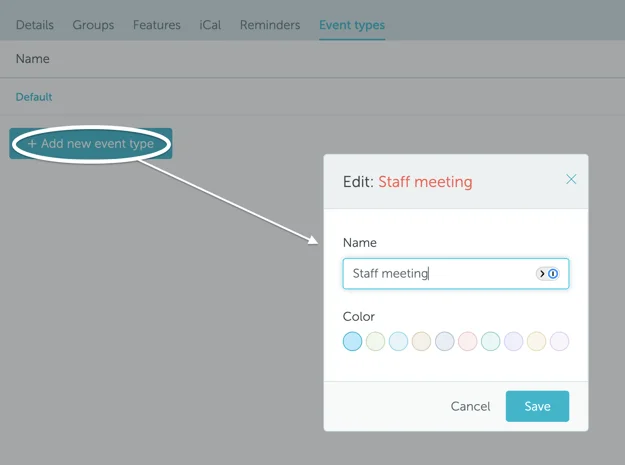
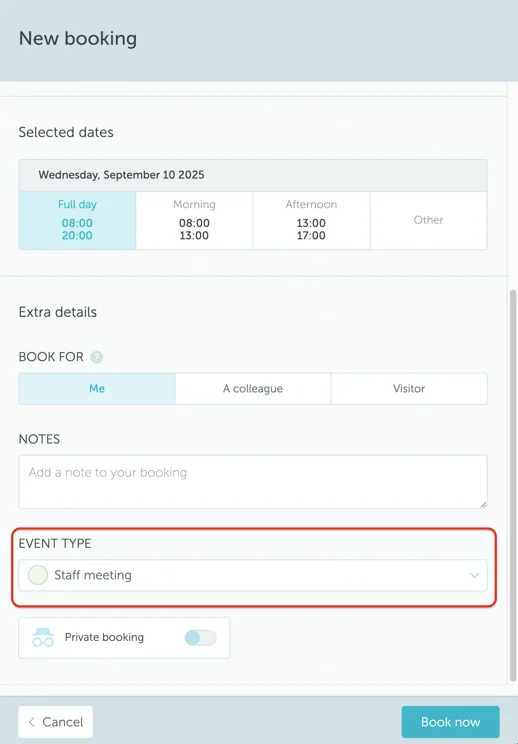
- Event Types tab: Set up event types with custom colors for space utilization
3. How to create Space GROUPS
Go to Settings → Space types → [Type name] → Groups → “Add group+”
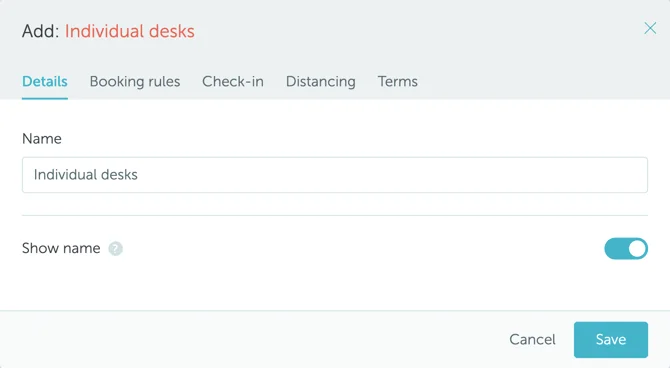
Details Tab
Name the group. Toggle “Show name” to display space names on the map without clicking.
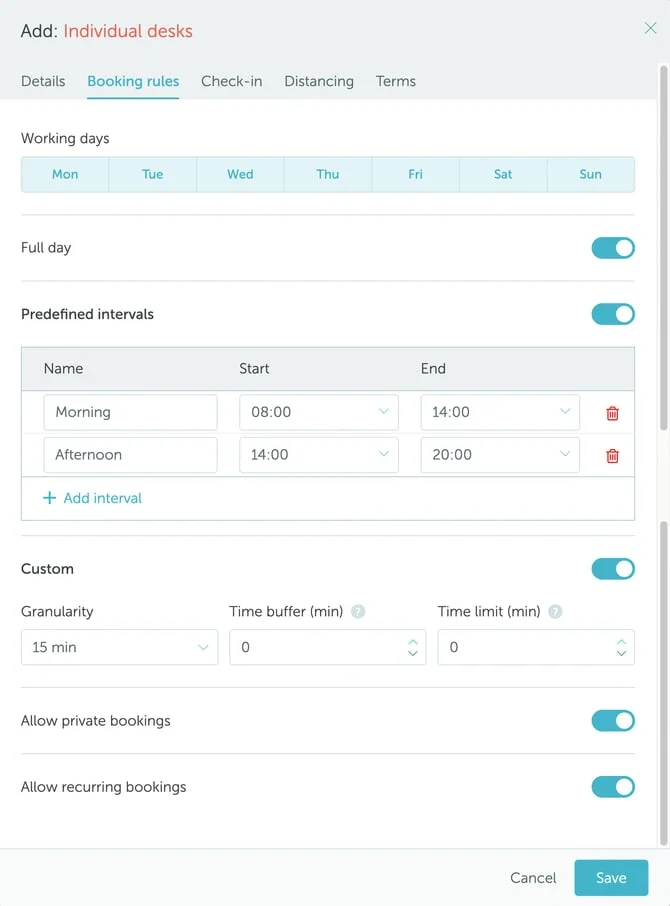
Booking Rules
Define how and when spaces can be booked:
- Working days: Select days when spaces are bookable
- Booking rules (at least one required):
- Full day booking
- Predefined intervals with customizable names (Morning, Afternoon)
- Custom user-defined intervals
- Granularity: Time increments for intervals and custom bookings
- Time buffer: Minutes required between bookings for cleaning/decongestion
- Time limit: Maximum reservation duration
- Allow private bookings: Users can reserve privately
- Allow recurring booking: Deactivate to disable recurring patterns
Check-in Settings
Enable “Require check-in” and select strategy:
- Simple (browser, Teams, or Mobile)
- WiFi (automatic upon app opening on office Wi-Fi)
- QR-code scan (scan from Mobile app)
- Geo-fenced (users must be within office radius)
Set a grace period timeframe for check-in. Bookings are automatically canceled if check-in fails.
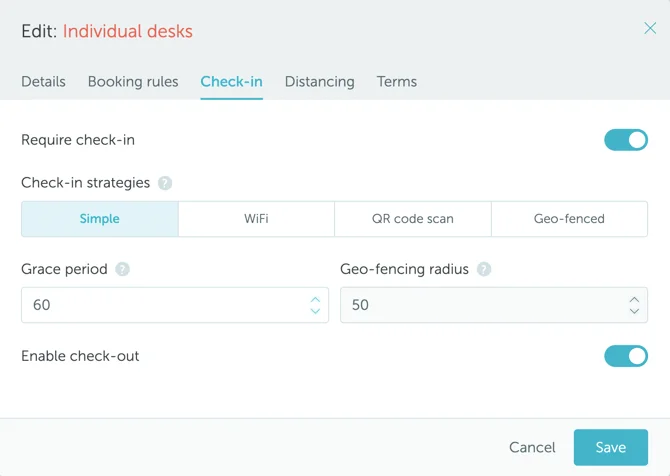
Enable check-out to allow users to end bookings early.
Distancing Tab
(Appears only when Physical Distancing is enabled for the Space Type)
Set “Min distance in m” (zero to disable). Requires “Scale” configuration at Floor level via Settings → Workplace → [Floor name] → Edit → Image (pixels per meter).

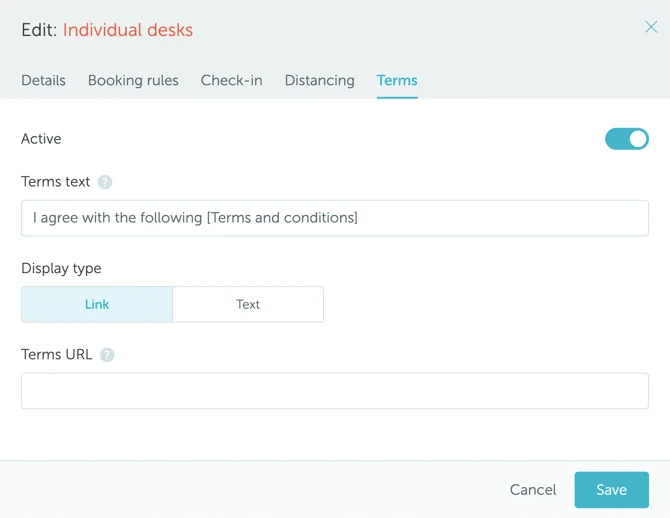
Terms Tab
Optionally require terms and conditions agreement. Host content externally (URL) or internally (Text display type). Users must check the T&C box before completing bookings.