1. How to create a new location #
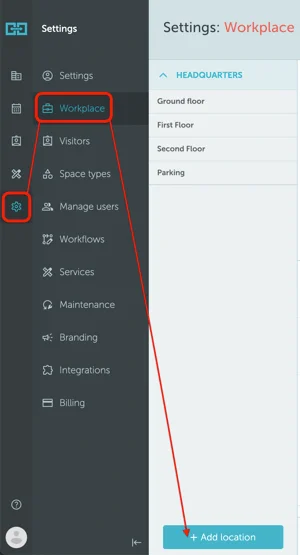
Navigate to Settings → Workplace and click the “Add location +” button.
General
Set the location’s name, timezone, capacity, and managers (optional). Timezones are shown with abbreviations paired with major cities for reference.
Schedule
Configure the location’s work hours. Read more about location schedules .
Visibility
Define visibility settings for:
- Booker: Hide name or hide name and assigned seat booking status
- Spaces: Show all or hide non-bookable space groups
- Space groups: Show on or hide from timeline
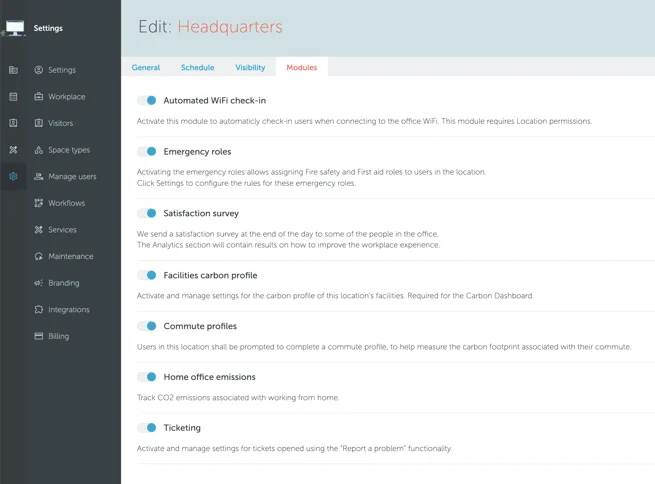
Modules
Activate modules including:
- Emergency roles (Fire safety and First aid assignments)
- Satisfaction survey (sent to office visitors daily)
- Ticketing (manage “Report a problem” functionality)
- Automated Wi-Fi Check-In (check-in when connecting to office Wi-Fi)
Save your settings when complete.
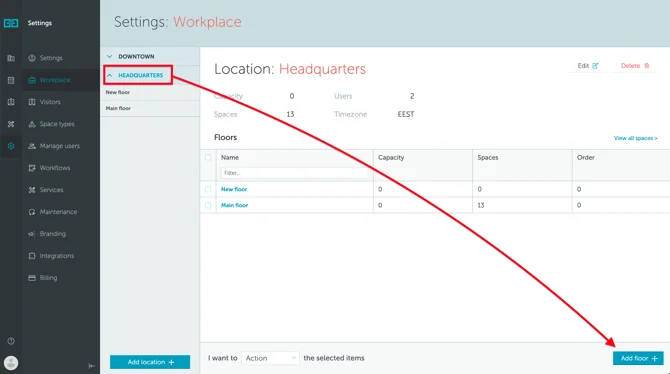
2. How to create a new floor #
From Settings → Workplace, select a location and click “Add floor+” from its details page.
Name the floor and add capacity (optional – applies only to desk count). Under the “Map” tab, upload a PNG or JPEG file (max 8000x8000 pixels; keep under 4MB for faster loading). Specify the scale ratio (pixels to meters).
Note: If replacing floor plans with different dimensions, spaces may shift. You’ll need to reposition them in Map View Edit-Mode.