Jump to:
1. Floor plan edit mode #
Use the floor plan edit mode to add, edit, or delete the spaces and areas directly from the floor map.
To access the floor plan edit mode, press the “Edit mode” icon on the right side of your UI:
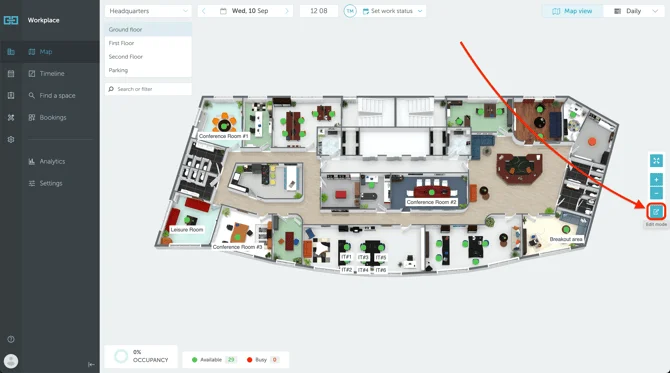
You will be redirected to the editable view.
On the top of the page, make sure to select what you are going to edit:
- Spaces
- Areas
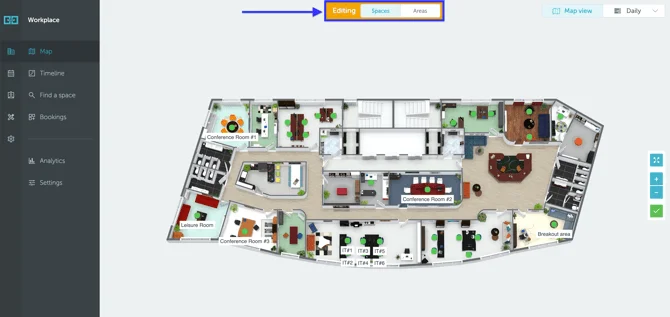
Once you are done setting up the office map, press on the green check mark on the right side of your UI to exit the edit mode.
2. How to add new spaces #
To add a new space, specify that you are editing spaces on the top of your floor plan. Then, press any empty spot on it.
You will be asked to select the space type (desk, meeting room, etc.), space group (if multiple), add space features, and name it.
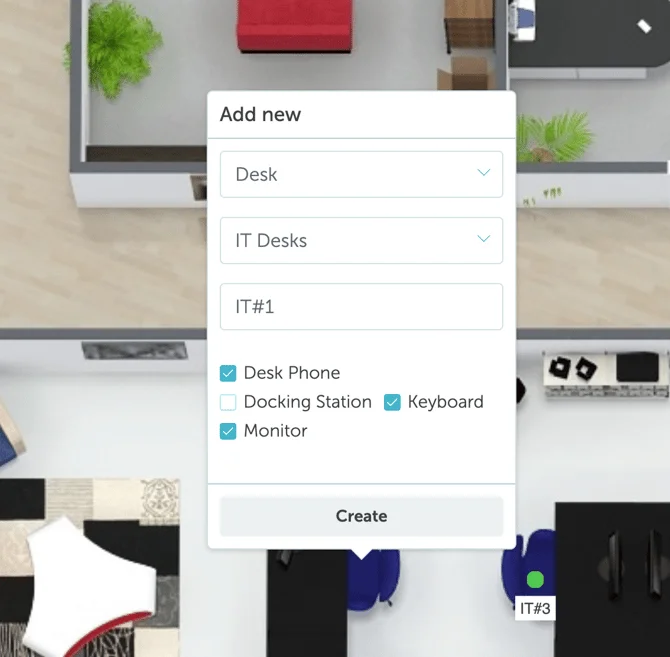
Press “Create”. The new space will appear on the map instantly.
You can drag the new space to move it on any other spot on the map.
3. How to edit and delete spaces #
While in Edit Mode, you can edit or delete any space by clicking on it:
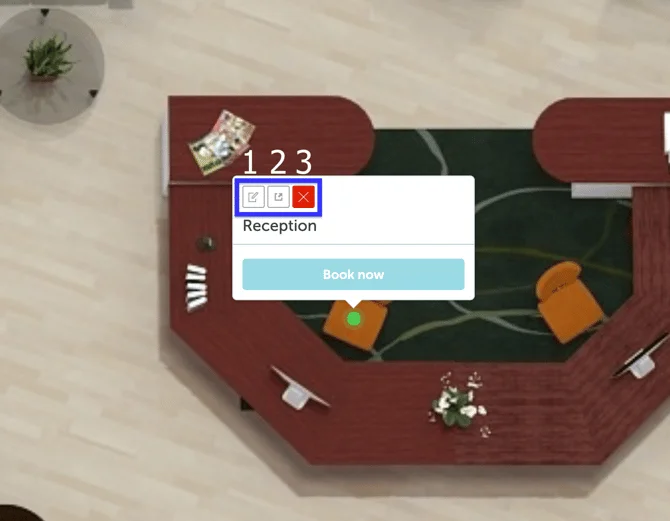
- Button #1 - called “Quick Edit”, will give you the ability to change some basic details of the space (name, space group, capacity and features).
- Button #2 - called “Edit” will redirect you to the advanced space editor. In addition to the capabilities of the Quick Edit, from here you can also:
- adjust the space’s position on the map more accurately.
- choose whether or not the space’s capacity is enforceable or just informative.
- set a minimum number of attendees.
- add additional information to the booking confirmation email for that space (Email Info).
- assign the space to a user (Assignment tab).
- add a picture for this space (Picture tab).

- Button #3 - called “Delete” will delete the space.
4. How to add and edit areas #
To add a new area, specify that you are editing areas on the top of your floor plan. Then, drag your cursor around the area’s contour. The new area will appear on the map immediately.

To define the area’s capacity, press on it and specify the maximum number of people the area can fit in:
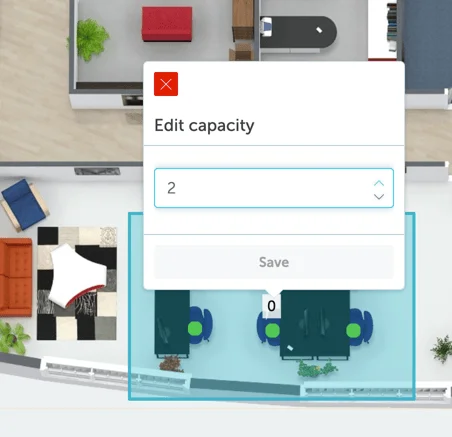
Don’t forget to save your selection.
The red “Delete” icon will remove the area permanently in one go.