Jump to:
How to set up a reception device
Step 1
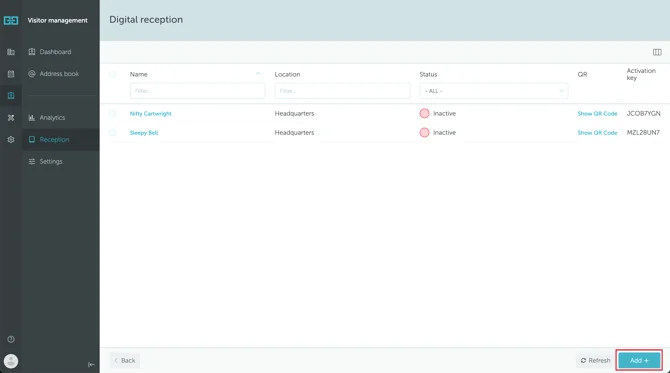
Open the YAROOMS web app and go to Visitor Management → Reception
Step 2
Here, you will see a list of all available configured devices. You can filter them by name, location, and status (active or inactive). To set up a new device, click Add+ in the bottom right corner.
Step 3
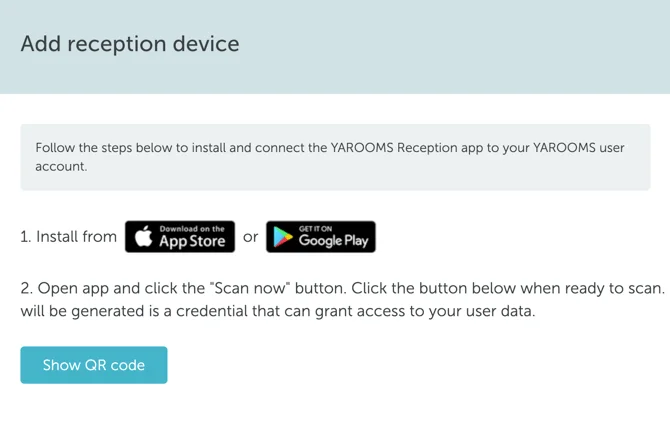
Click “Show QR Code”
Step 4
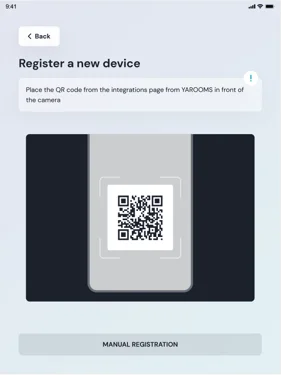
Open the YAROOMS Reception app on your tablet and press the button to scan the QR code from the web app.
Step 5
You scanned the QR code, so the tablet is now connected. Let’s get back to the web app and edit the device’s configuration.
After scanning the QR code with a tablet, hit Continue in the web app.
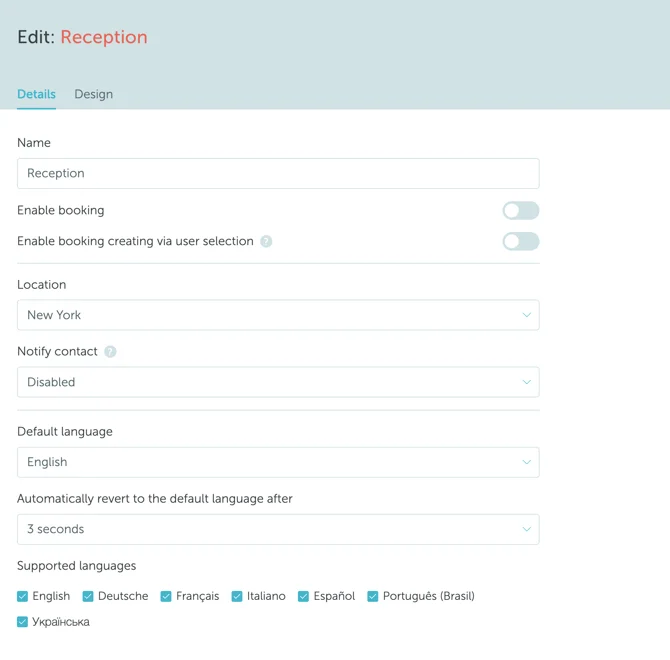
Now it’s time to edit the device’s configuration. In the ‘Details’ tab, you have the following options:
- Name: you can assign your device a name (for easier managing and search purposes).
- Enable booking: allowing bookings to be created from the reception tablet.
- Enable booking via user selection: As an alternative to authorizing a booking by scanning a QR code, you can authorize it directly by searching for the booking in your account.
- Location: the location this reception device is linked to.
- Notify contact: after checking-in as a guest, visitors can search for the person you are meeting with, and they will be notified.
- Default language.
- Automatically revert to the default language after [number of minutes].
- Supported languages: choose which of the available languages should show up as options for your visitors.
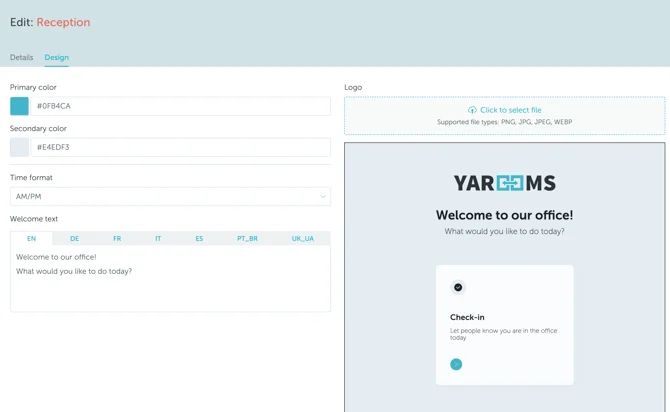
Step 6
In the ‘Design’ tab, you can adjust the device’s interface to your organization’s branding (colors, logo, time format and welcome message).
That’s it, everything is ready! The newly added device will appear in the devices list, with an ‘Active’ state.