SAML2.0: How to connect to OneLogin
This article explains how to activate SSO and automatic user provisioning via the OneLogin identity provider.
STEP 1: Create a new application in OneLogin
In the top menu bar, click Apps → Add Apps
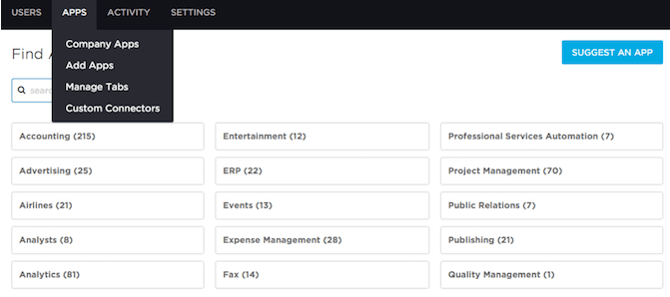
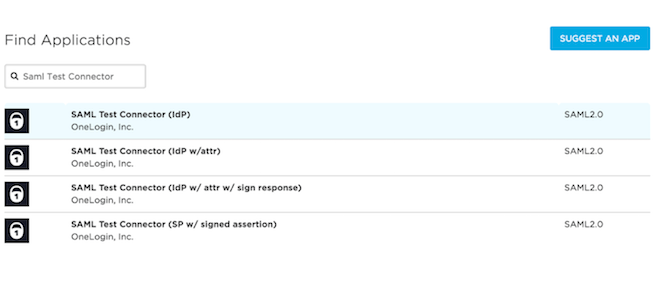
STEP 2: Create a new SAML Test Connector (IdP w/attr).
Search for SAML Test Connector (IdP w/attr) and click that option.
STEP 3: Add an app description
Type in the name of the app. The logo is optional and used only in OneLogin, not in YAROOMS.
STEP 4: Configure the SAML Connection in YAROOMS
- Identity Provider: Type OneLogin (this is a label, any value is accepted, it will appear on the login page as "Authenticate with OneLogin"
- Issuer URL: Copy and paste the value for Issuer URL from OneLogin's SSO tab
- SAML Endpoint: Copy and paste the value for SAML 2.0 Endpoint (HTTP)
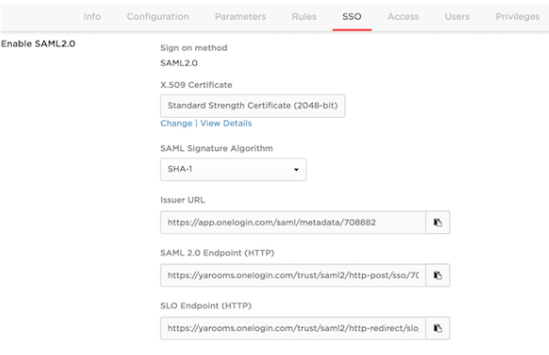
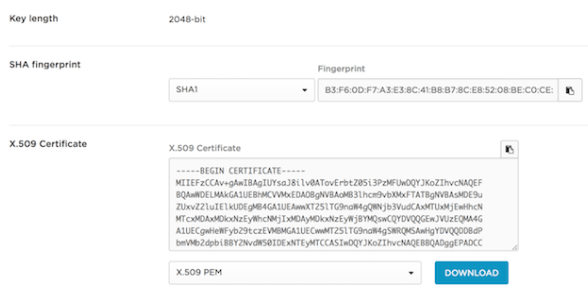
- X.509 Certificate: Click on the View Details link in OneLogin. Copy the entire string from the X.509 Certificate field and paste it in YAROOMS
- Name ID Format: choose emailAddress as value.
- Attributes Mapping: see photo below

Save options and navigate to the "User options" tab.
Set a default group and location for the new users created with data from the Identity Provider. When one of your users authenticates to YAROOMS for the first time through the OneLogin integration, YAROOMS provisions a new User account.These settings are the default settings for new users.

Save User options and navigate to the "Application details" tab.
STEP 5: Configure the application in OneLogin.
Navigate back to the OneLogin application created before and click on the Configuration tab.
Fill in ACS (Consumer) URL Validator and ACS (Consumer) URL fields with the values provided by YAROOMS (the other fields are optional).
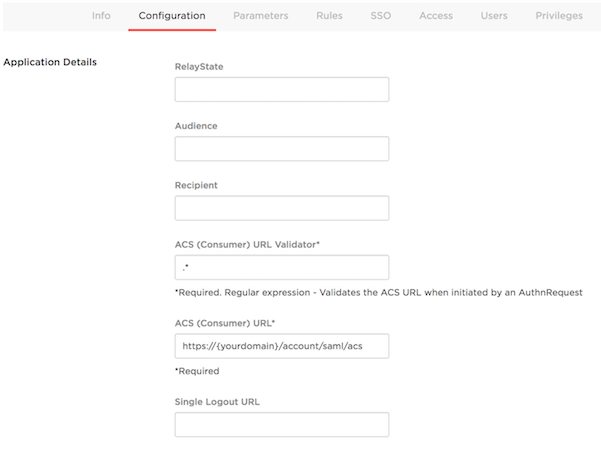
STEP 6: Activate SAML 2.0 Integration in YAROOMS
Click on the Activation button under the Application details tab and complete the integration process.
⚠️ Proper user provisioning and assignment in OneLogin are not topics covered by this tutorial which assumes you already know how to configure OneLogin options that are specific to how your organisation sets up its users. The assignment of access for users to the newly configured YAROOMS app is one of these topics.
