
1. How to register a visitor
a) Register a visitor manually
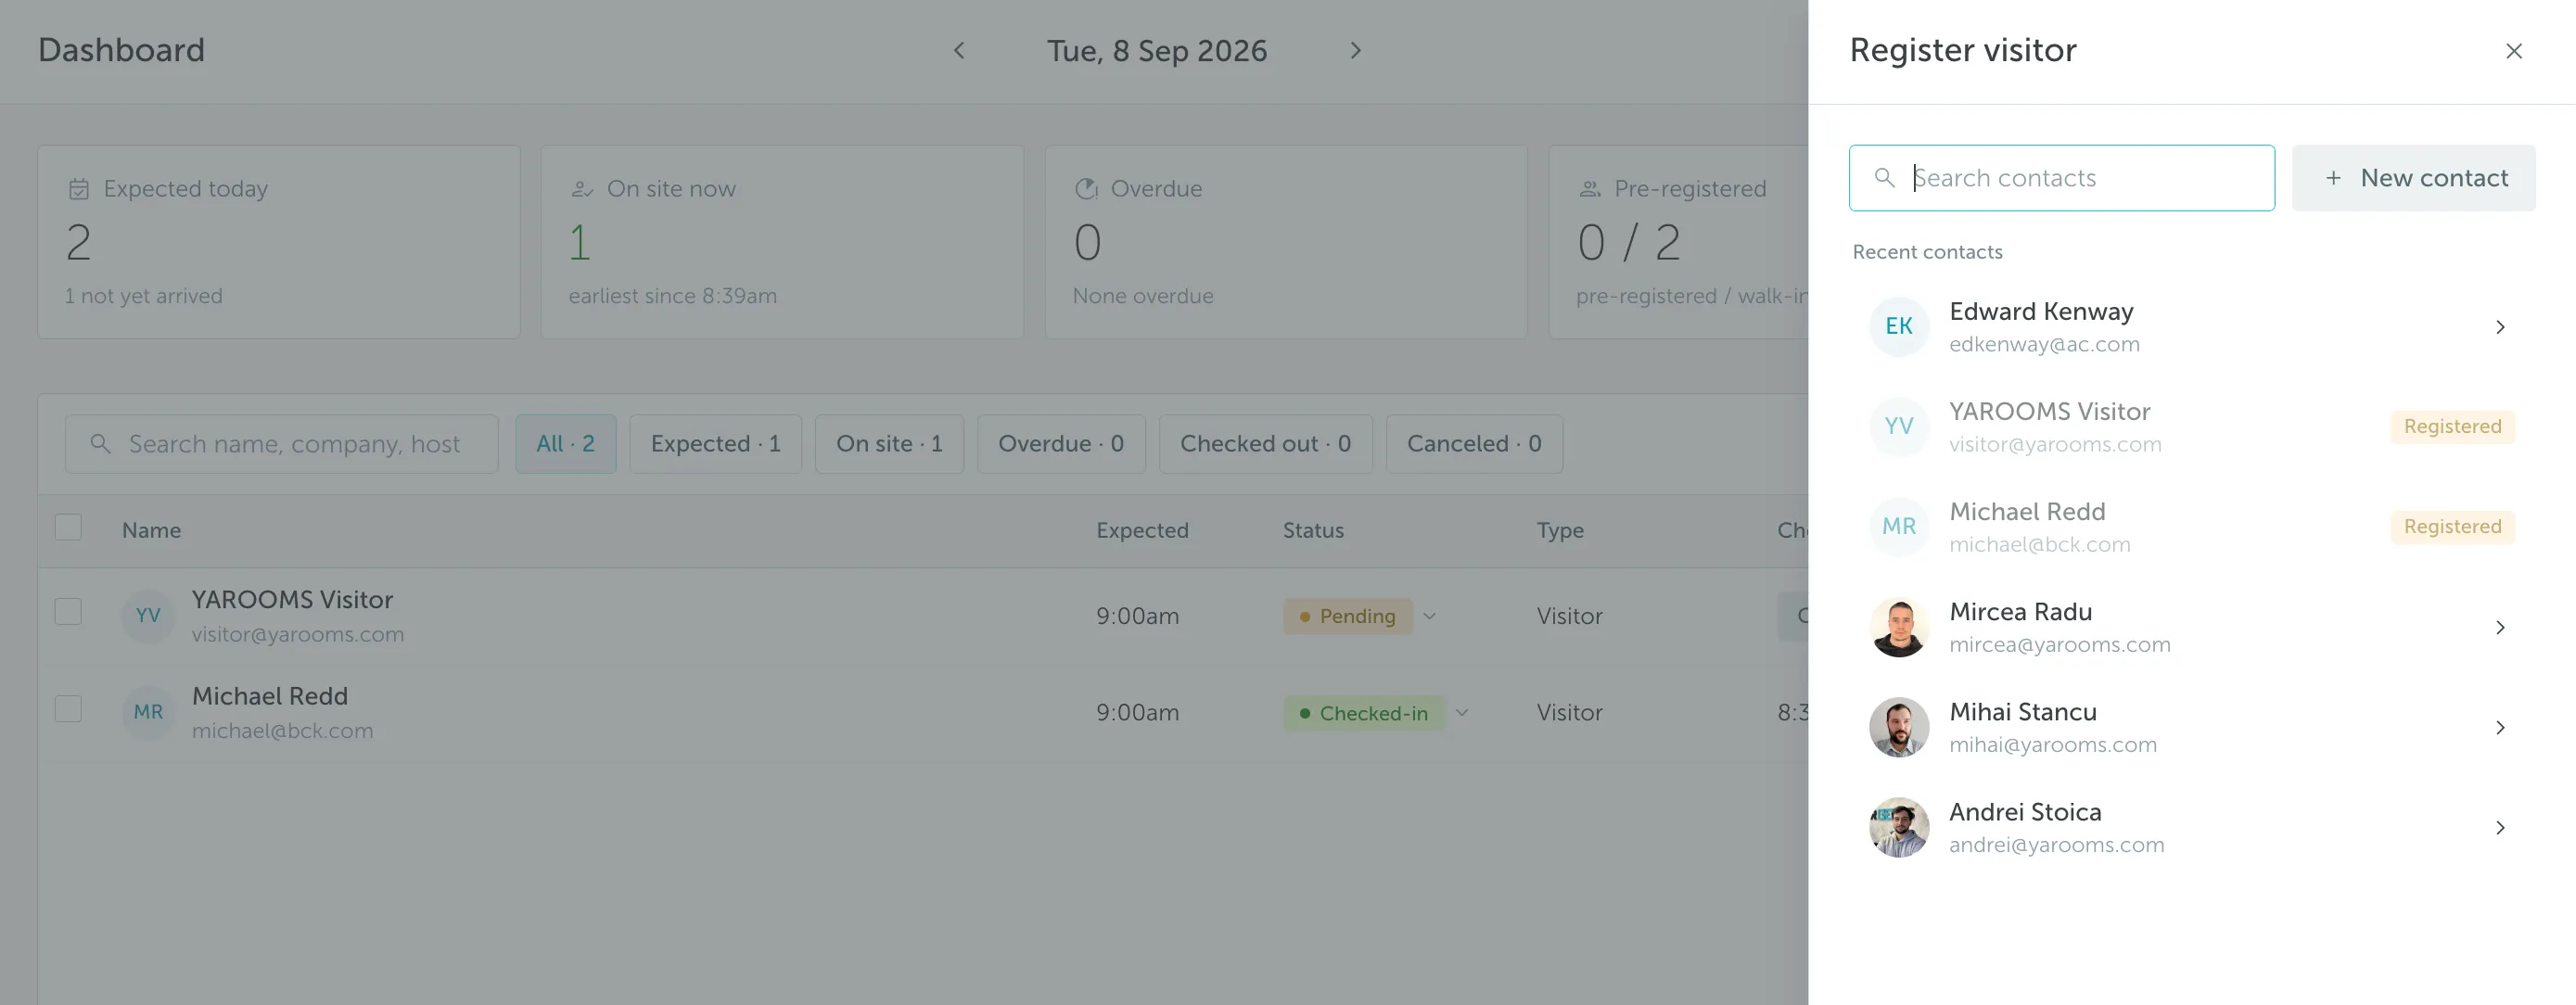
To register a visitor manually, go to Visitor Management → Dashboard → Add visit. In the Register visitor panel, search for an existing contact from your address book or click New contact, fill in the visitor details, and save.
b) Pre-register guests from meeting bookings
Another way is to have visitors pre-registered from a booking. To do so, activate Pre-register guests from meeting bookings at Visitor management → Settings.
Once you activate this option, the Space types list appears. Choose the space types this setting applies to, such as Desk or Meeting room.
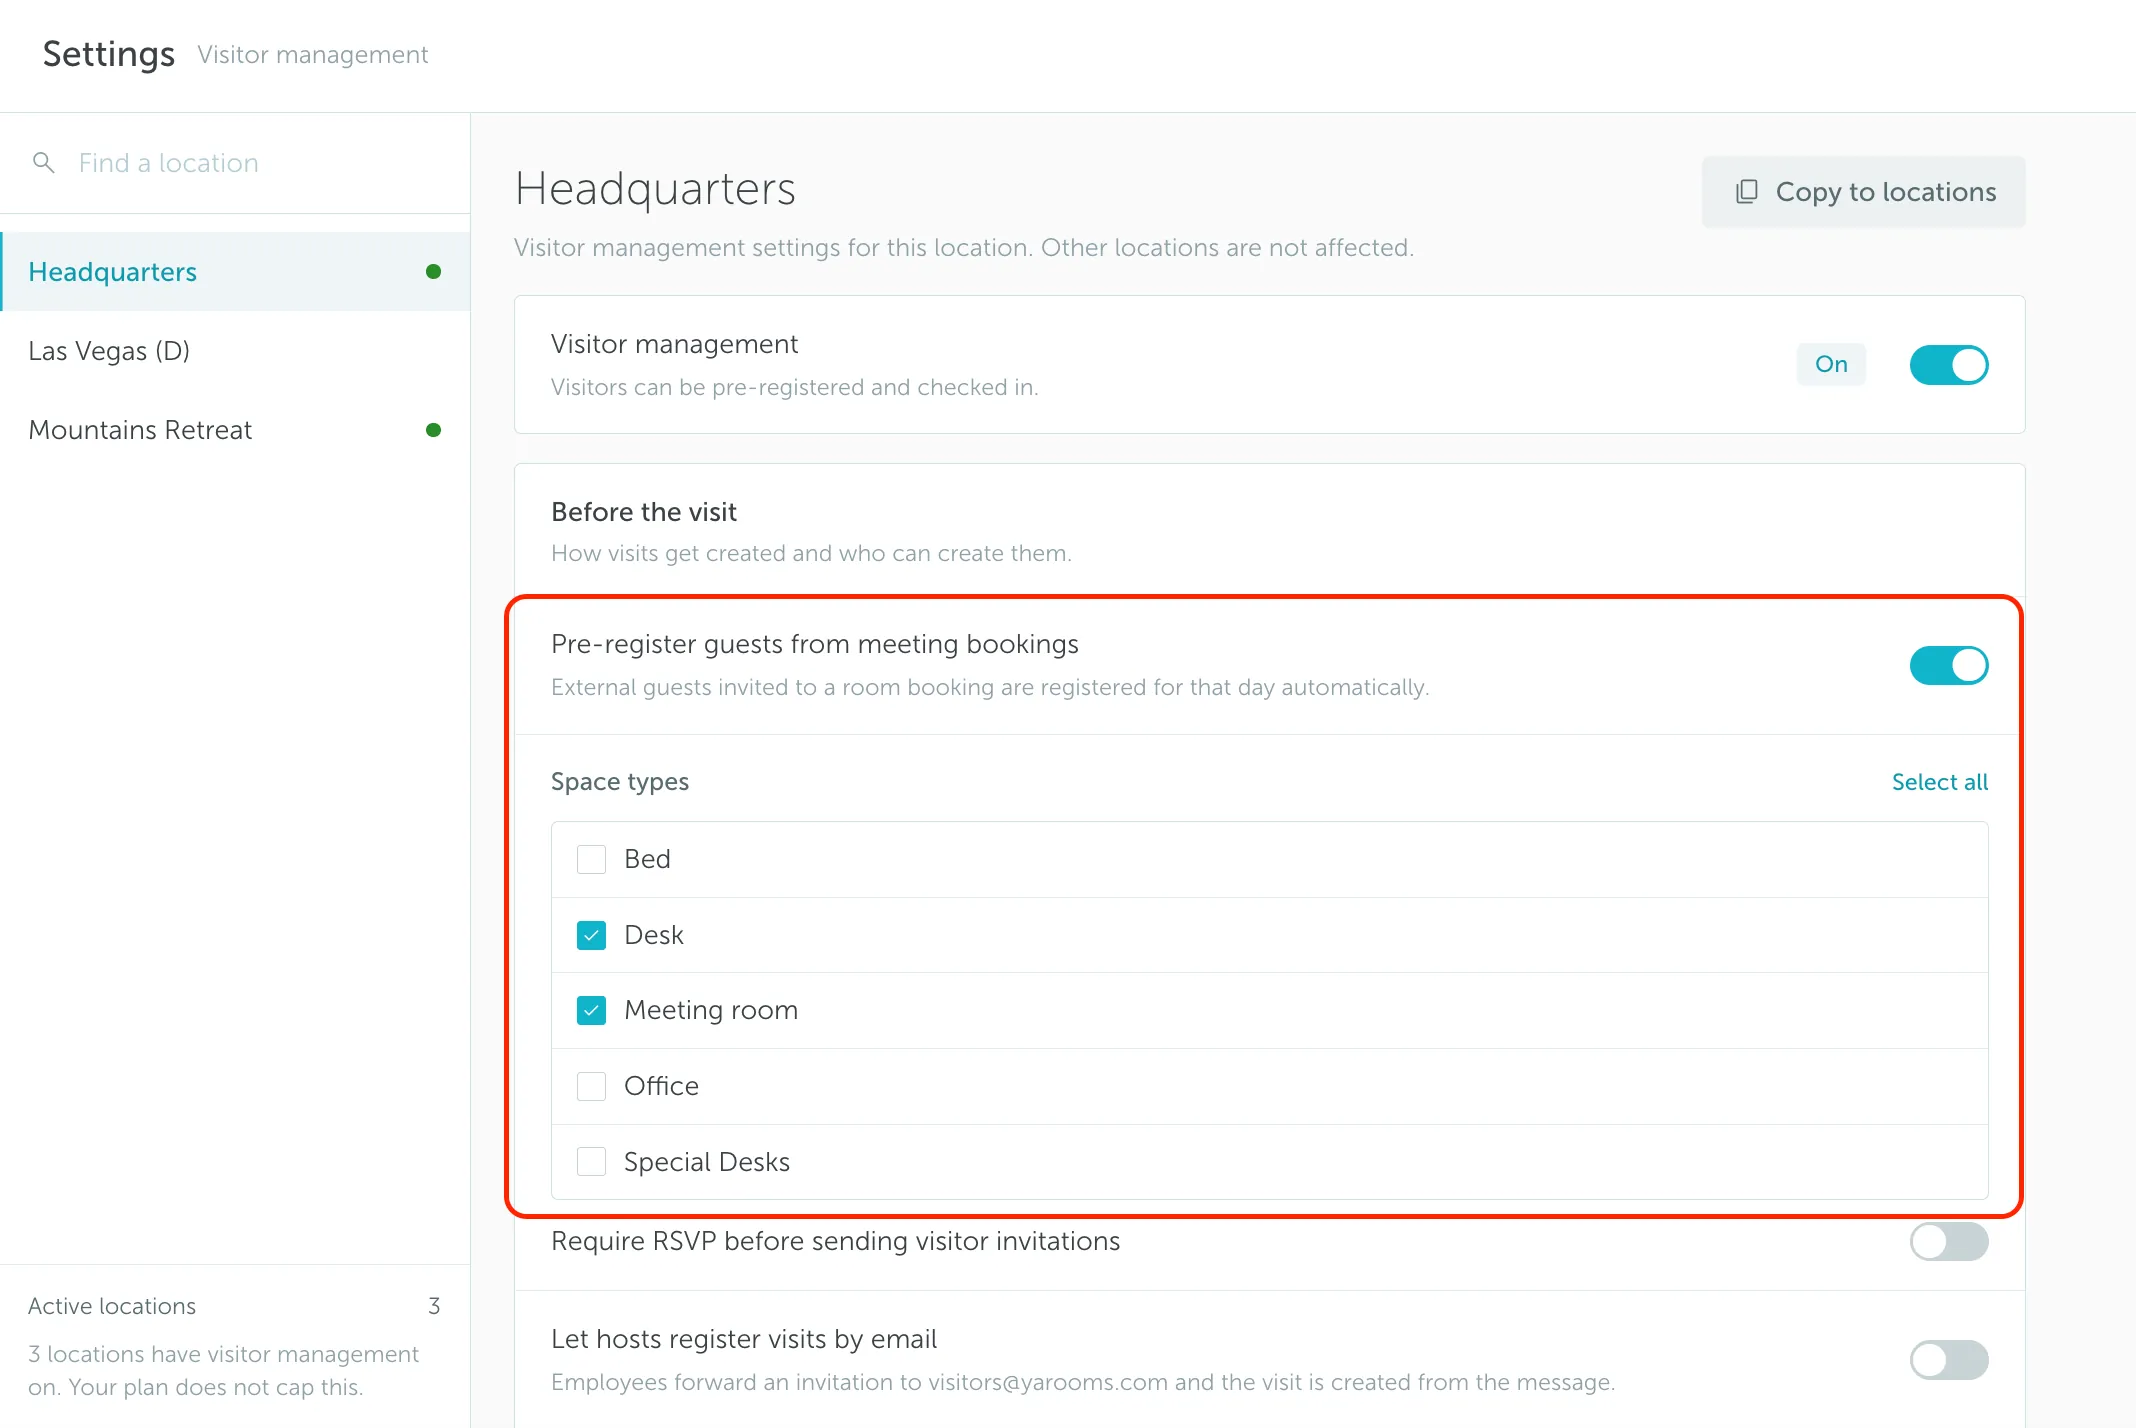
For example, if you activate it for Meeting room, external guests invited to meeting room bookings will appear in the Visitor Management dashboard.
c) Let hosts register visits by email
Hosts can also register visits by email when Let hosts register visits by email is enabled in Visitor management → Settings.
When this option is enabled, employees can create visits by adding visitors@yarooms.com as an attendee in a calendar invitation. YAROOMS reads the invitation and creates the visit in the Visitor Management dashboard.
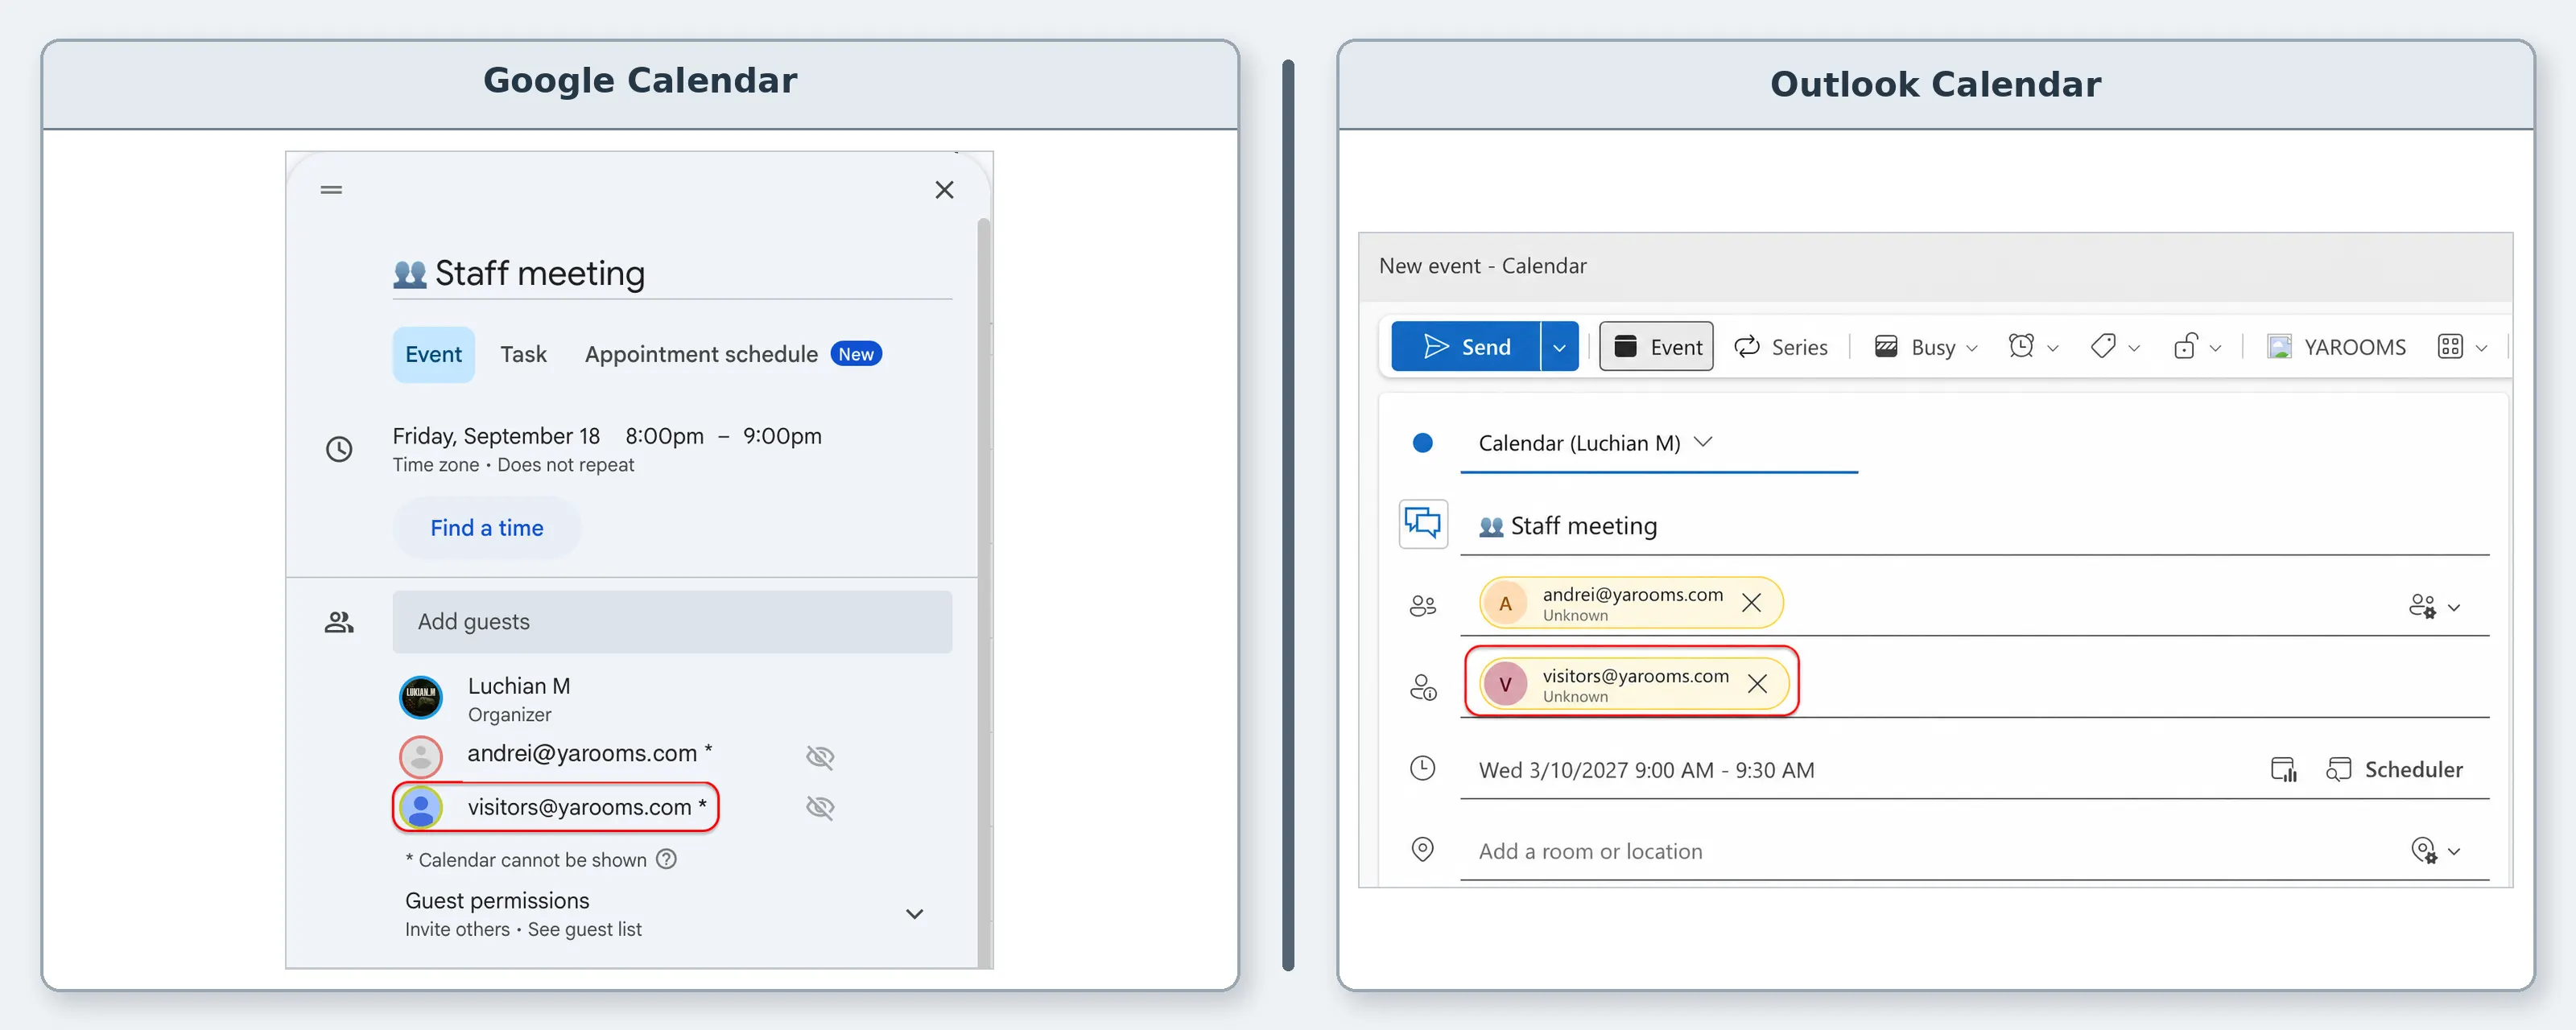
For this process to work:
- The host must already exist as a YAROOMS user. The visit is created in the YAROOMS account where that host user exists, so the host’s email address must match an existing user.
- Visitor Management must be active for the location assigned to that host user.
- When creating the calendar event, the host must choose the option that sends invitations to the attendees. Simply adding the event to the calendar without sending invites will not create the visit in the YAROOMS dashboard.
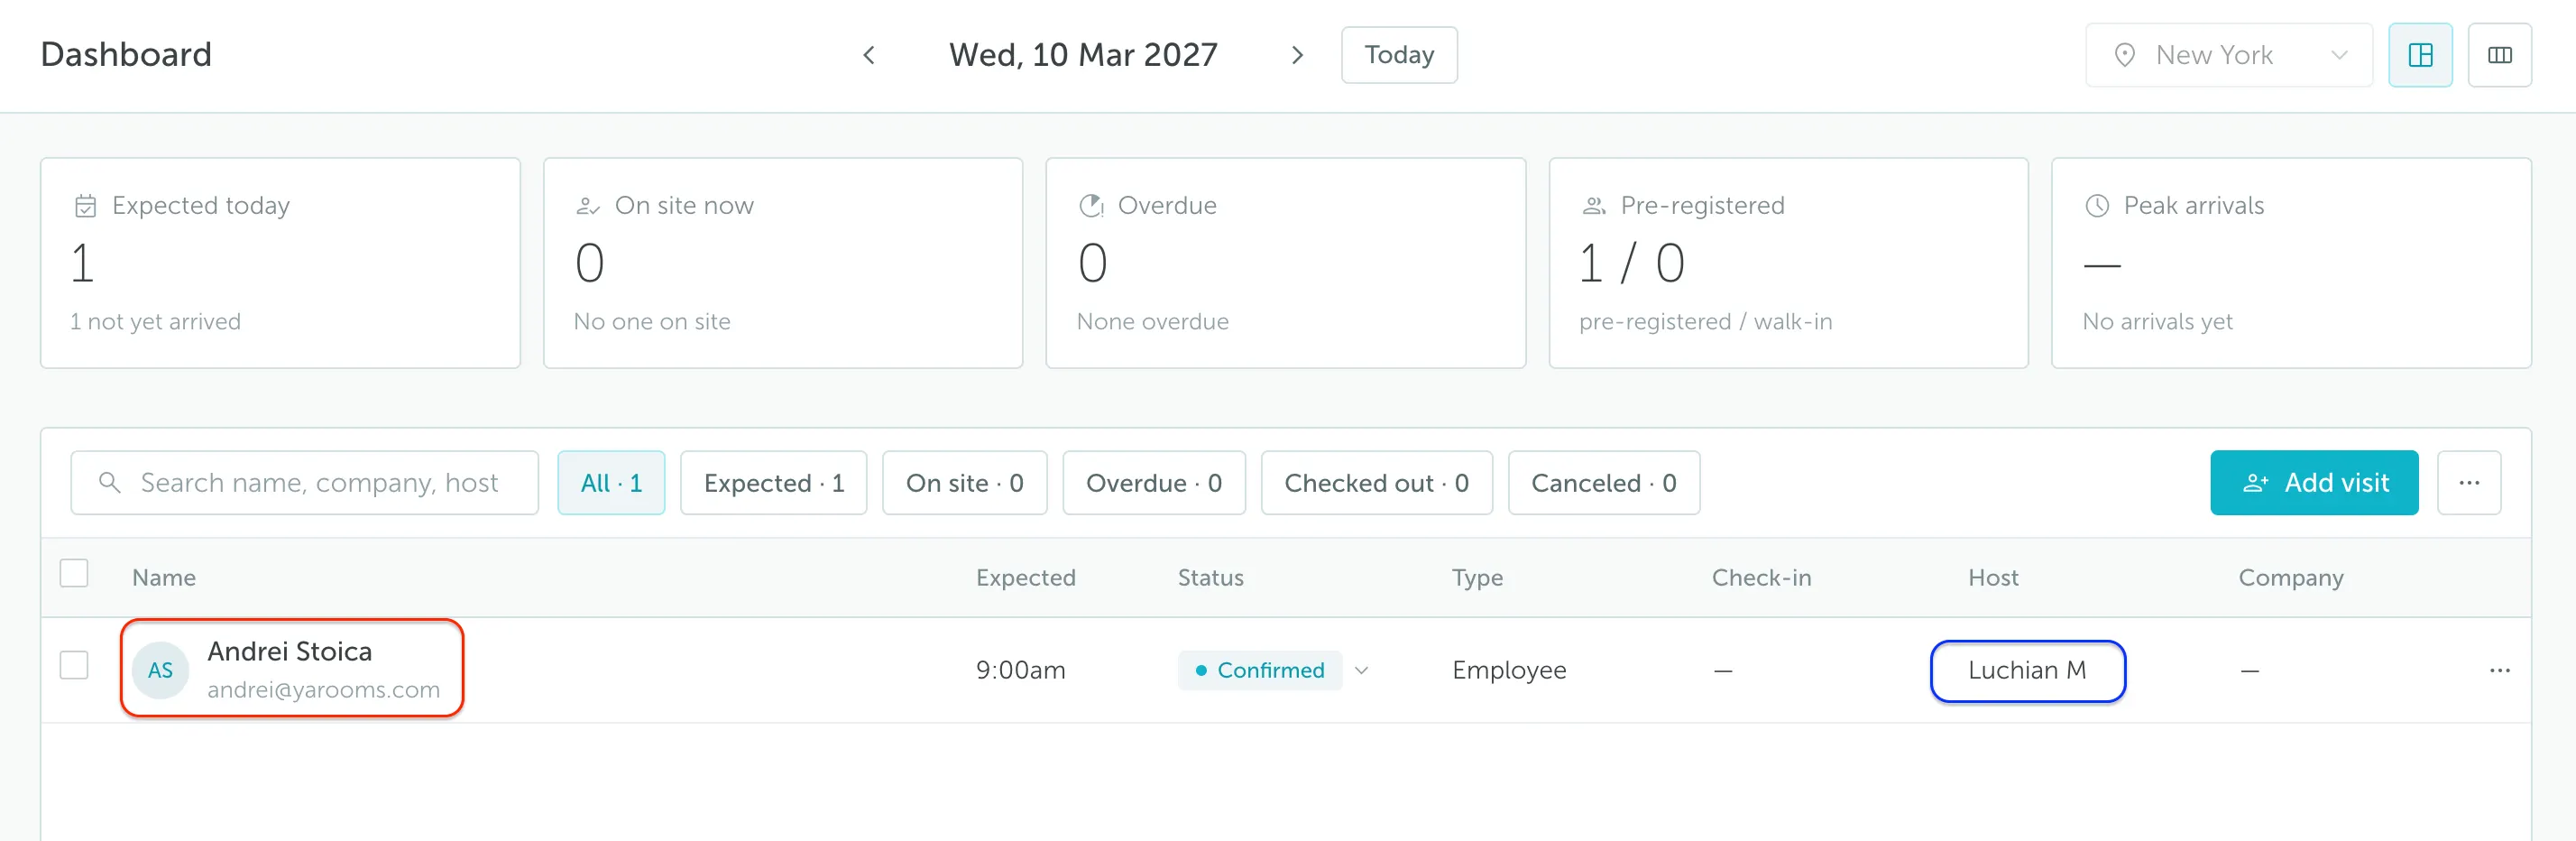
After the invitation is sent, the visitor appears in the Visitor Management dashboard as a registered visit.
2. How to check-in/check-out the visitor or cancel their visit
Once the visitor is registered, you can check them in or out from the Visitor Management dashboard. Use the Status dropdown to choose Pending, Confirmed, Checked-in, or Checked-out. You can also check out a checked-in visitor from the Check-in column.
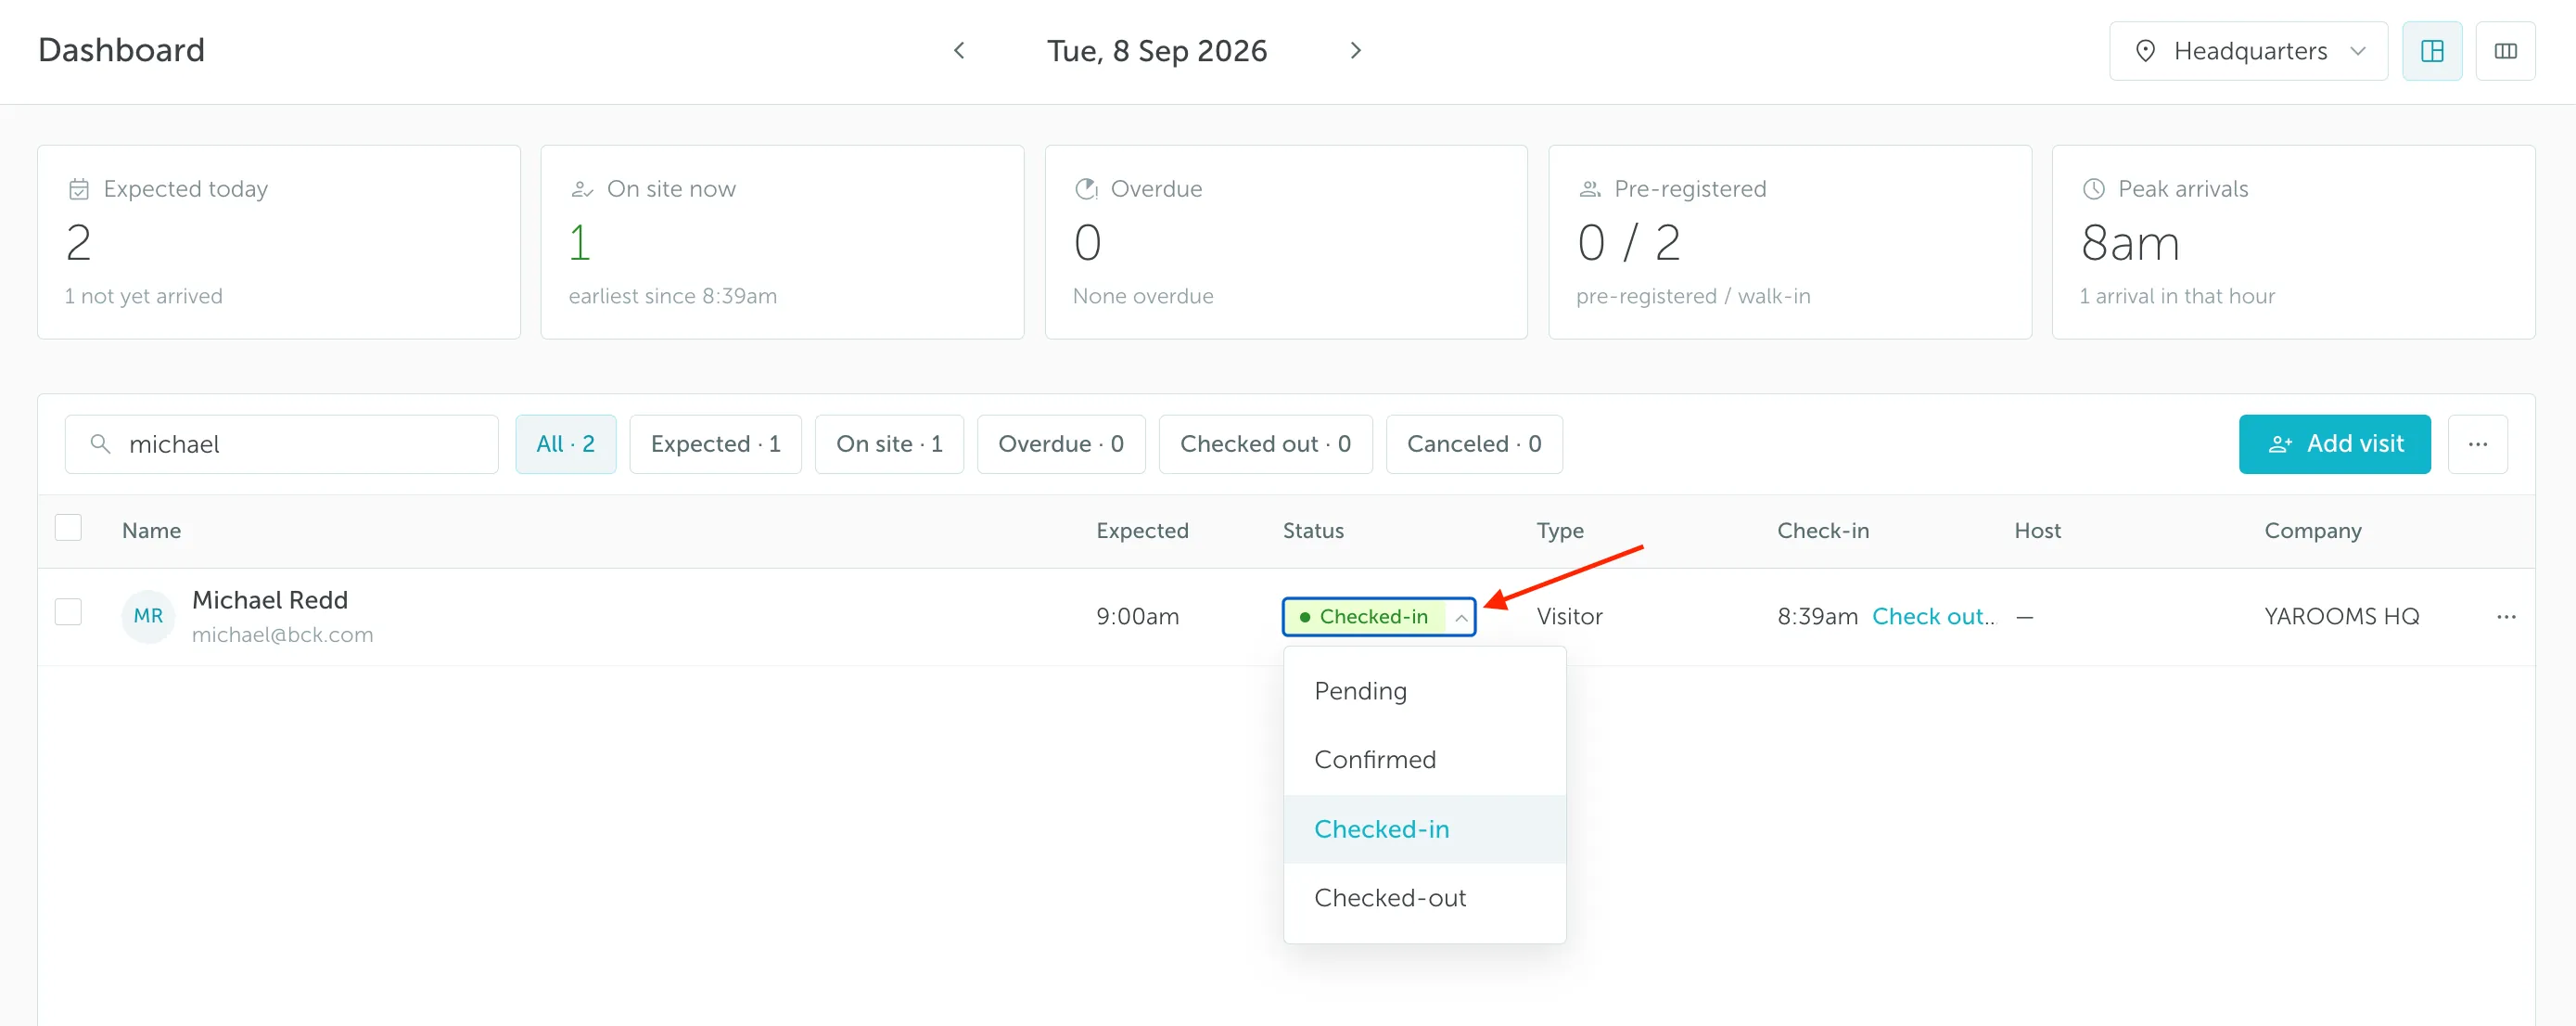
To cancel a visit, click the three dots button on the right side of the registered visit row to open the visit details, then click Cancel Visit.
Keep in mind that Visitor Management (VM) check-in/check-out is separate from booking check-in/check-out. VM check-in/check-out refers to arrival and departure at the location where the visit takes place.
For example, if you have multiple bookings in a day, you will only perform one VM check-in, which happens when you arrive at the building.