
Jump to:
1. How to activate the Visitor Management system
To begin using the Visitor Management System in a location, go to Visitor management → Settings → [click on the name of a location] → Visitor management and set the switch to On.

2. Configure Purpose of visit
Purpose of visit is an optional dropdown field you can add to visitor registration. When enabled, it asks visitors to pick a reason for their visit, such as “Interview”, “Meeting”, or “Delivery”, from a list of options that you manage per location.
Go to Visitor management → Settings and pick the location you want to configure. The Purpose of visit card is in the location settings.
In the Ask the visitor setting, choose how the Purpose of visit field behaves:
- Never: hides the field.
- Optional: shows the field, but visitors can complete registration without selecting a value.
- Required: visitors must select a value before they can complete registration.
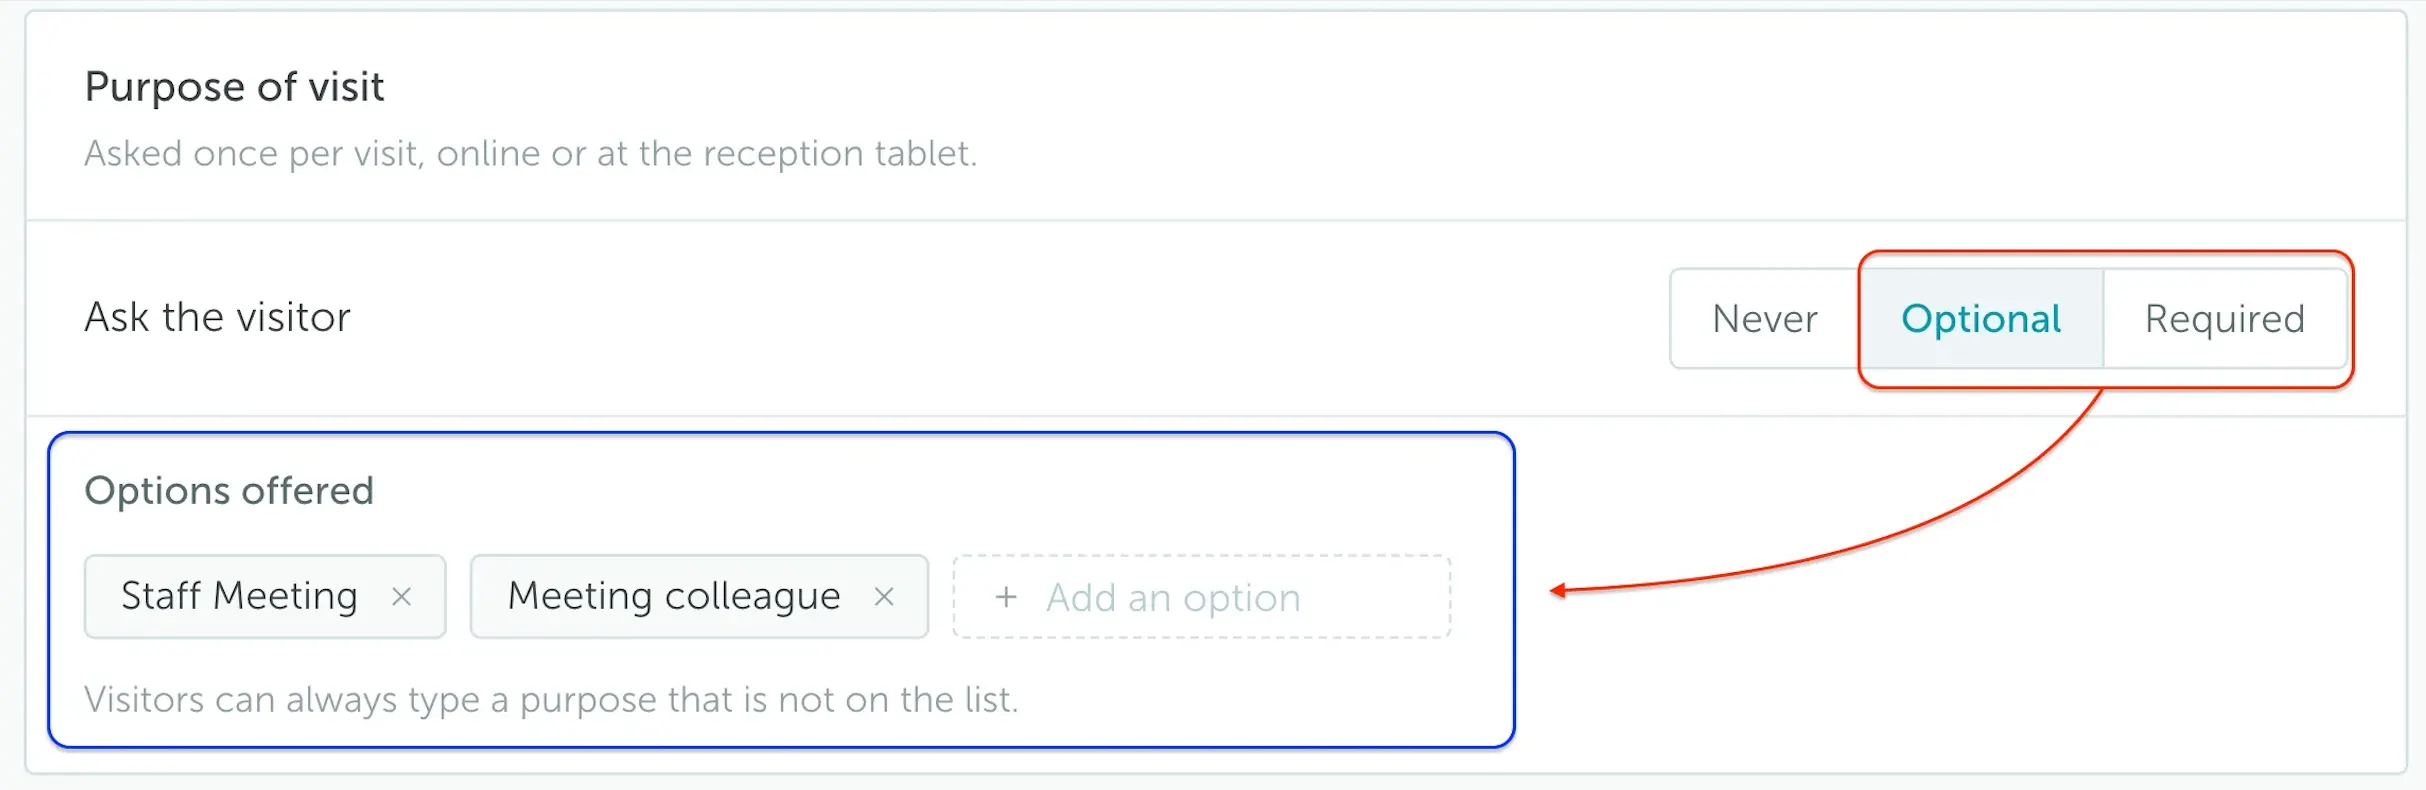
In Options offered, add the values that should appear in the dropdown, such as Meeting, Training, Delivery, or Coffee.
Settings are saved per location, so different offices can use different lists.
Once enabled, the Purpose of visit dropdown shows up in every registration flow:
- Self-registration (the link visitors get by email): appears as the first step.
- Reception device: appears as a step in the on-site flow.
- Dashboard “Add visit” for an existing contact: appears just above the Notes field.
- Dashboard “New contact” registration: appears as part of the form.
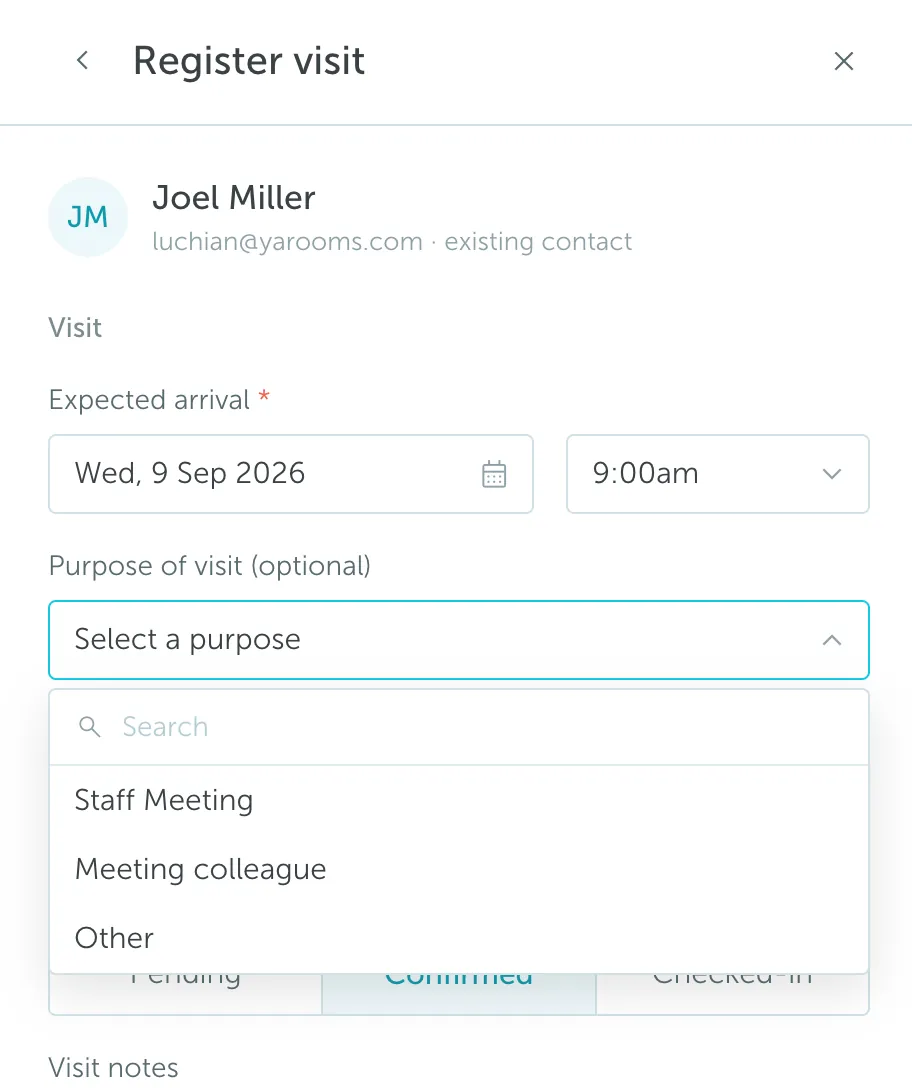
If the field is set to Required, registration cannot be completed without selecting a value.
After a visit is created, the selected purpose is visible in the Visits table and in the Visit info view. In the dashboard, the Purpose of visit column is filterable, so you can quickly find all visits with a specific purpose.
3. Visitor Management access rights
You can provide custom Visitor Management module access to users by:
- Providing just the list view of the Visitor Management dashboard and address book.
- Allowing users to manage visitors and visits (add, edit, or delete contacts from the address book or visits from the dashboard).