
Planning your first day in the office? Start by finding a suitable space, reserve it for the time you need, and check in when you arrive. This guide takes you through those essentials, then helps you set up the mobile app.
Before you start: sign in to your organization’s YAROOMS account using the address and login method provided by your administrator. Your account address looks like company.yarooms.com.
Note: Available locations, spaces, booking options, and check-in methods depend on your organization's setup. You may not see every option shown in these examples.
Find a space
Start with Workplace → Map when you want to choose where to sit. If knowing when a space is free matters more, use Workplace → Timeline.
Choose where and when
- Select your location, then the floor you want to work on.
- Choose the date of your visit. Check this before booking, especially if you have been browsing future dates.
- Use Find a space or person to search by name or filter by space type and features, such as a meeting room or a desk with a monitor.
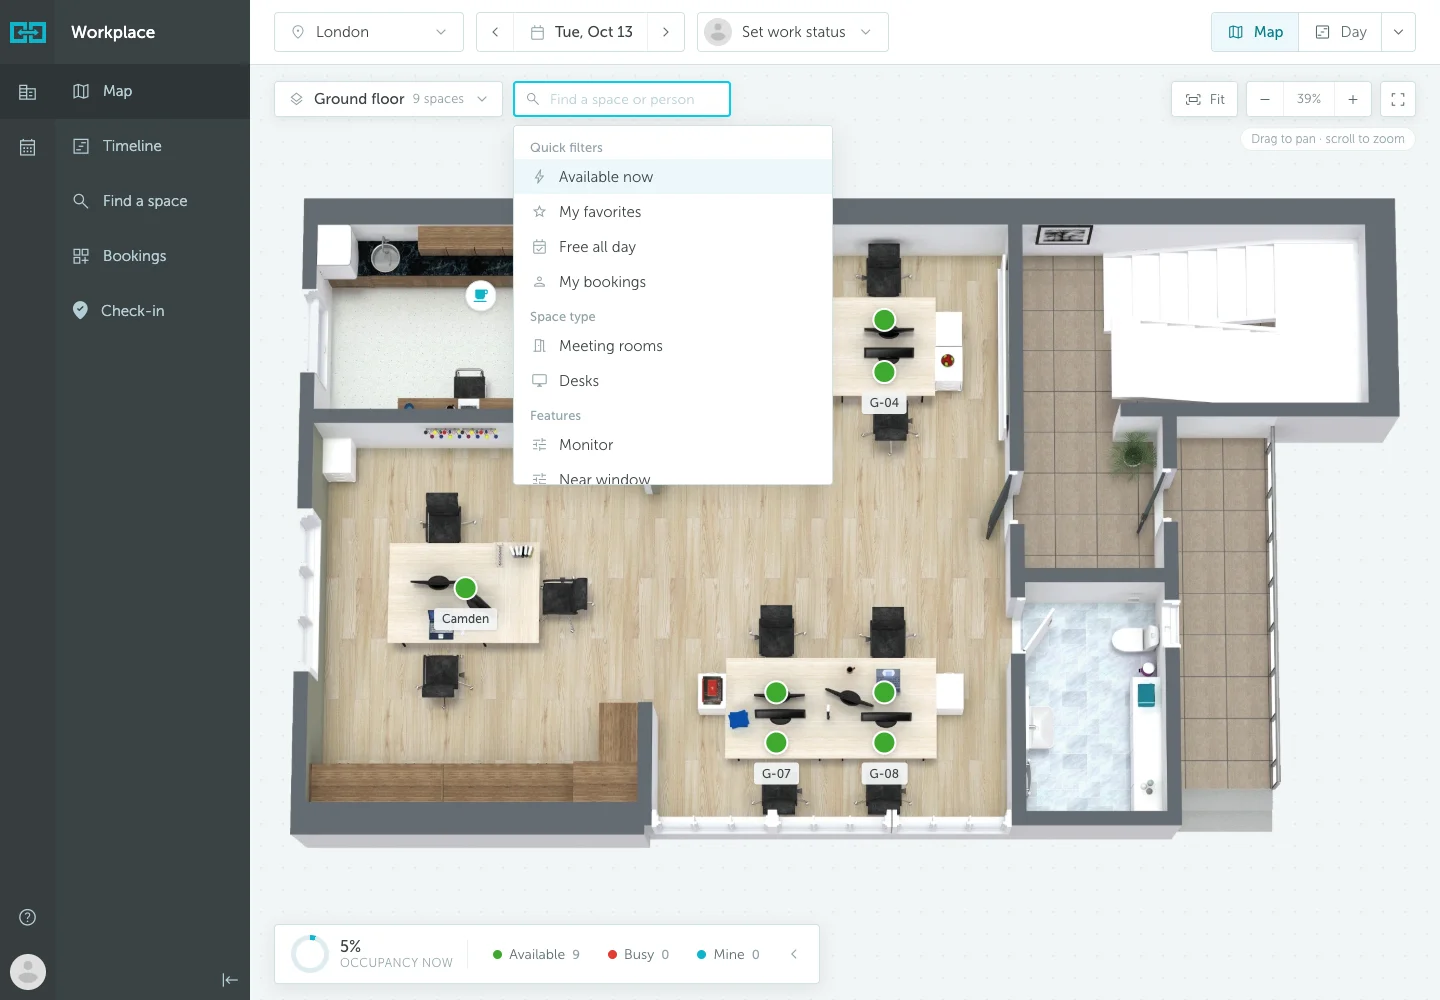
Click a matching space to see its details and availability. On the map, green indicates availability, red indicates a booked space, and grey indicates a space you cannot currently book. Check the space’s availability bar for the time you actually need: a room can be busy for part of the day and free later.
Prefer a schedule?
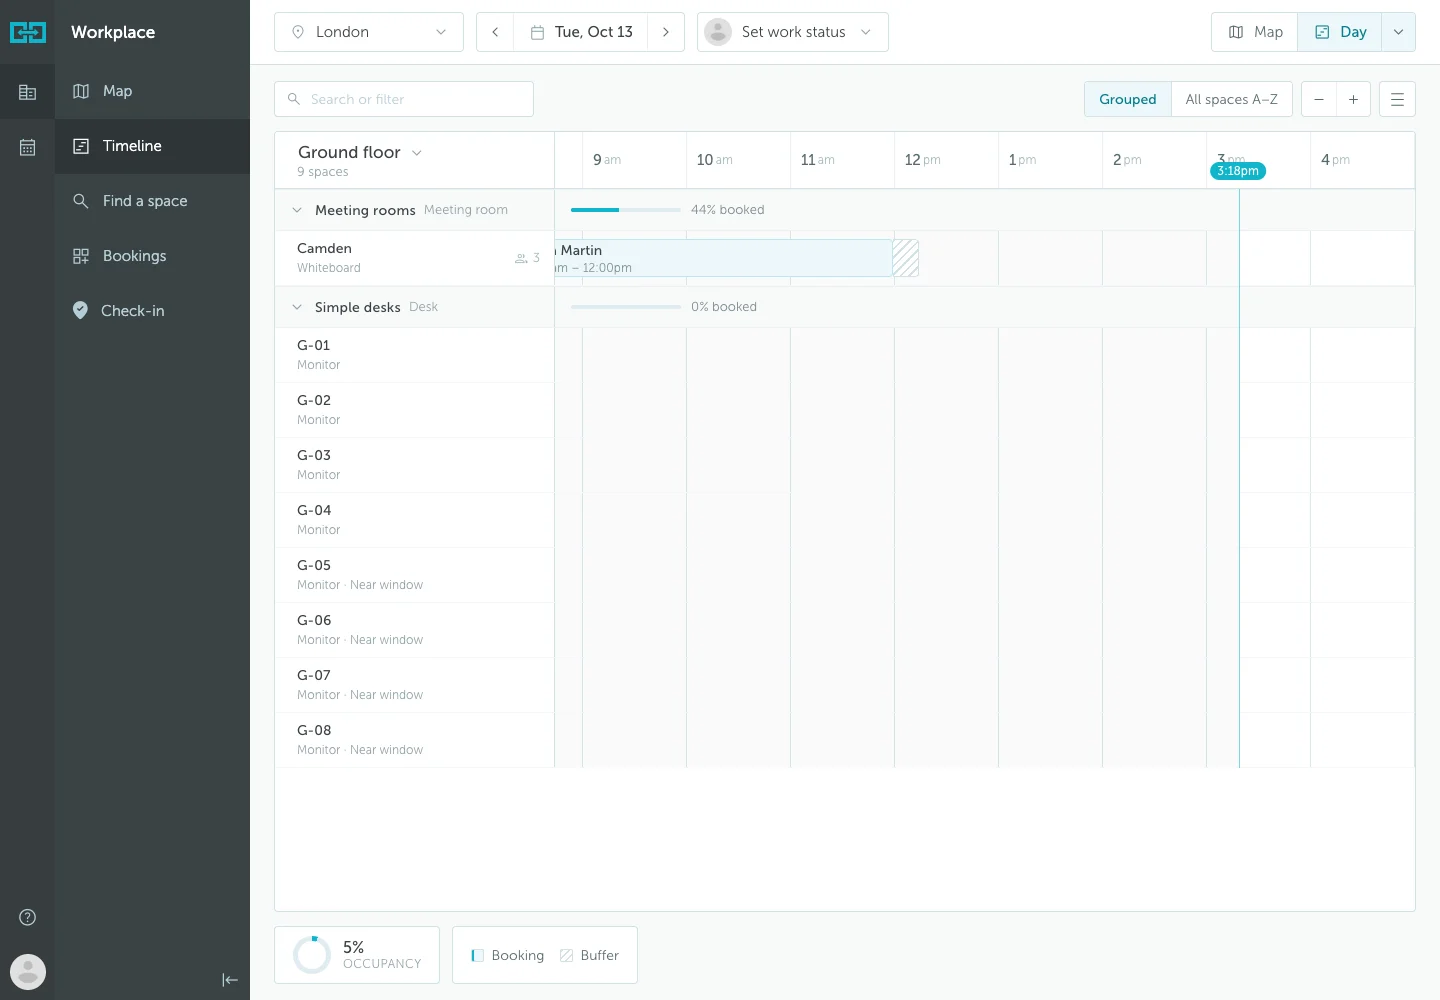
In Timeline, find the row for your chosen space and look for an available time interval. Booking bars show occupied times; available predefined intervals appear as dashed boxes where your organization uses them.
Need a particular combination of dates and amenities? Use Workplace → Find a space to search by location, floor, dates, space type, and required features.
For more search options, see Finding a Space.
Booking a desk/room
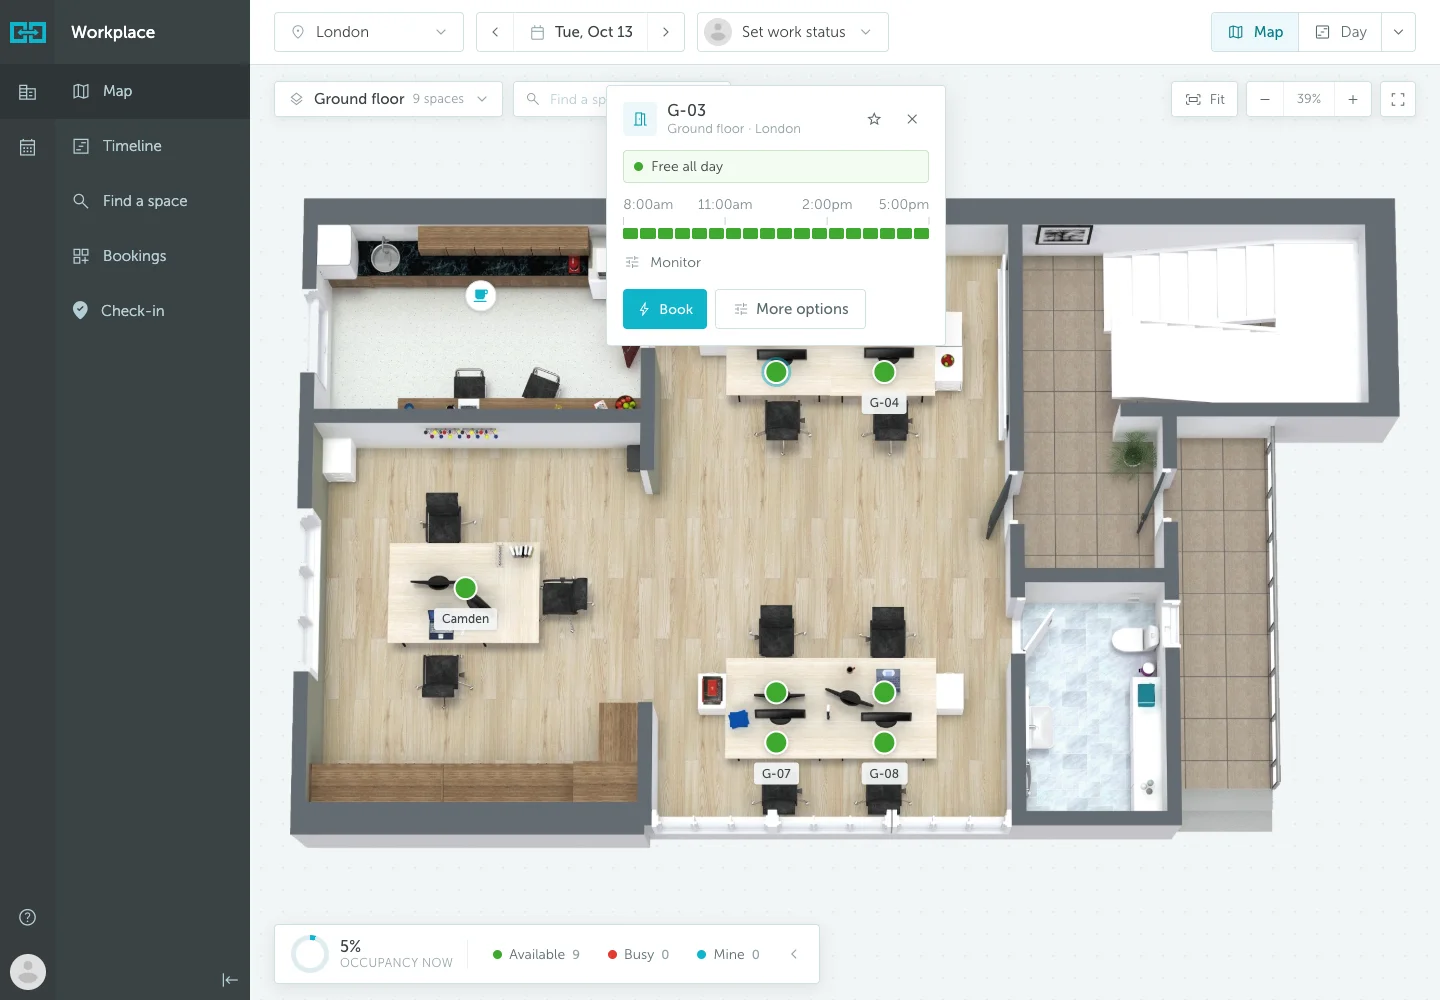
Once you have found a space, click its marker on the map or an available interval in Timeline. Check the space name, date, and time in the popup.
- Book is the instant-booking button. It reserves the space using a preset interval configured by your administrators, typically the most commonly used interval for that desk or room.
- More options opens the booking panel so you can choose from other available booking options and time intervals, and adjust the reservation before confirming.
Make your first reservation
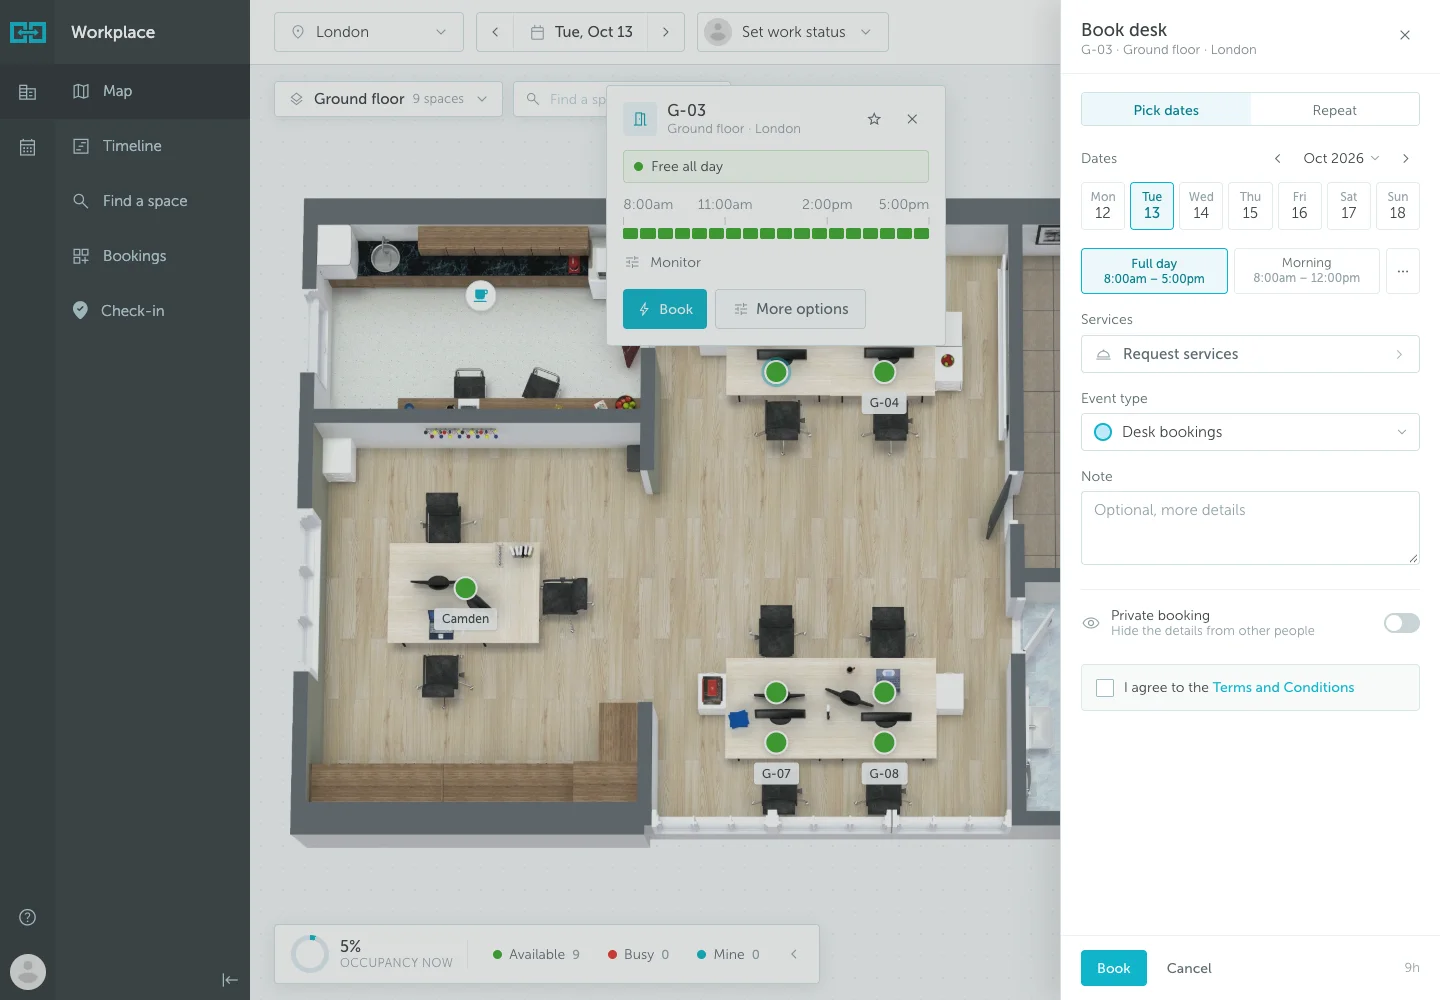
- Select More options if you need to change the dates or times.
- Under Pick dates, choose the day or days you want to book.
- Choose Full day, an available predefined interval, or Custom times. The choices depend on the space’s booking rules.
- Complete any required booking fields. For a meeting room, add attendees if that option is available. An event type labels the booking; a note can provide extra context.
- Review the details and click Book at the bottom of the panel.
Open Workplace → Bookings to review your reservation. If your plans change, open the booking to adjust or cancel it so someone else can use the space.
For your first booking, keep it simple: reserve one space for one date. Once you are comfortable, explore recurring bookings, attendee invitations, and the other options in How to Book a Space.
Check-in to your desk
A booking reserves your space. Check-in confirms that you have arrived. If your organization requires it, complete this step when you get to the office.
Your administrator decides which check-in methods are available. Here’s how each one works.
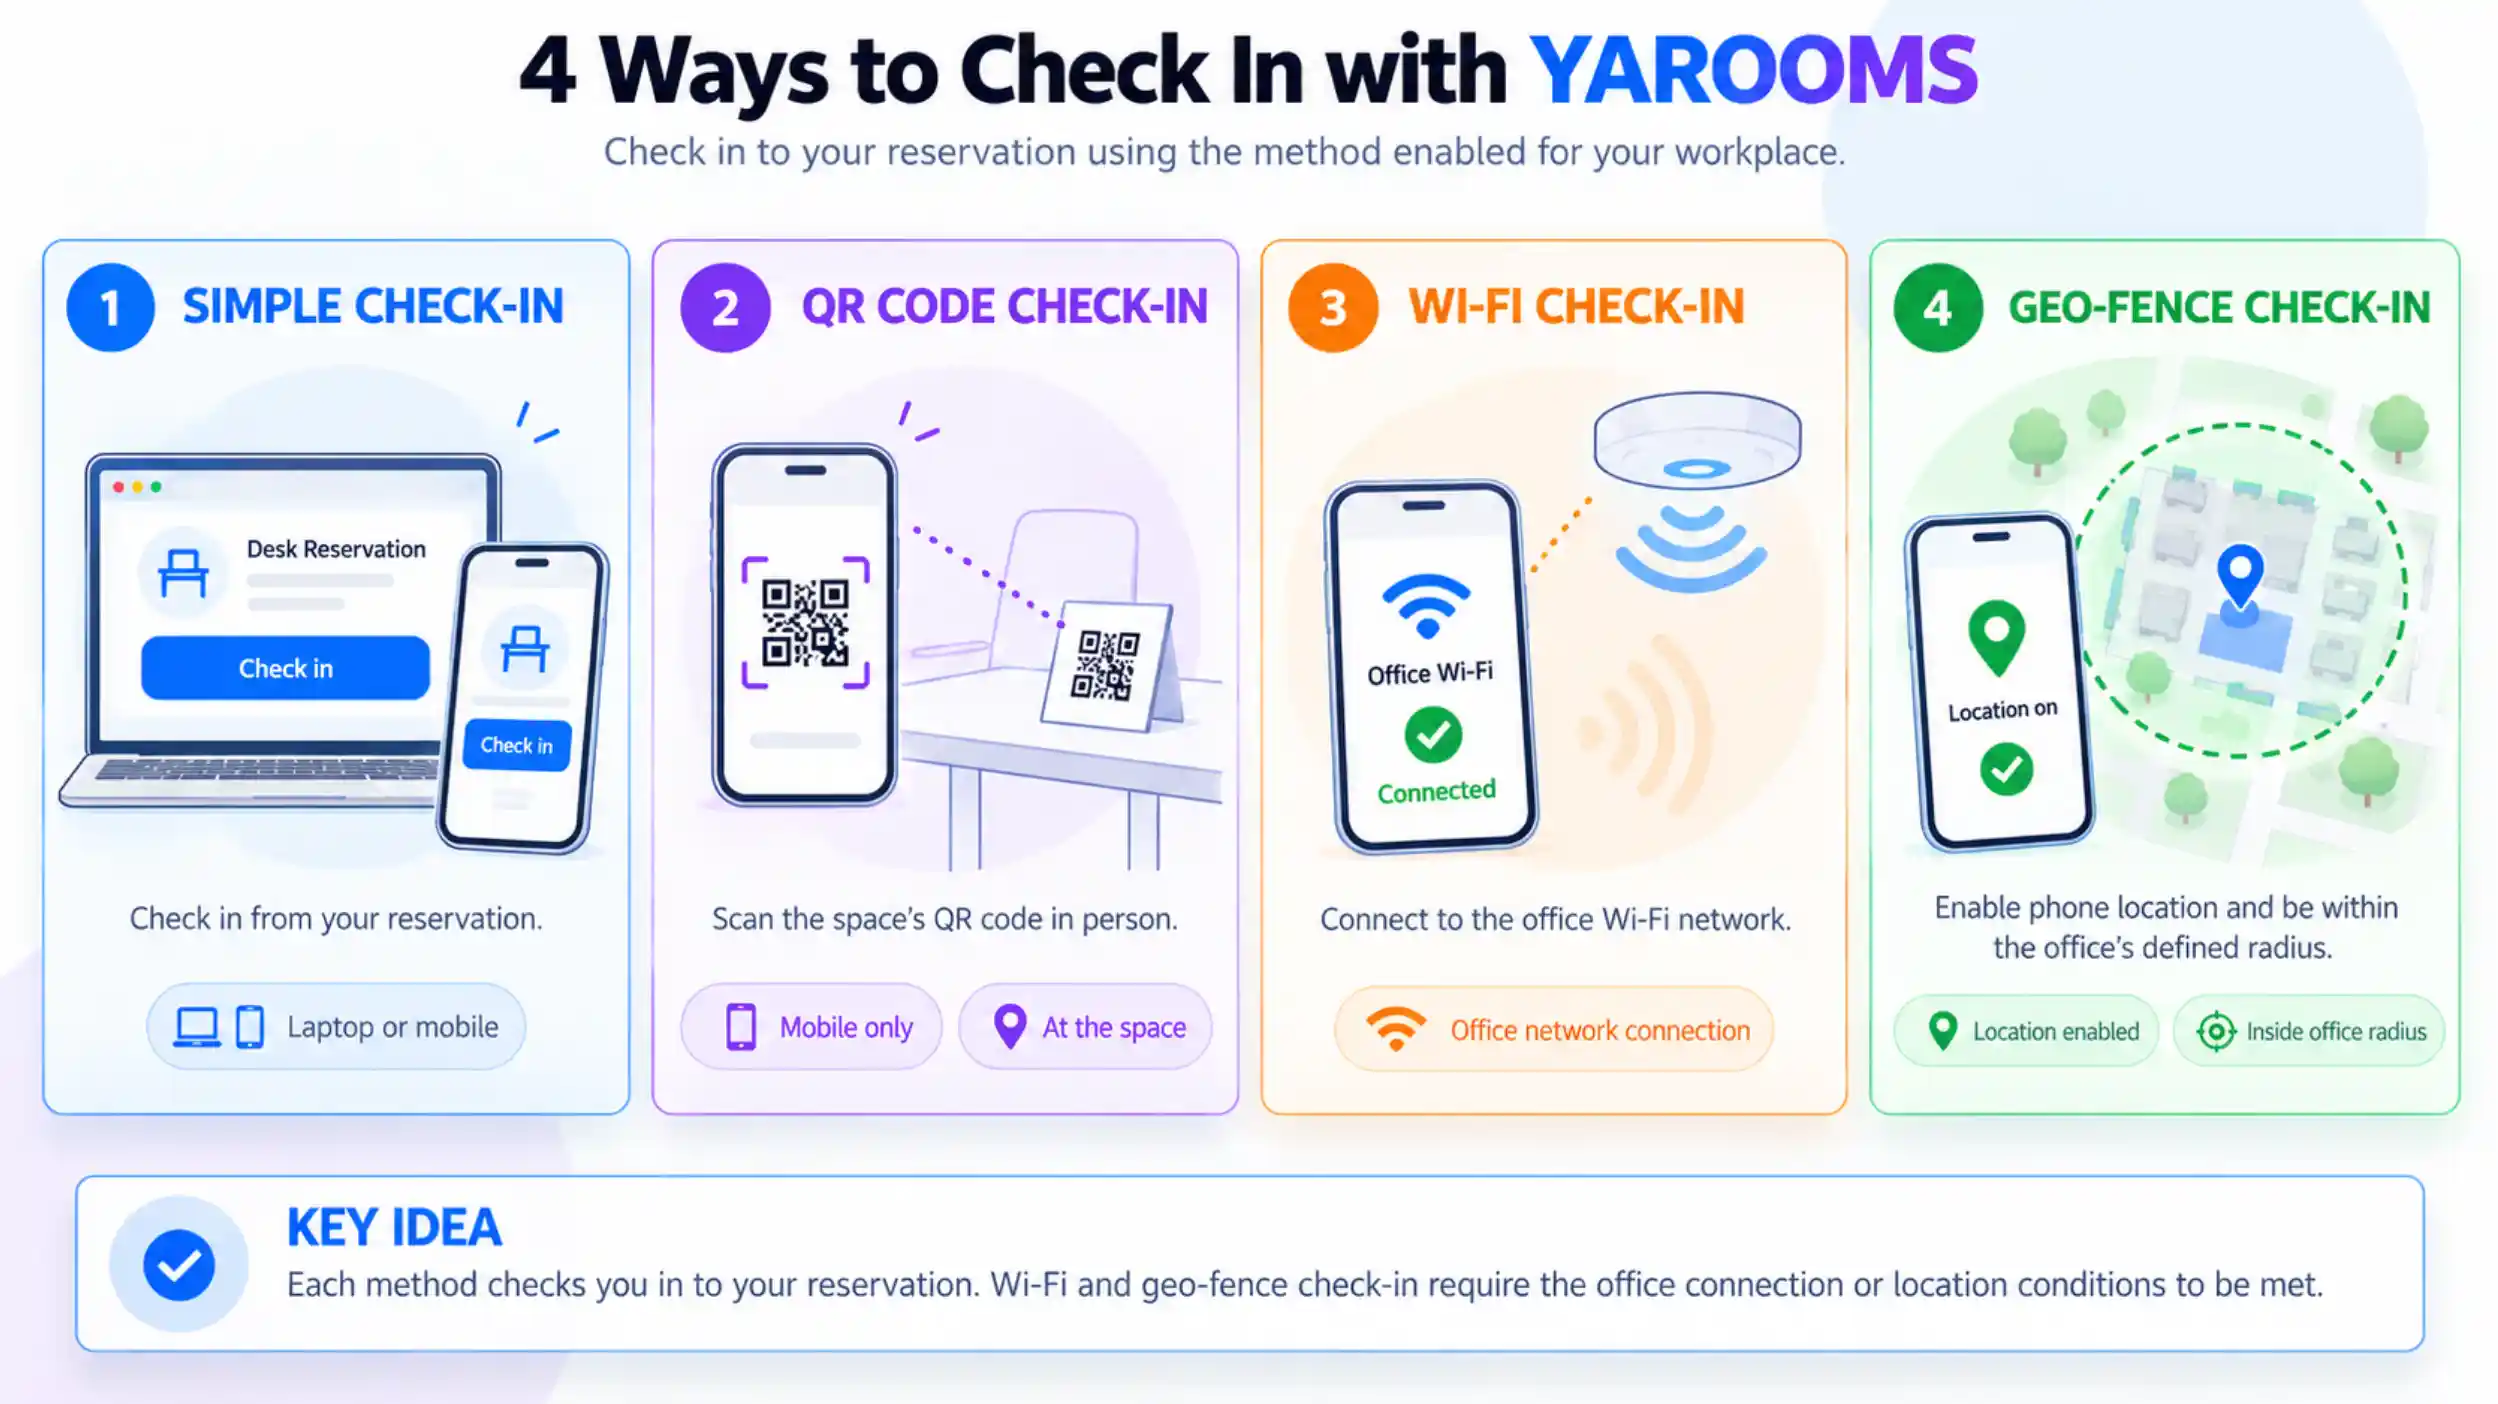
Simple check-in is the most popular starting option because it is the least restrictive: users can check in from a computer or phone, without needing to be at the office.
For simple check-in on the web:
- Open Workplace → Map and select the desk you reserved for today.
- Click Check in in the space’s popup.
- Confirm that the booking is shown as checked in.
You can also open Workplace → Bookings, select your reservation, and use Check-in in the booking details. This panel shows the applicable check-in deadline.
Warning: If check-in is required and you miss the deadline, your reservation may be released for someone else to book. Follow the deadline shown for your booking, not the example time in a screenshot.
If your organization requires a desk QR code, use the mobile app as described below. Geo-fenced check-in requires location permission and being within the office’s configured radius. When check-out is available, use it if you leave early to free the space.
See How to Check-In / Check Out for the different methods.
The YAROOMS Mobile App
Take your bookings with you: use the app to reserve a space and check in from your phone. Set it up before your first visit so you are ready when you arrive.
Download and install
Download YAROOMS from the App Store for iPhone or Google Play for Android. Install the app, then open it to connect to your existing YAROOMS account.
Link your account and log in
You can link the app and sign in by scanning a QR code from your web account:
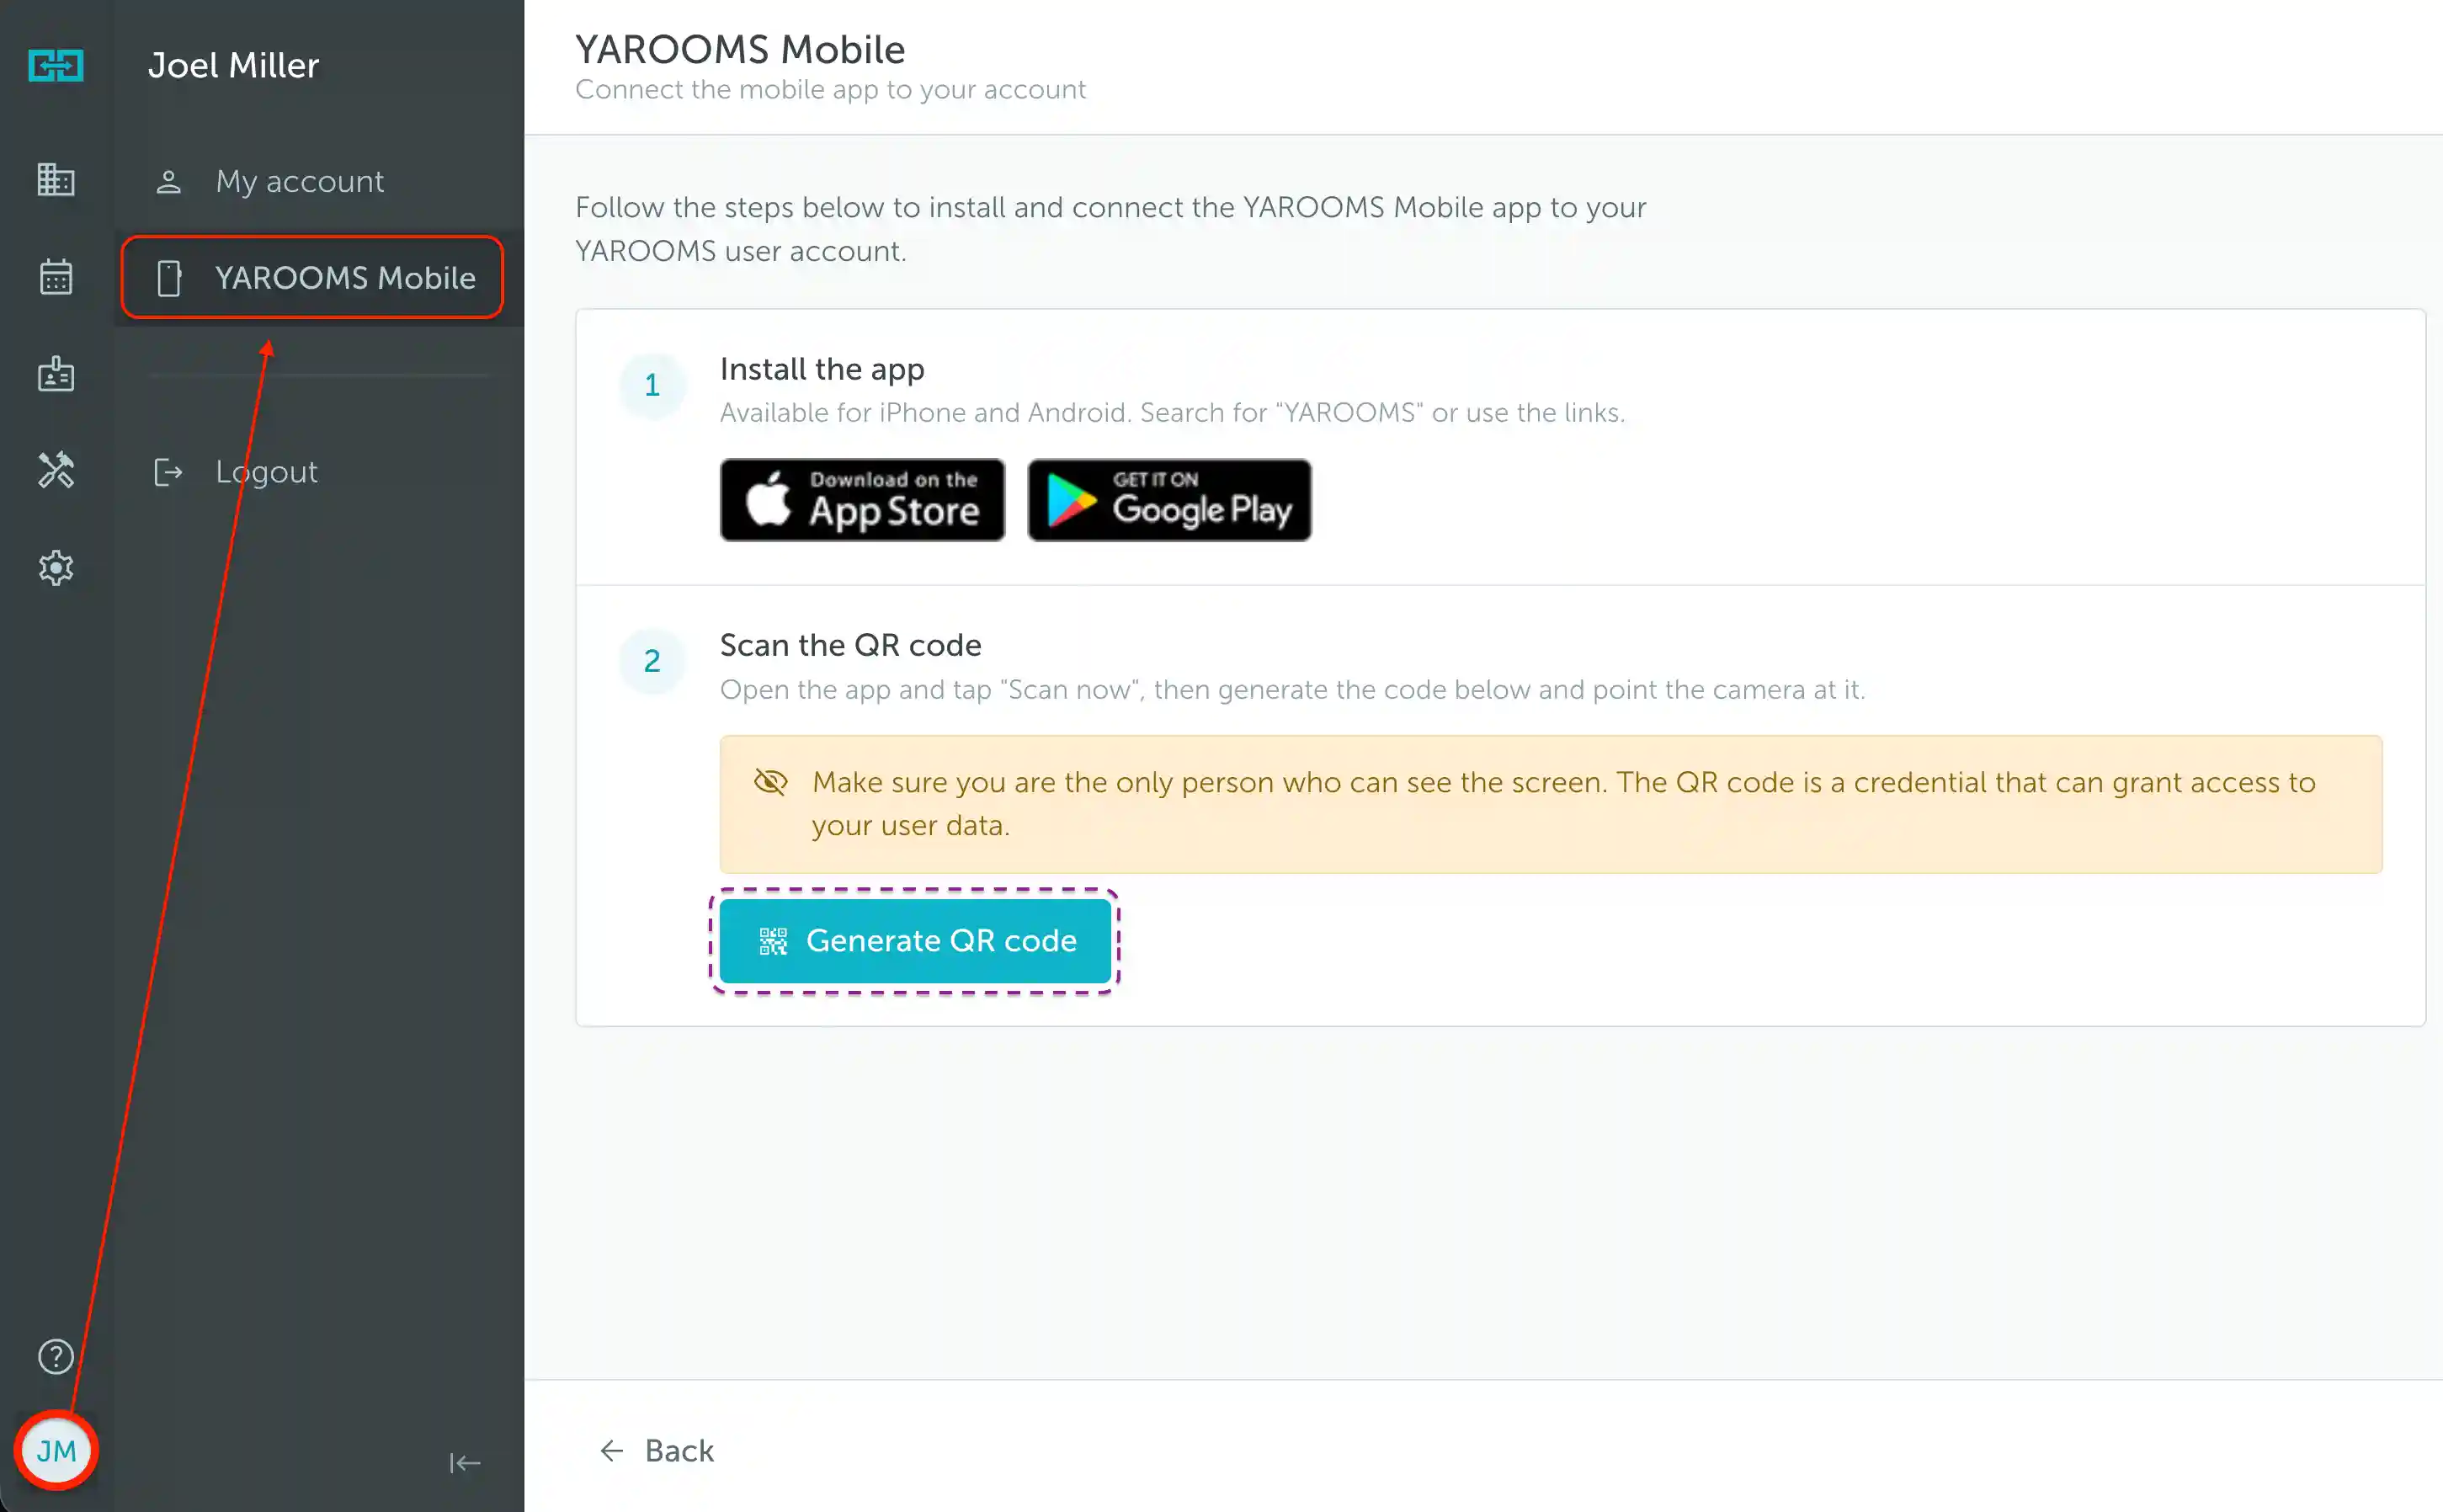
- Sign in to YAROOMS in your web browser.
- Open your profile menu from the bottom-left corner and select YAROOMS Mobile.
- Select Generate QR code.
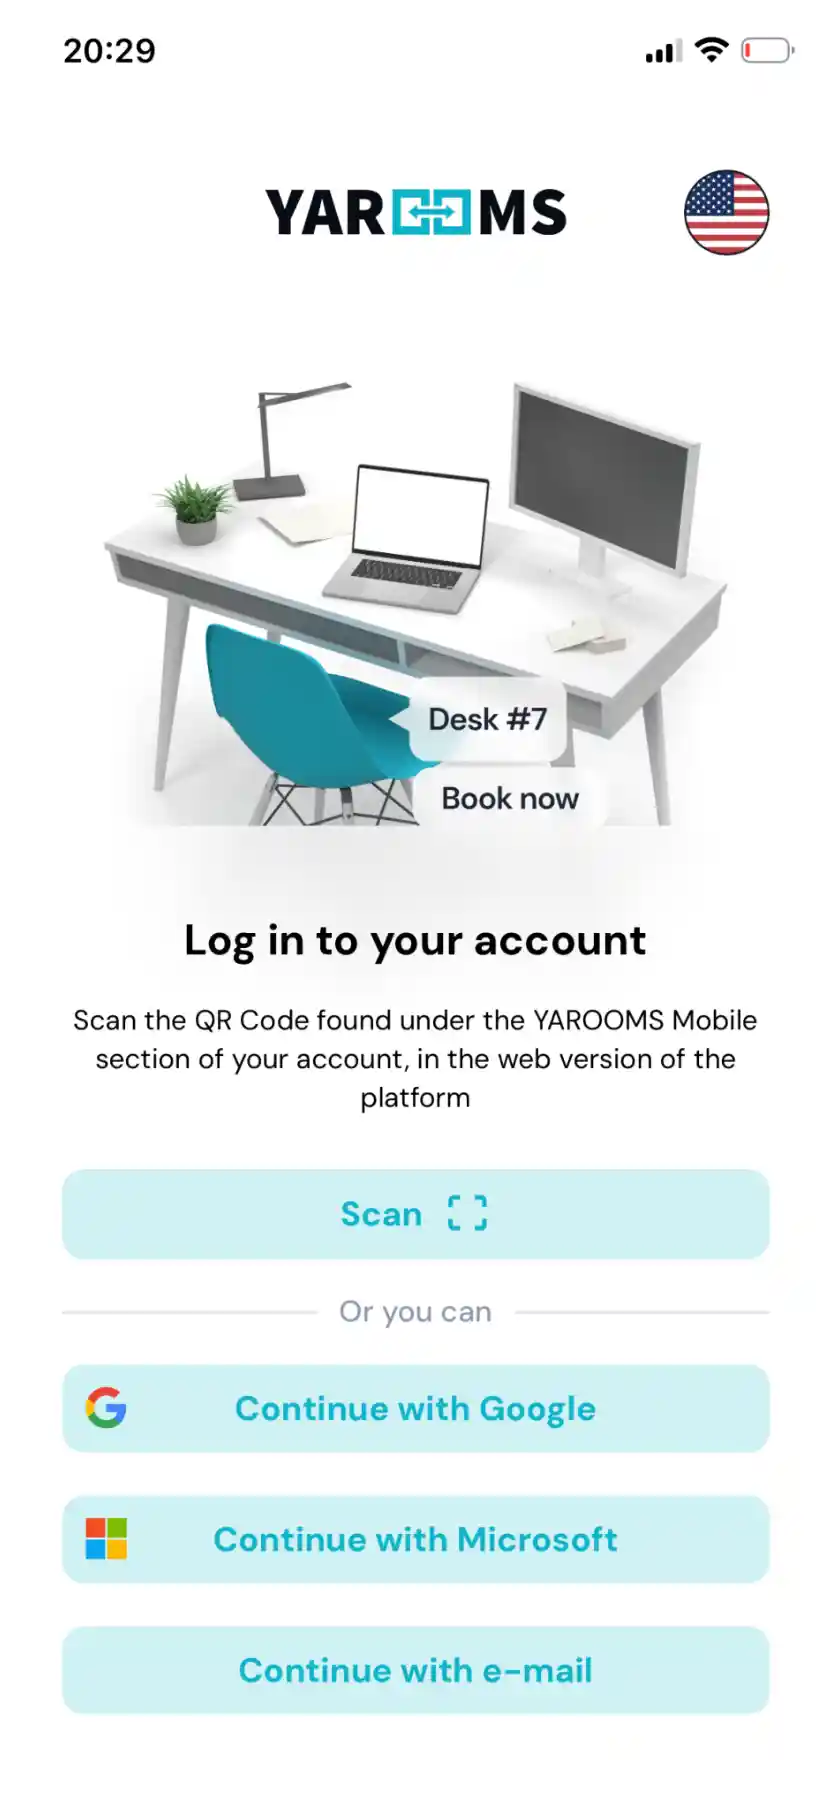
- On the mobile login screen, tap Scan and scan that code. Allow camera access when prompted. This connects the app to your account and signs you in.
Alternatively, use Continue with Google, Continue with Microsoft, or Continue with e-mail, depending on how your organization signs in to YAROOMS. Use the same work account you use on the web. If asked for your YAROOMS domain, enter your organization’s account address, such as company.yarooms.com, not the public YAROOMS website.
Note: The QR code generated in your web account connects the app to your account. It is different from the QR code attached to a desk, which you scan to check in. Keep your account-linking code private.
Make a booking
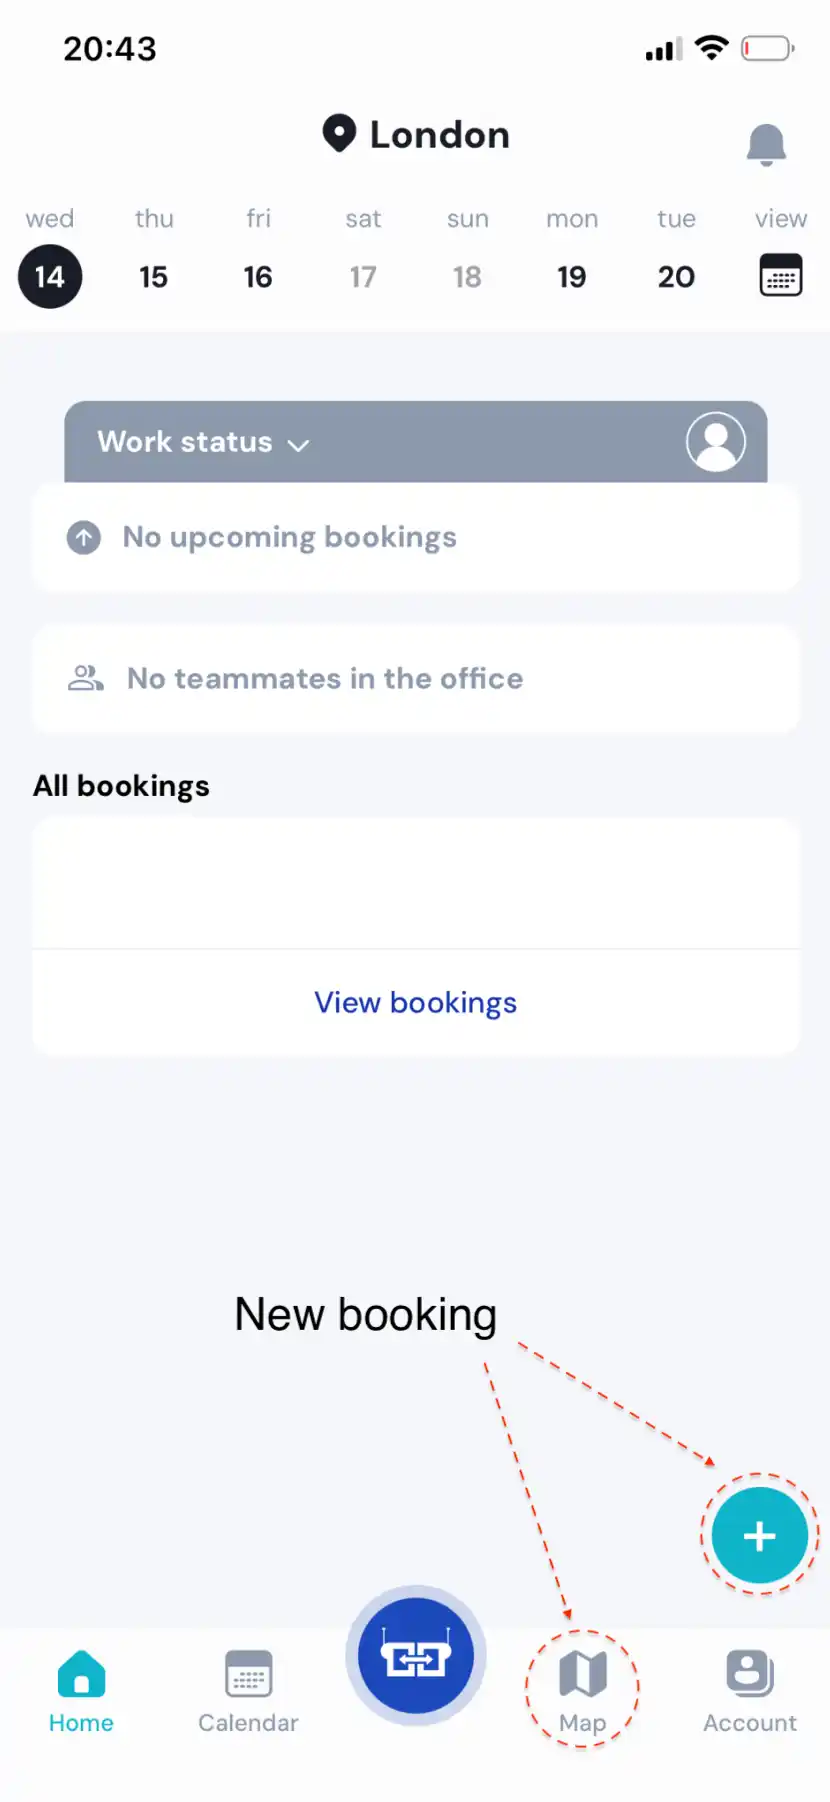
Once signed in, check the location and date. Your bookings for the selected day appear on the home screen.
To create a booking, tap the + button in the bottom-right corner, or open Map and select an available space. For the full steps, see How to Use the YAROOMS Mobile App.
Check in from your phone
When you arrive, open the app and find today’s reservation in your bookings list. The booking indicates which check-in method applies.
Simple check-in
Tap the check-in button on your booking and wait for the success confirmation. No desk QR code is needed for this method.
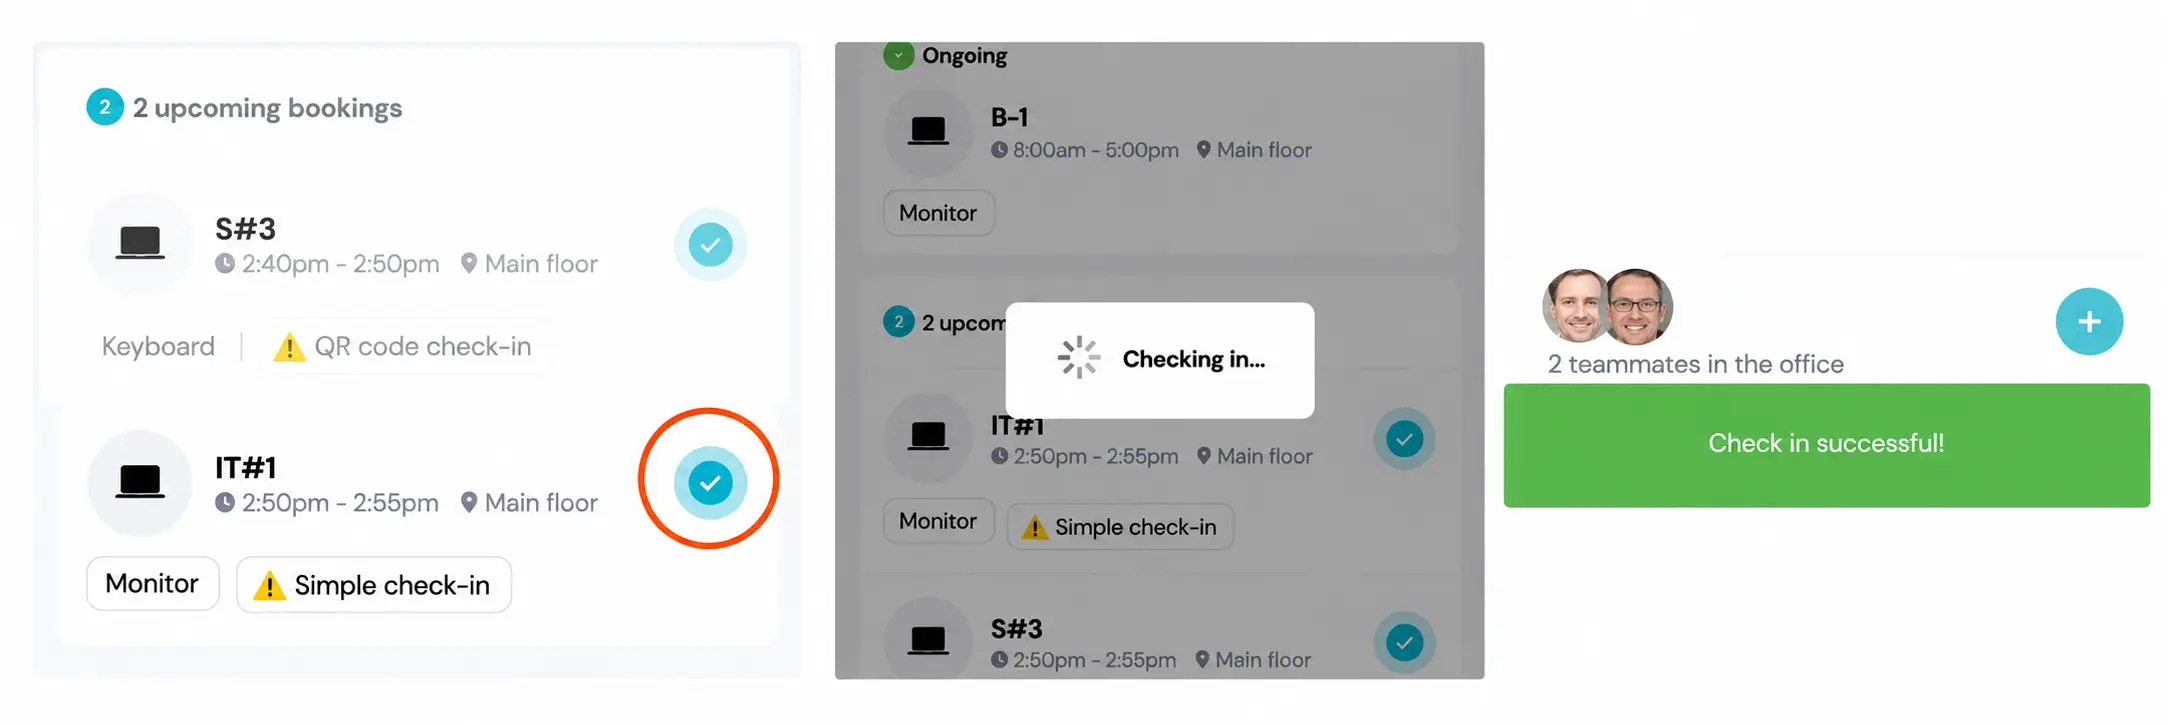
QR code check-in
- Tap the check-in button for your reservation.
- Allow camera access if prompted.
- Scan the QR code placed on the desk or room you booked.
- Wait for the success confirmation before closing the app.
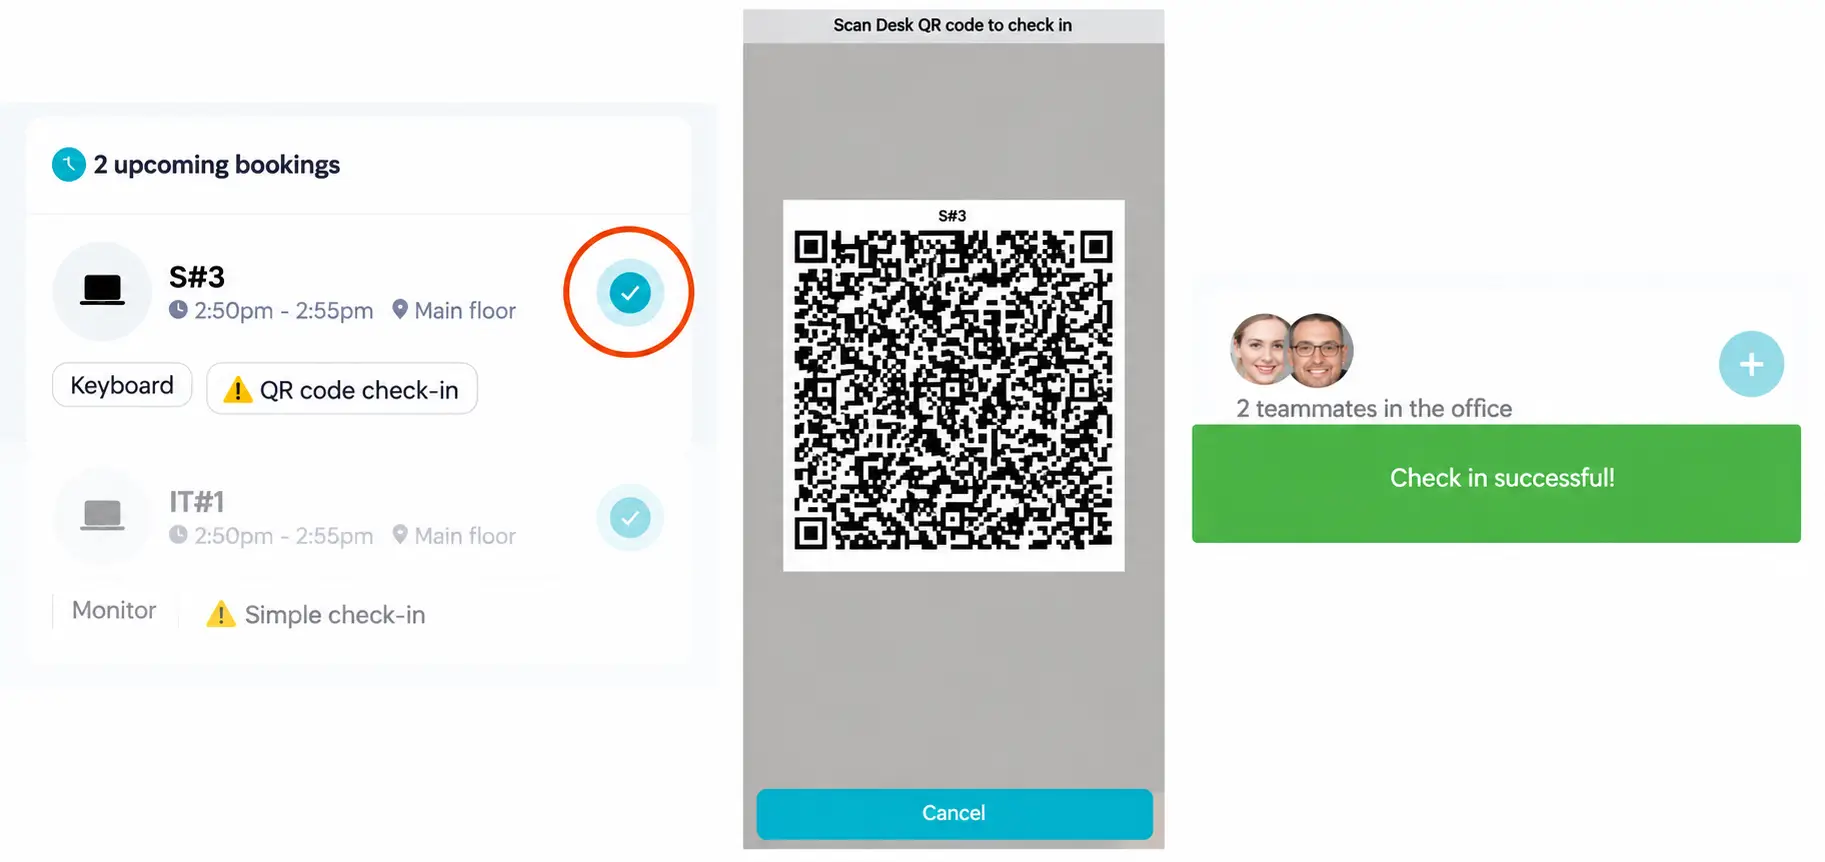
If your organization uses automated Wi-Fi check-in, connect to the office Wi-Fi and open the YAROOMS mobile app, then check that your booking is marked as checked in. With geo-fenced check-in, allow location access and complete check-in within the configured office radius.
Before you settle in, check three things: the booking is for the correct space, it covers the time you need, and check-in has succeeded if required. If a required check-in fails, contact your workplace administrator before the deadline.
You now have the essentials: find a space, reserve it, and confirm your arrival, from your browser or your phone.
Need help with permissions or access? For changes to your account permissions, booking restrictions, or access to locations and spaces, contact your organization's YAROOMS administrators. Click the question mark icon in the bottom-left corner of the web app, then select Contact admins under Help and support to see their names and email addresses. See Finding an Administrator for a visual walkthrough.