Check-in setup
If you typically hold a lot of meetings and need to reduce no-shows, the check-in feature is something you should enable.
To activate it, navigate to Manage > Meeting rooms in your YAROOMS account (as Administrator) and select an existing room or create a new one. Click the “Check In” tab, set it to Active, and choose your “Grace period” - the time period after which the room is automatically cleared and the booking cancelled if nobody checked-in.

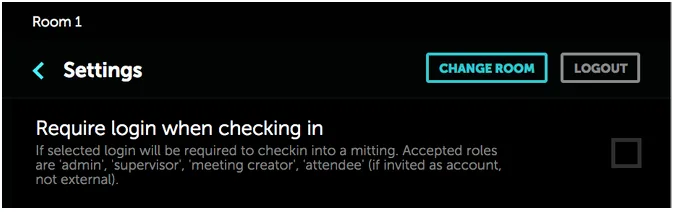
You can further require users to log in when checking in via the Settings menu on your tablet by enabling the “Require login when checking in” function. When active, users receive a pop-up requesting their credentials.
Checking in
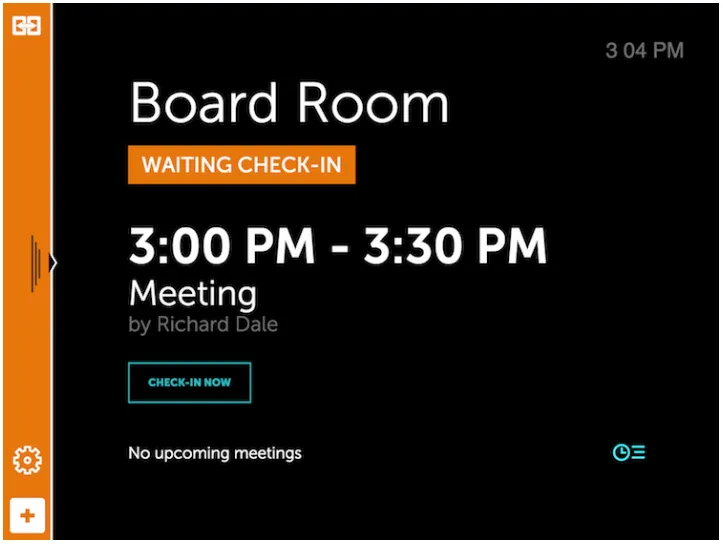
Once enabled, the tablet app displays a “Check In” button when meetings start. Users simply click it. Check-ins (or lack thereof) can also be viewed in your Reports section.
No Show
If users fail to check in within the grace period:
- The meeting is erased from the tablet
- The meeting disappears from calendar views
- The meeting appears in Reports with “No Show” status
- The room becomes instantly available for other bookings