This guide covers configuring SAML 2.0 authentication with Azure Active Directory for YAROOMS.
Step 1: Create Azure Application
- Authenticate to portal.azure.com with Admin privileges
- Navigate to Enterprise Applications
- Click “New Application” and select “Non-gallery application”
- Enter a name and wait for completion
Step 2: Configure Single Sign-On
- In the application overview, click section “2. Set up single sign on”
- Select SAML as the authentication method
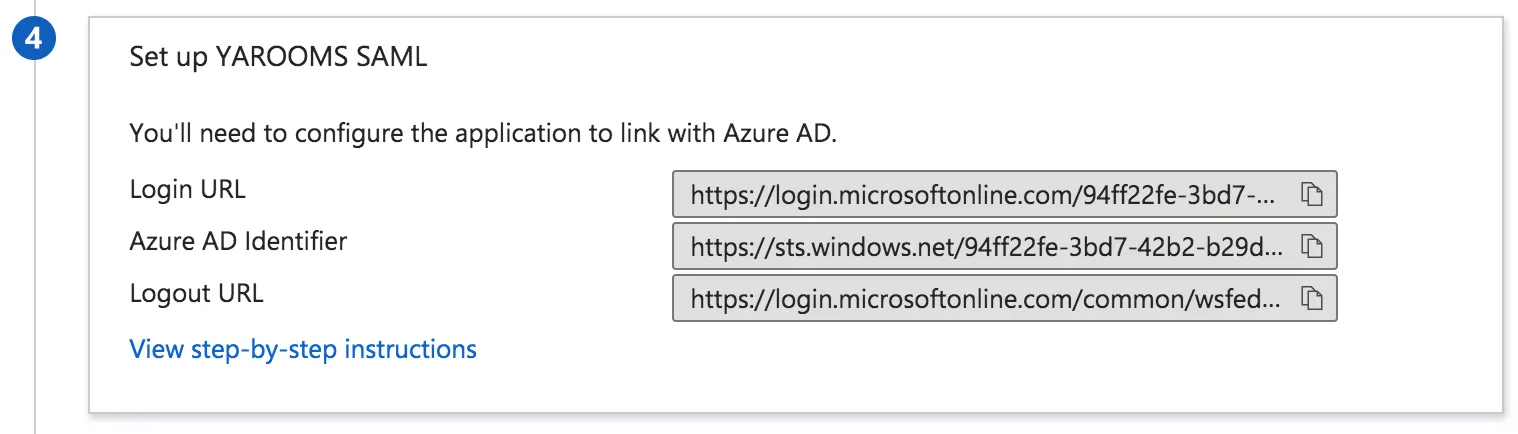
Step 3: Map Azure Values to YAROOMS
The Azure configuration page contains values needed for YAROOMS setup:
From Section #4 (SAML Configuration):
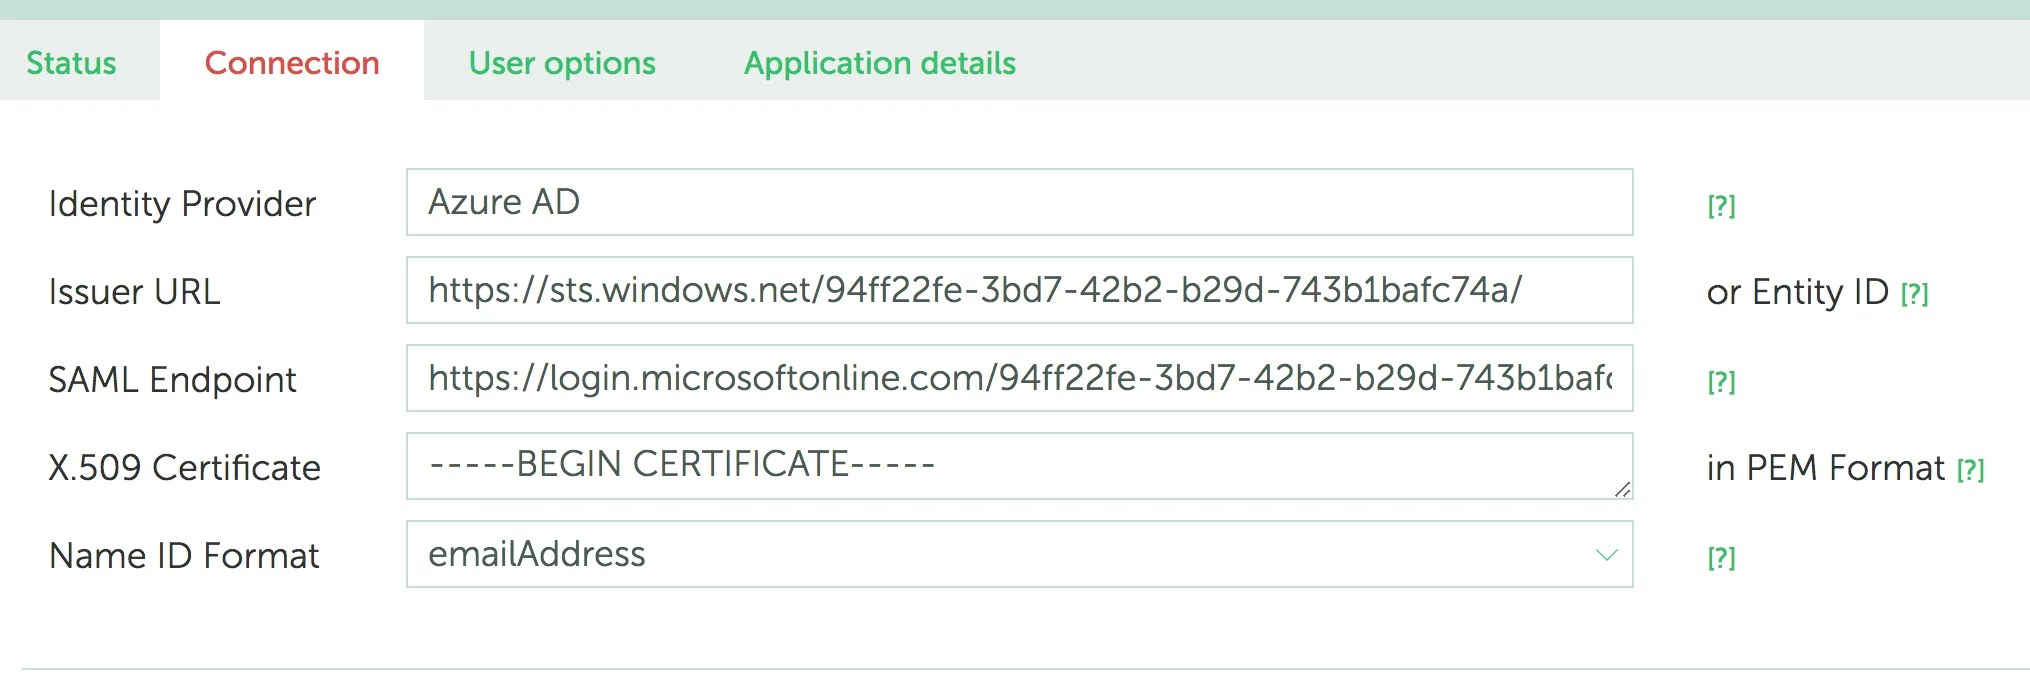
- Copy Azure AD Identifier → paste into Issuer URL field
- Copy Login URL → paste into SAML Endpoint field
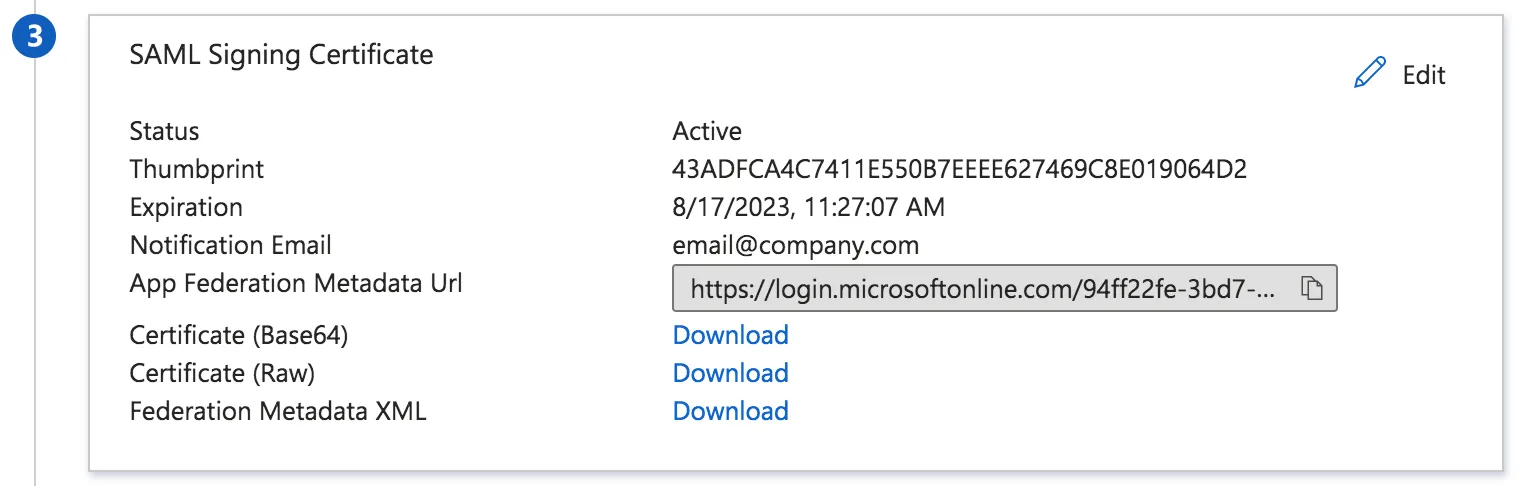
From Section #3 (SAML Signing Certificate):
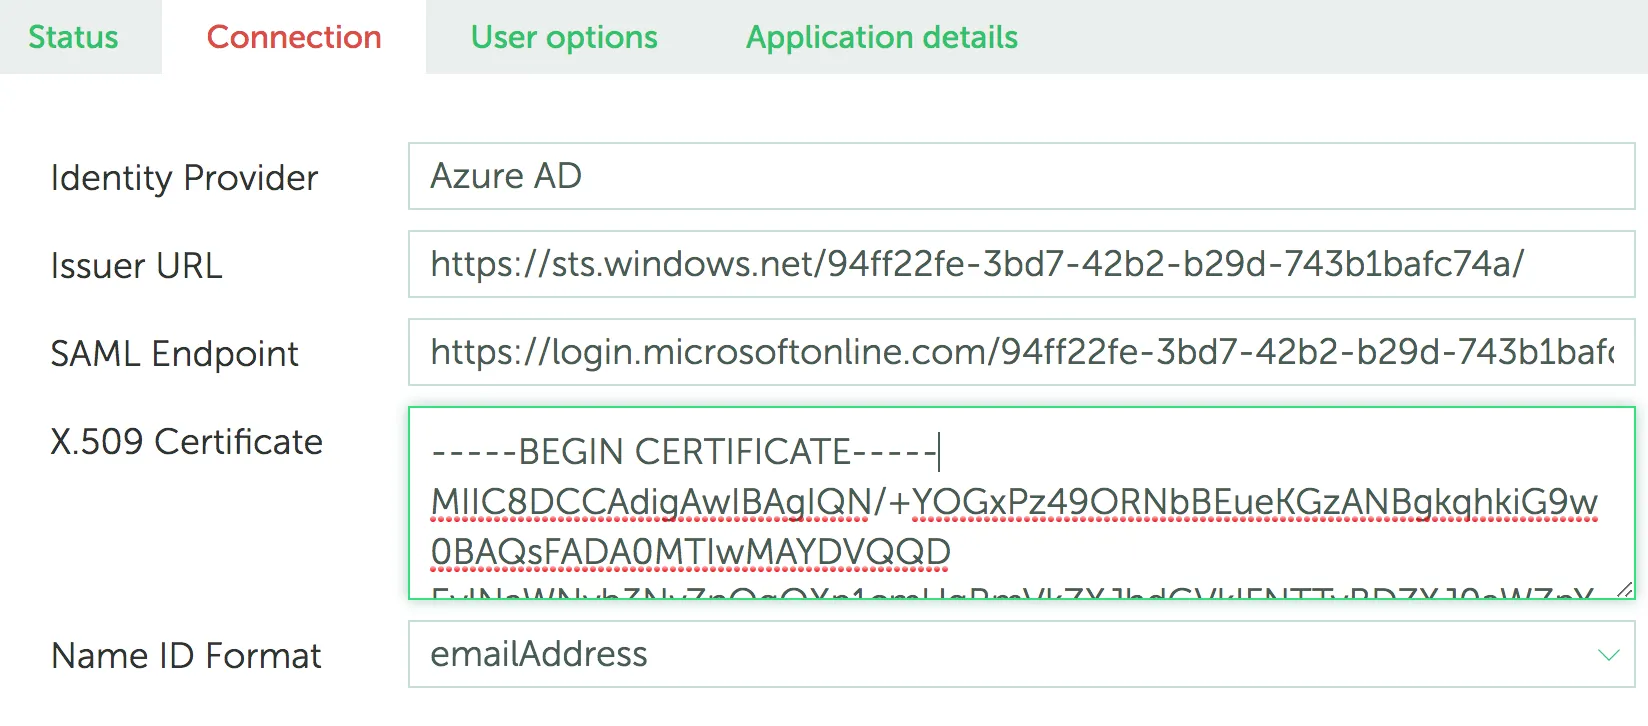
- Download certificate in Base64 format
- Paste contents into X.509 Certificate field
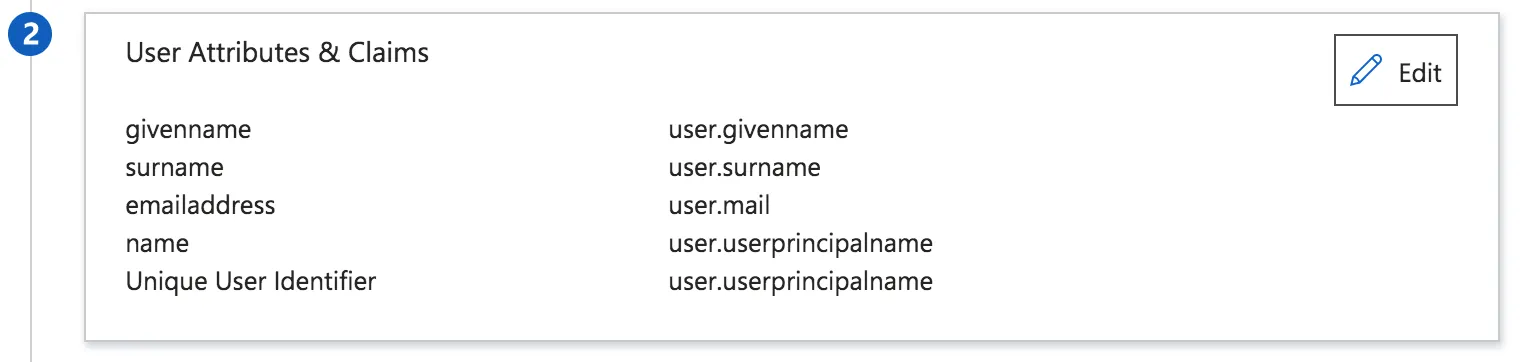
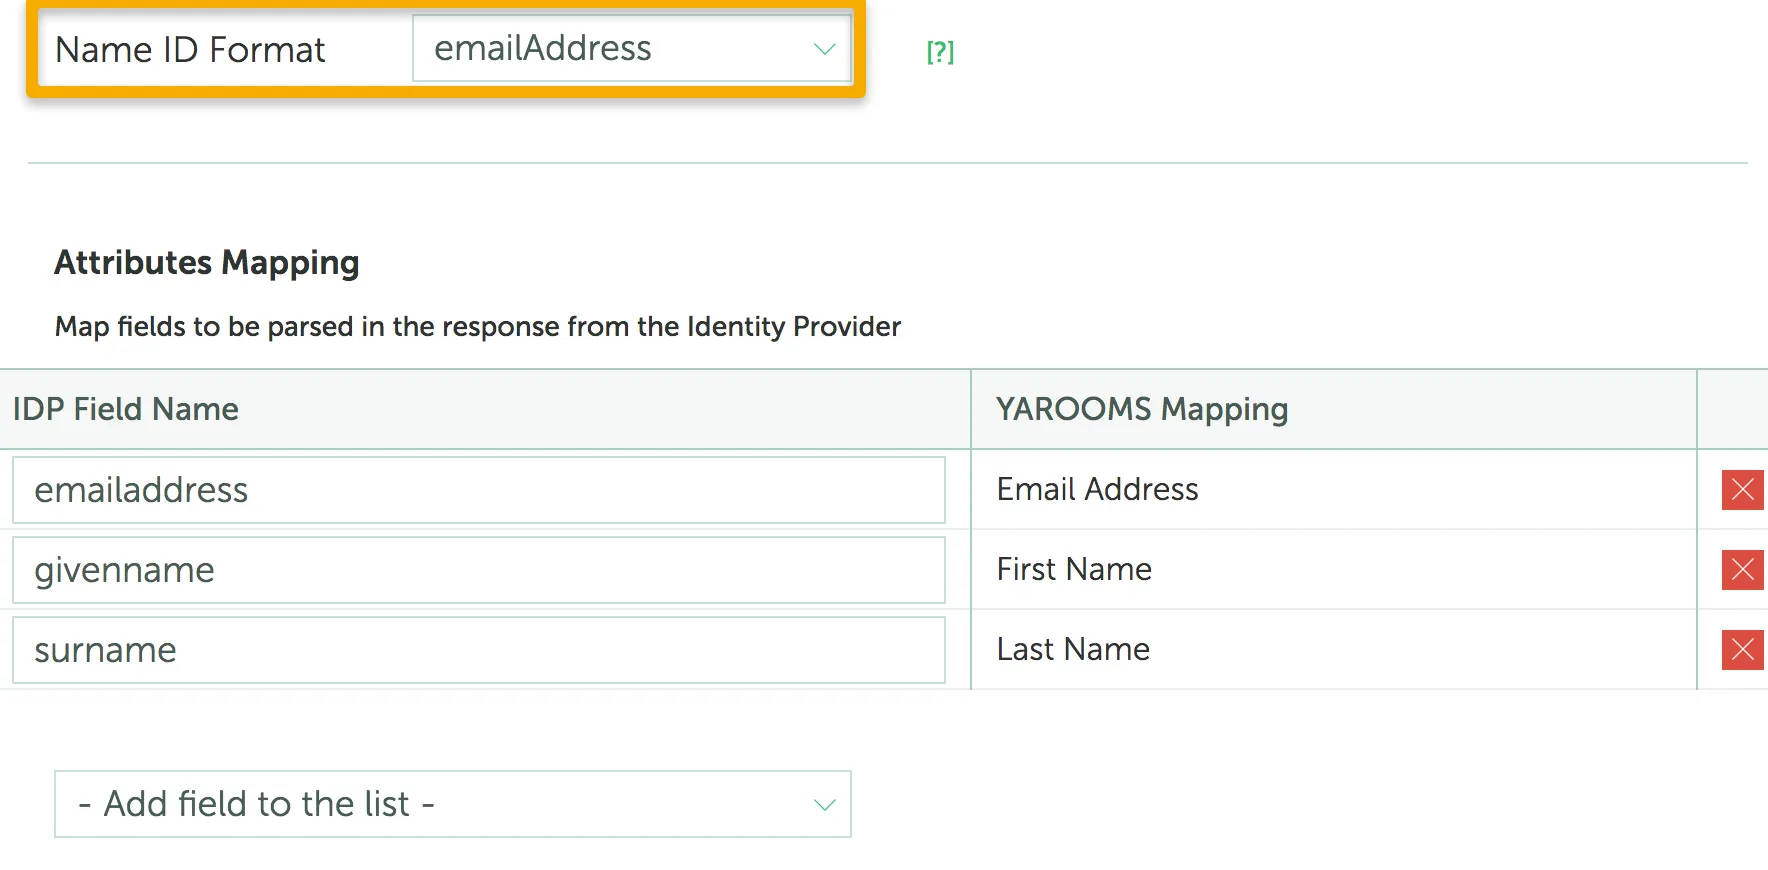
Step 4: Map User Attributes
From Azure Section #2 (User Attributes & Claims):
- Set Name ID Format to emailAddress
- Use exact user attributes from Azure in IDP Fields’ values
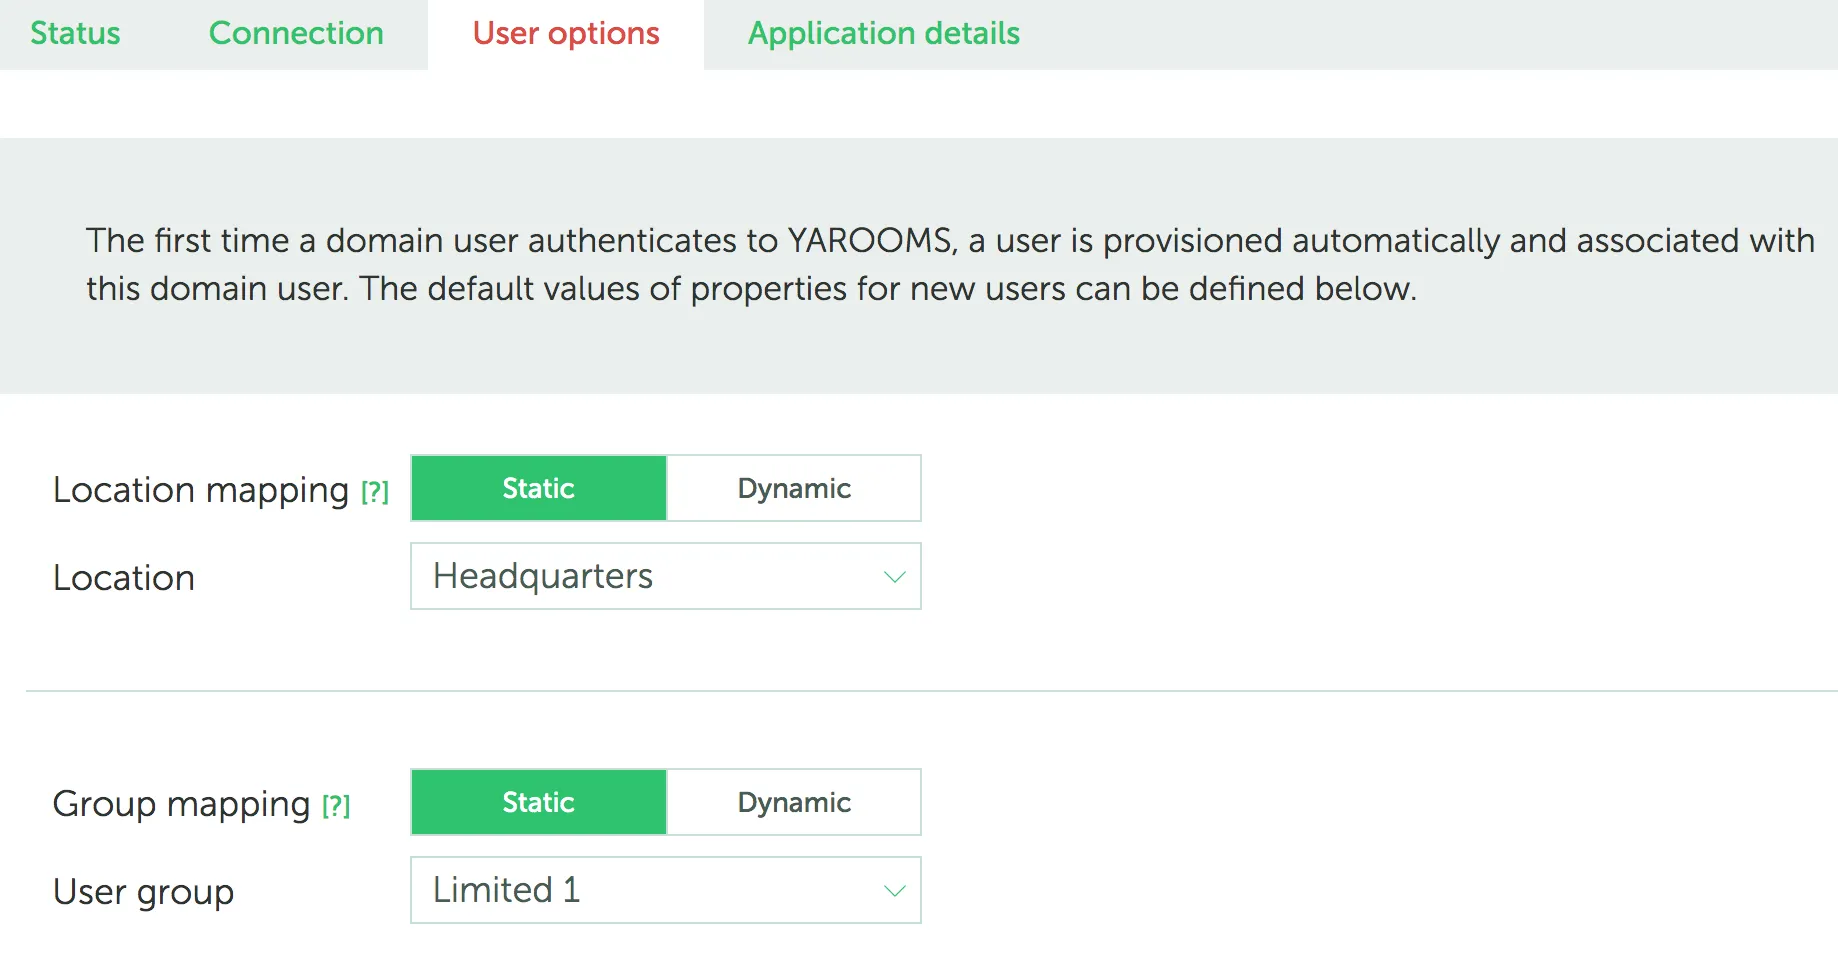
Step 5: Configure User Options
In YAROOMS, navigate to the “User options” tab to:
- Select Location for newly provisioned users
- Select Group for newly provisioned users
Note: It is recommended not to choose Administrator or Supervisor groups for mapping, as all new users will have all the privileges of these groups.
Step 6: Complete Azure Configuration
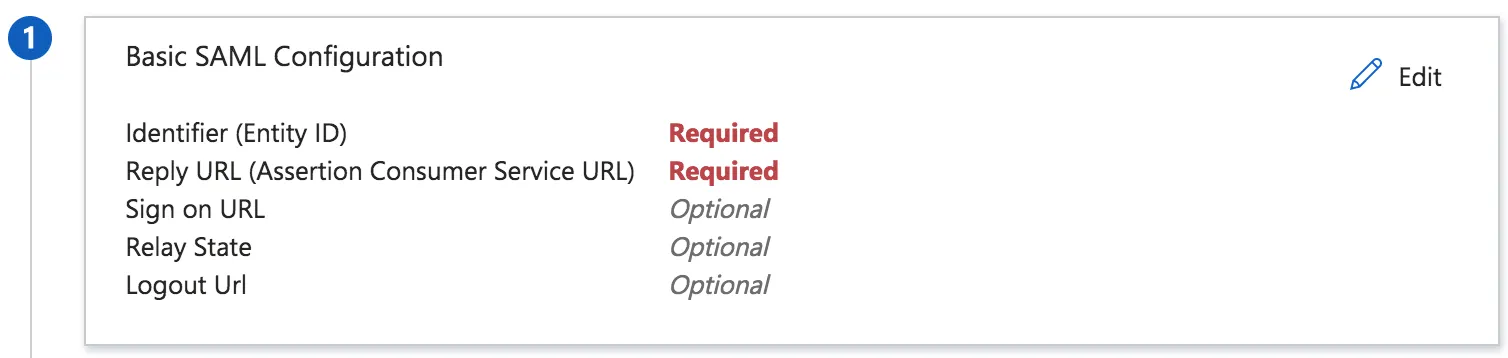
In the “Application Details” tab, copy the values to Azure Section #1:
- Entity ID → Identifier (Entity ID)
- ACS (Consumer) URL → Reply URL (Assertion Consumer Service URL)
- Relay State → Relay State
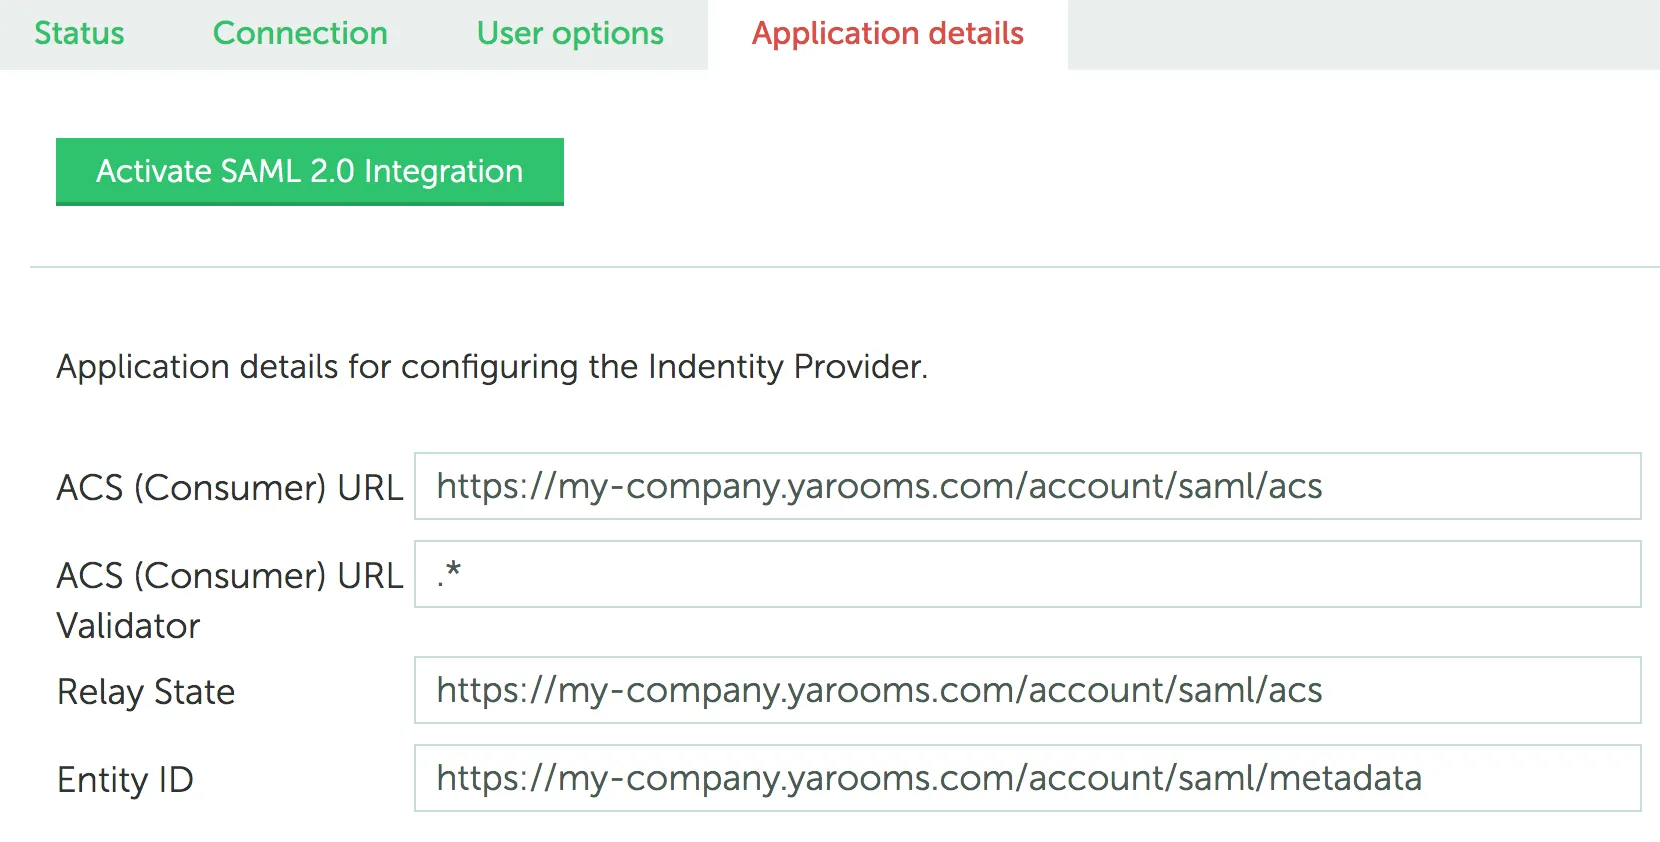
Step 7: Activate Integration
- Click “Activate SAML 2.0 Integration” in YAROOMS
- Save SAML configuration in Azure
- Test settings using the “Test” button in Azure Section #5

Ensure user accounts assigned to the Azure application are properly configured for the provisioning integration.