
Jump to:
Using the address book
The address book stores contact details for employees and visitors. If your organization has granted you access, open Visitor Management → Address book. Use the location selector in the top-right corner to choose the location you want to work with.
Search by name, email, or company using the search field above the list. You can also narrow the results using the filters below the column headings. The list shows contact details such as type, email, phone number, company, job title, car plate number, and preferred language. Use the controls at the bottom to move between pages or change the number of contacts per page.
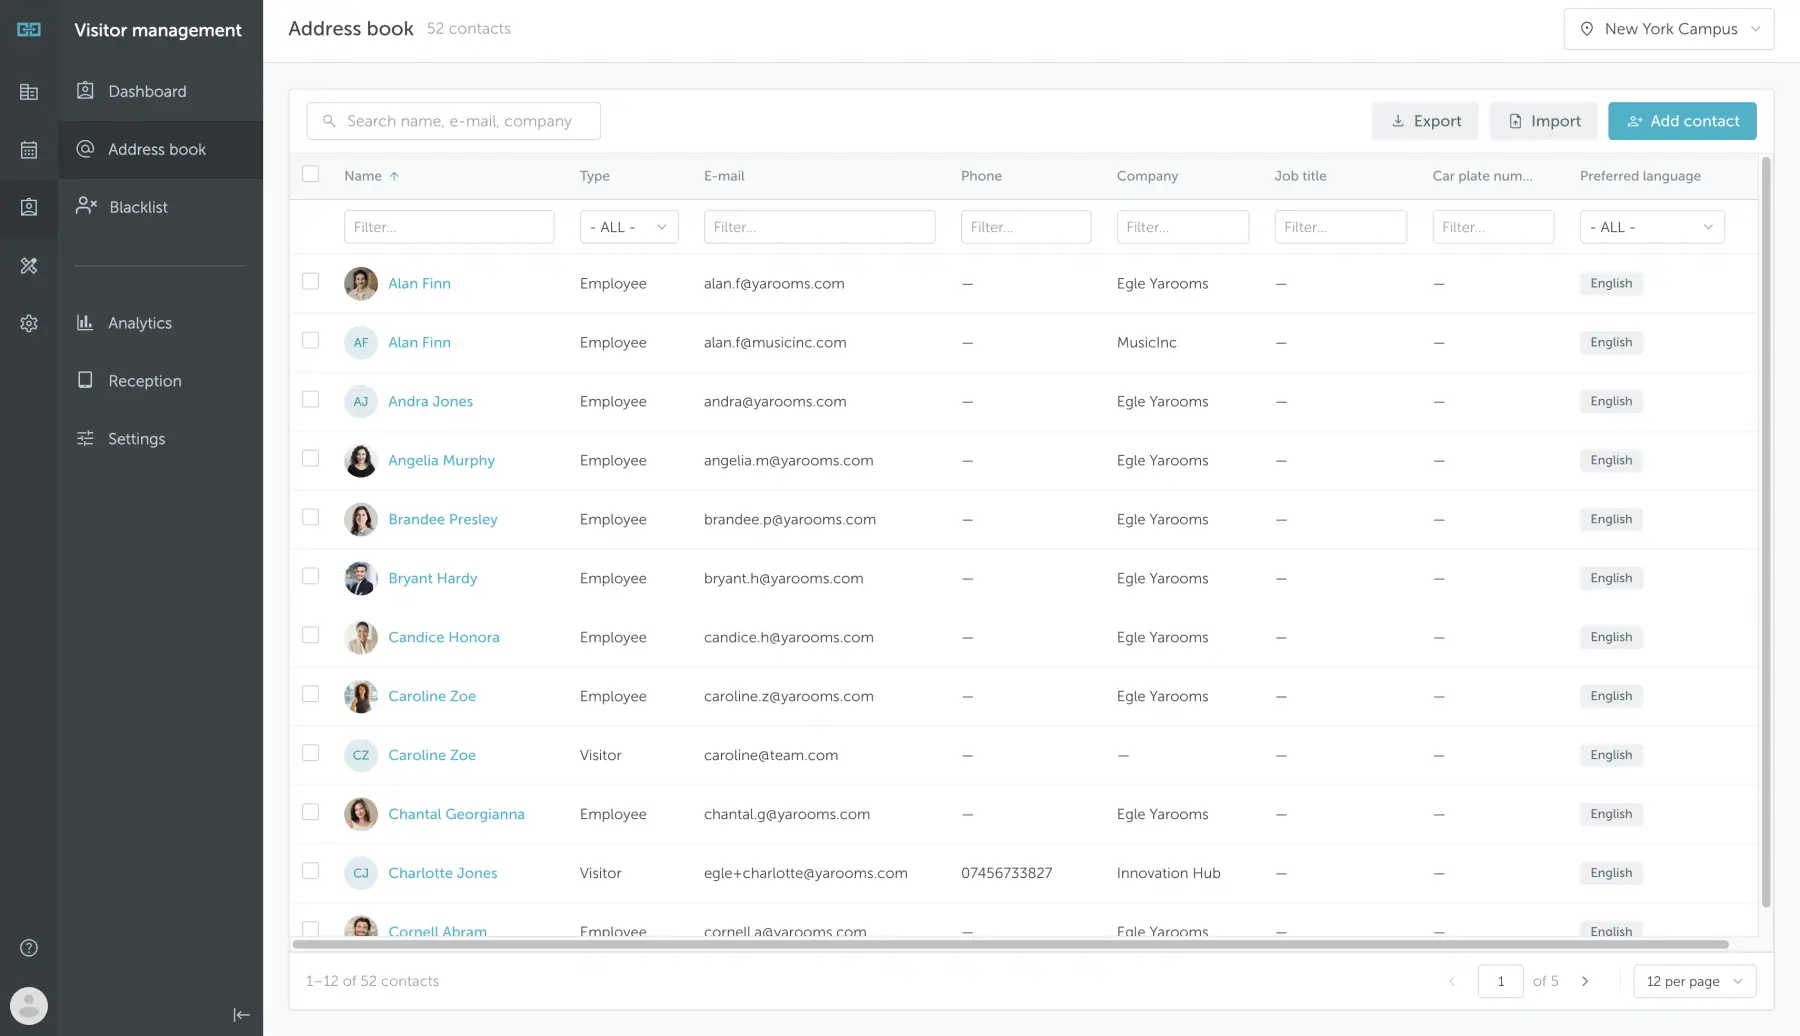
To add a contact:
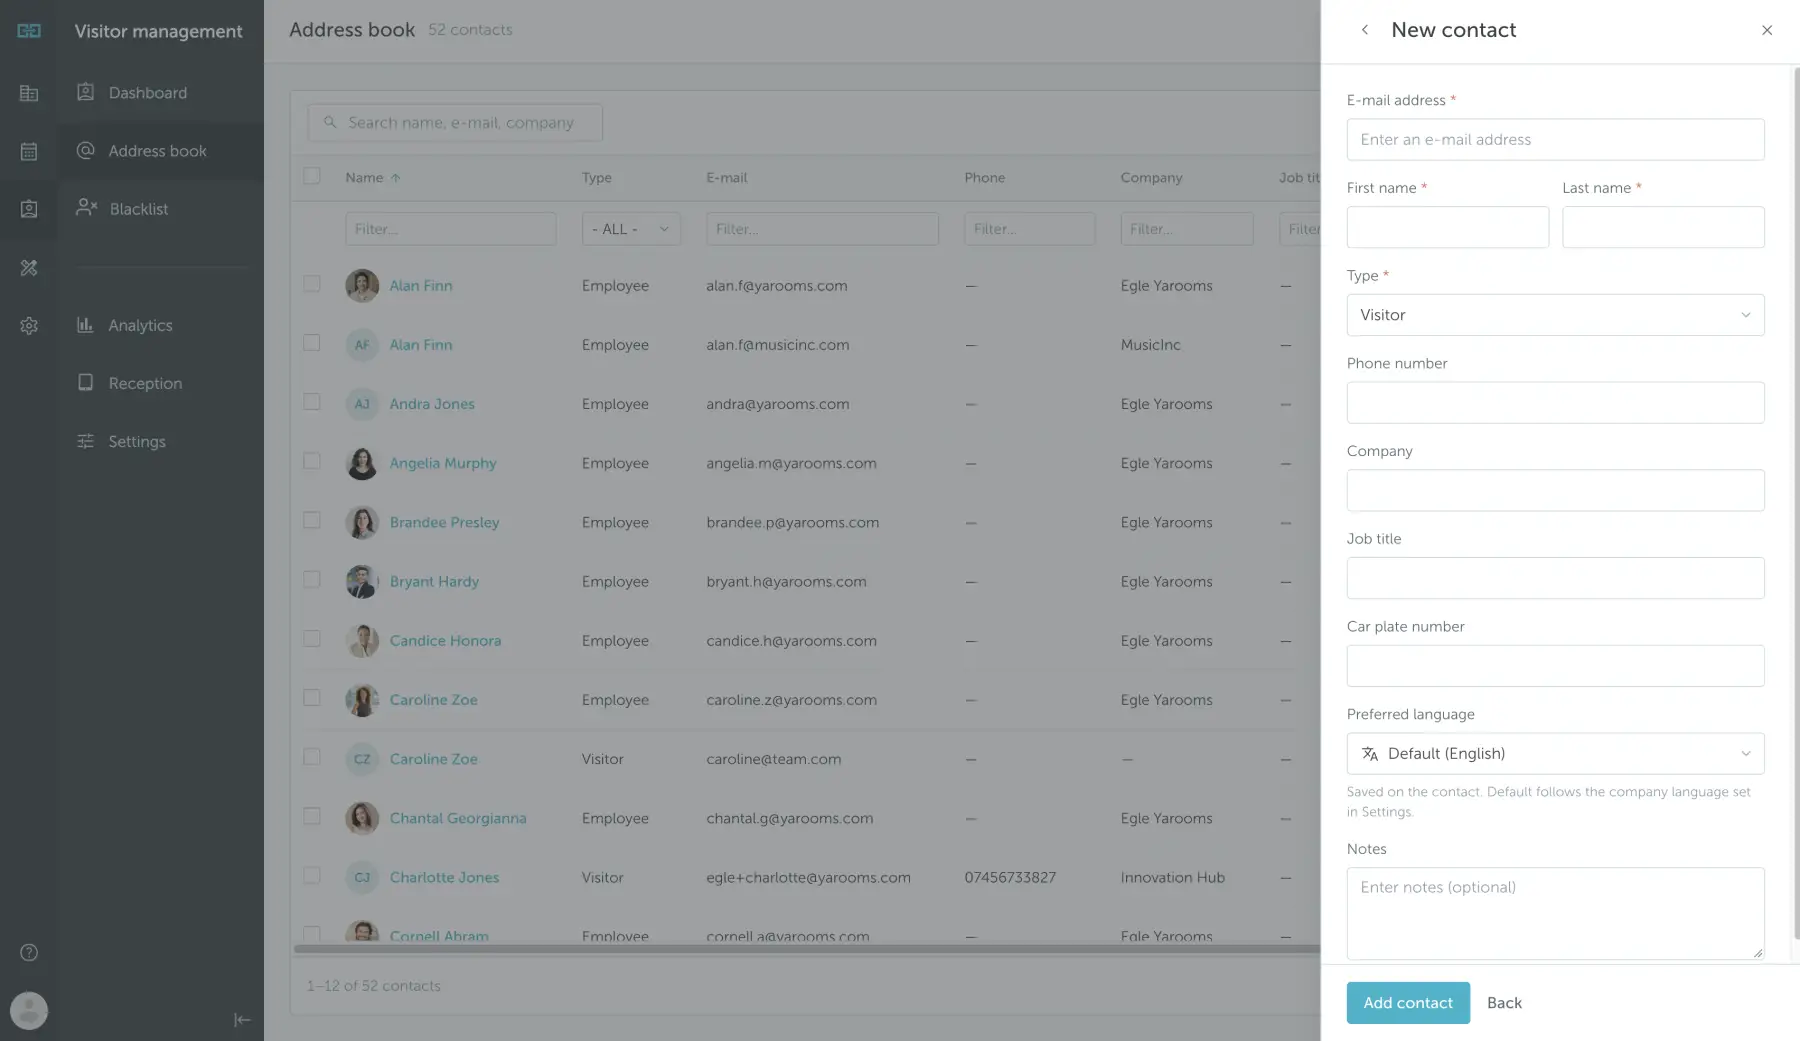
- Click Add contact in the top-right corner.
- In the New contact panel, enter the required E-mail address, First name, Last name, and Type.
- Add any optional details, such as phone number, company, job title, car plate number, or notes.
- Choose a Preferred language, or leave the default to use the company language set in Settings.
- Click Add contact at the bottom of the panel.
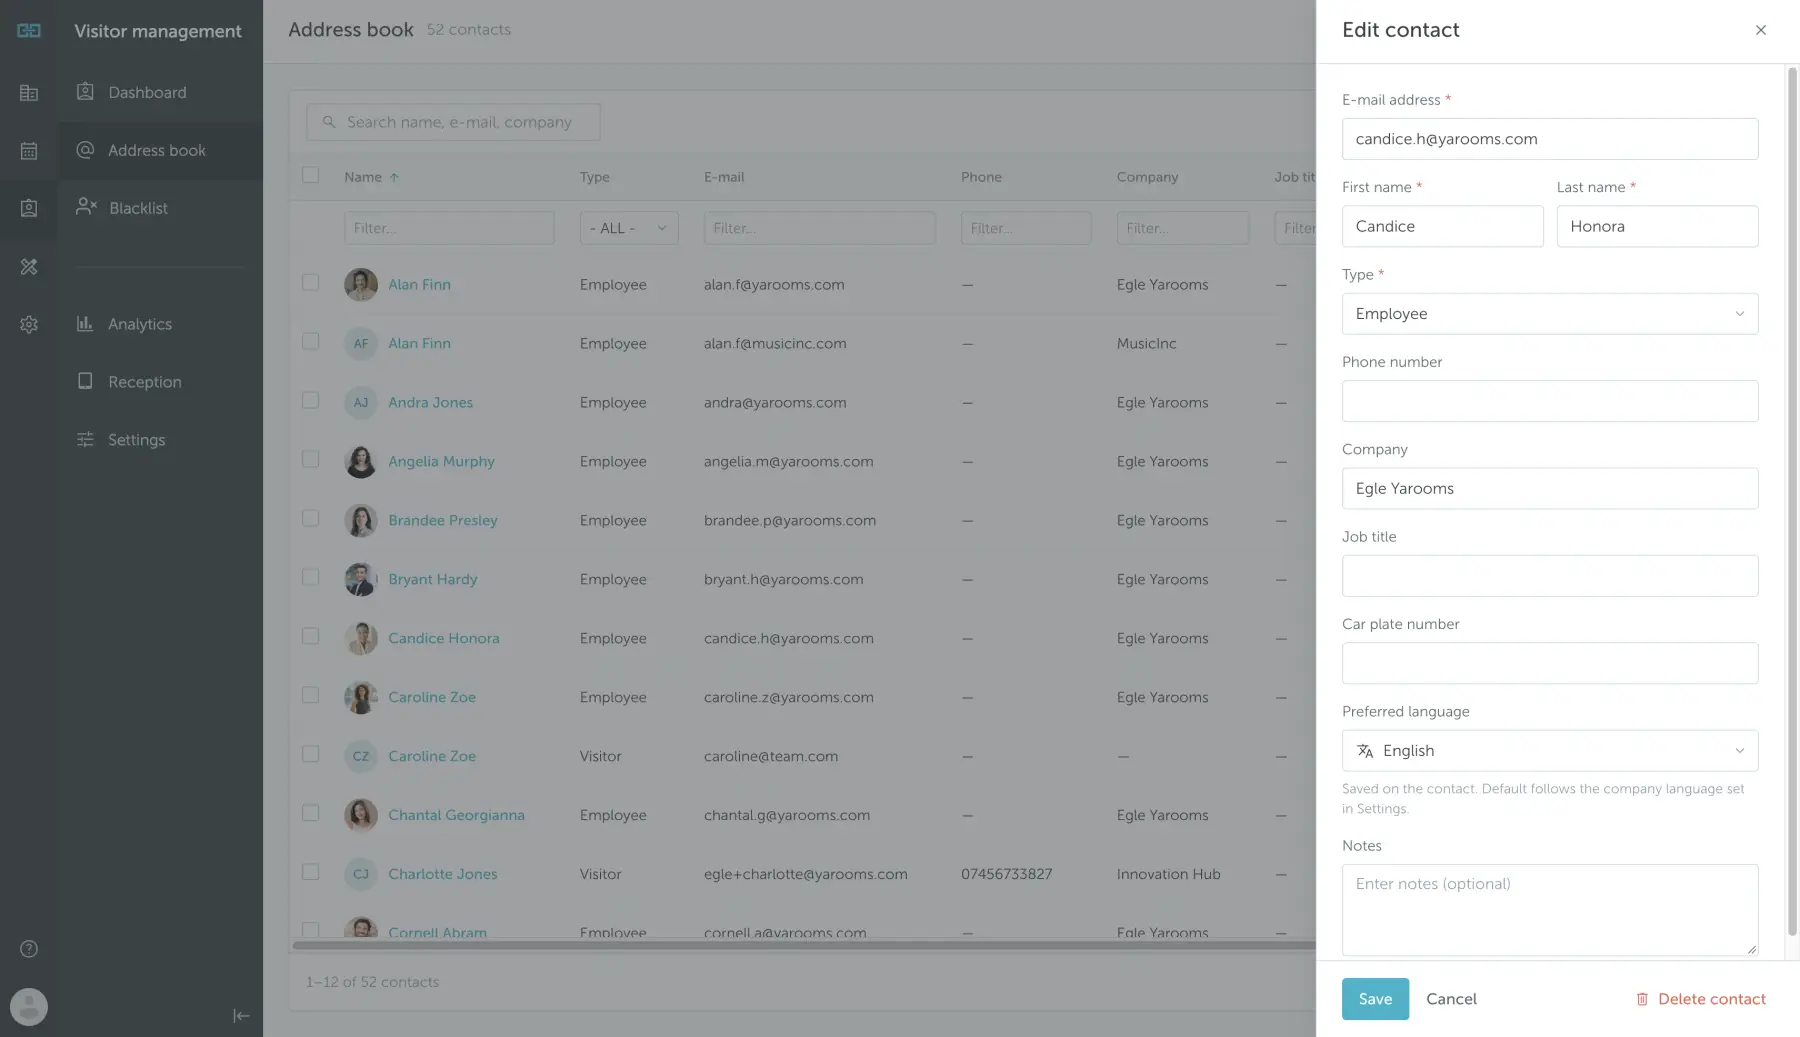
To update an existing contact, click their name in the address book to open the Edit contact panel. Update their details and click Save. The panel also includes Cancel and Delete contact actions.
Using the Visitor Management dashboard
Open Visitor Management → Dashboard to view visits for a selected day. Use the date controls at the top to navigate to past or future days, and the location selector to choose your location.
The summary cards show Expected today, On site now, Overdue, Pre-registered (compared with walk-in visits), and Peak arrivals. For trends such as no-show rate and peak arrival times, see visitor analytics.
Use the search field to find a visit by name, company, or host. The filters above the list let you switch between All, Expected, On site, Overdue, Checked out, and Canceled visits.
The visit list shows information such as:
- Name and email address.
- Expected arrival time.
- Status, such as Pending, Confirmed, Checked-in, or Canceled.
- Type, indicating whether the person is a Visitor or Employee.
- Check-in, with an action to check the person in or, for someone already checked in, their arrival time and a Check out action.
- Host and Company.
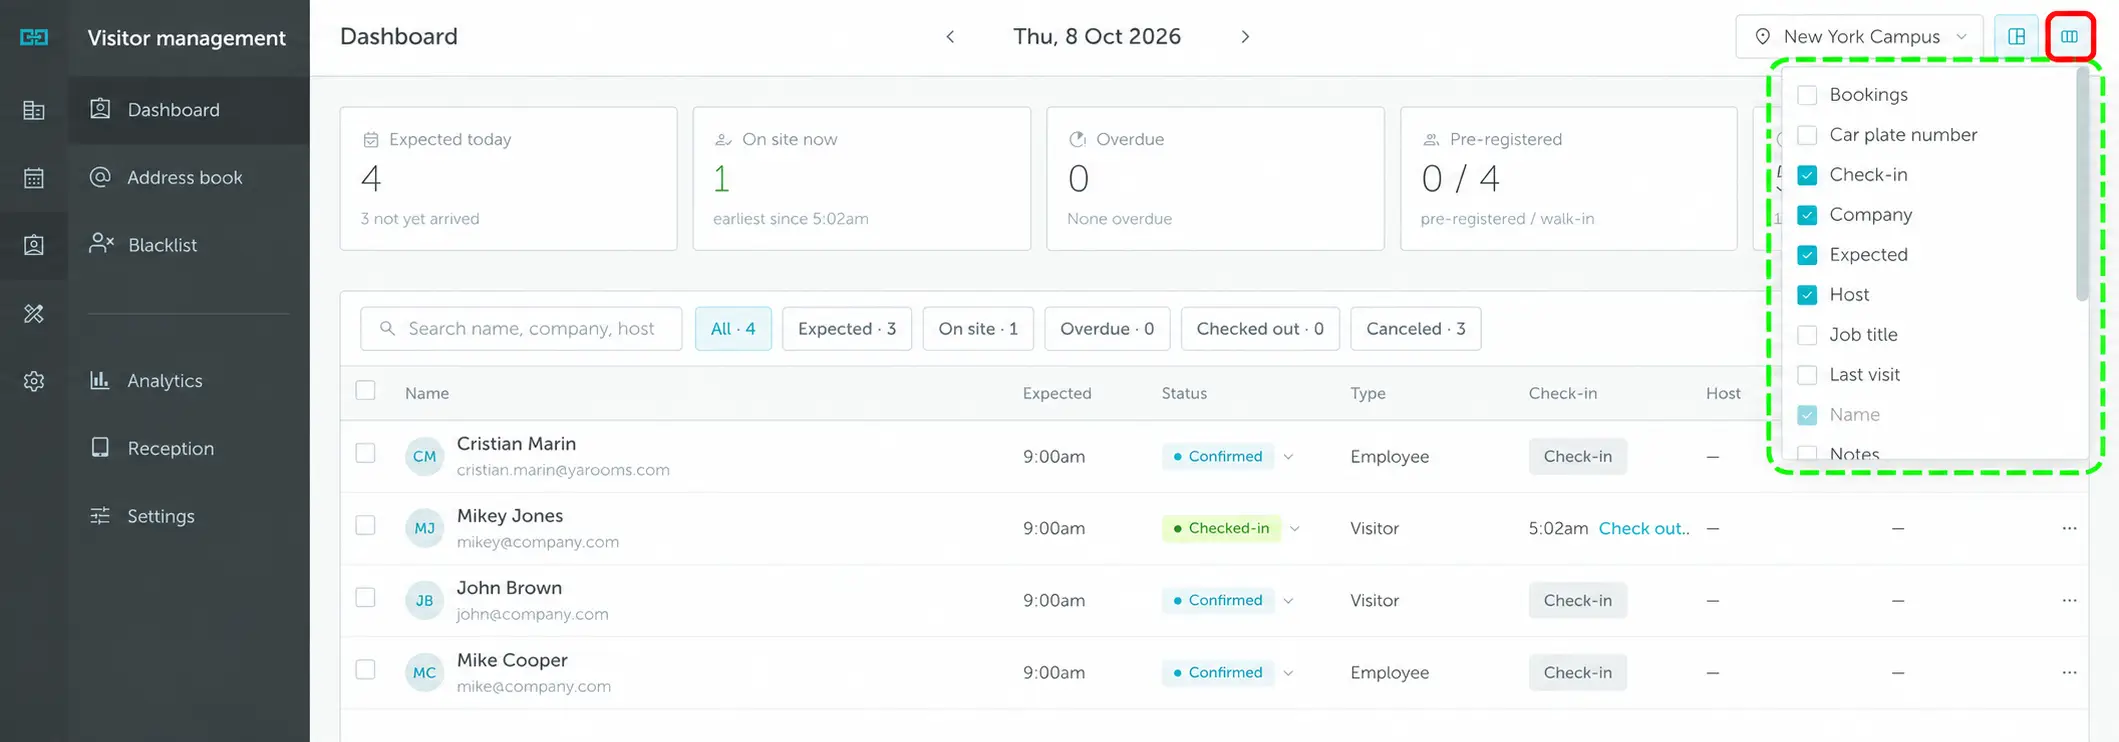
To choose which details appear, click the columns icon in the top-right corner, highlighted in red below. Select or clear the checkboxes in the menu, outlined in green. Available details include bookings, car plate number, check-in, company, expected arrival, host, job title, last visit, and notes. Scroll within the menu to see more options.
Adding a visitor
If your organization has granted you access, open Visitor Management → Dashboard and click Add visit.
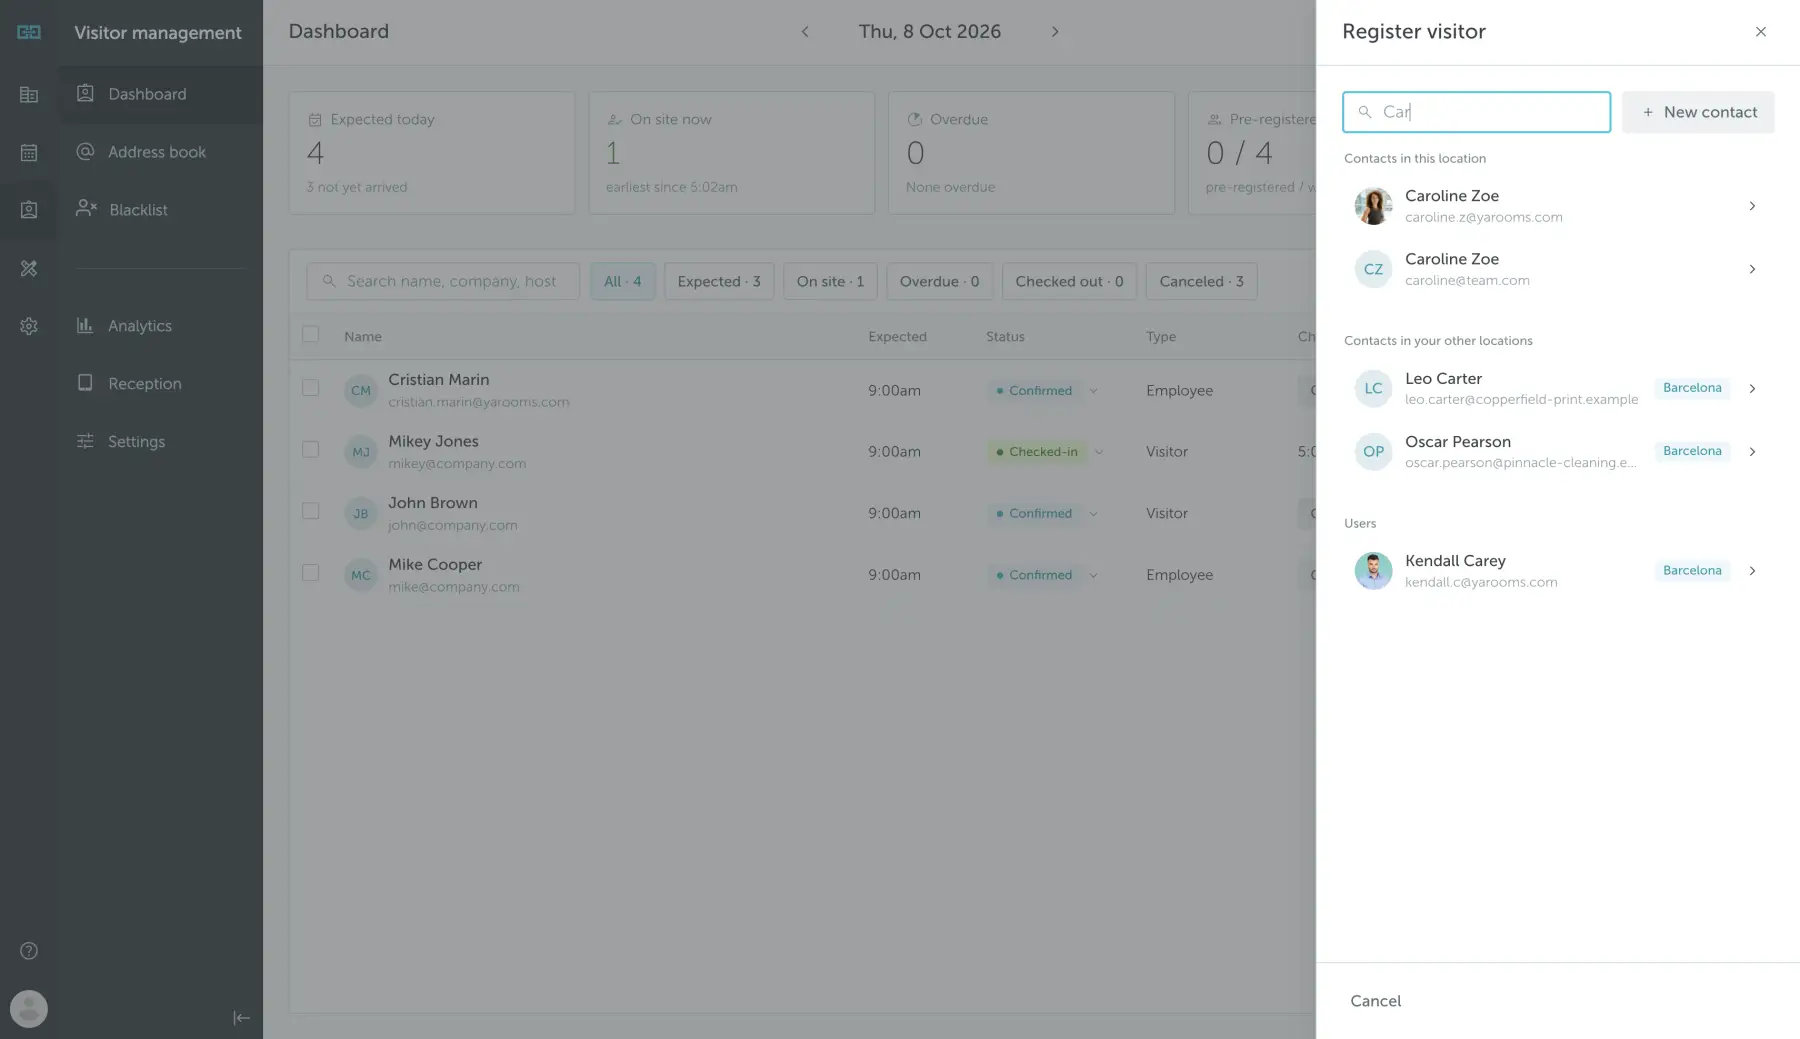
In the Register visitor panel, search for an existing contact. Results are grouped into Contacts in this location, Contacts in your other locations, and Users. Select the person you want to register. If the person is not listed, click New contact.
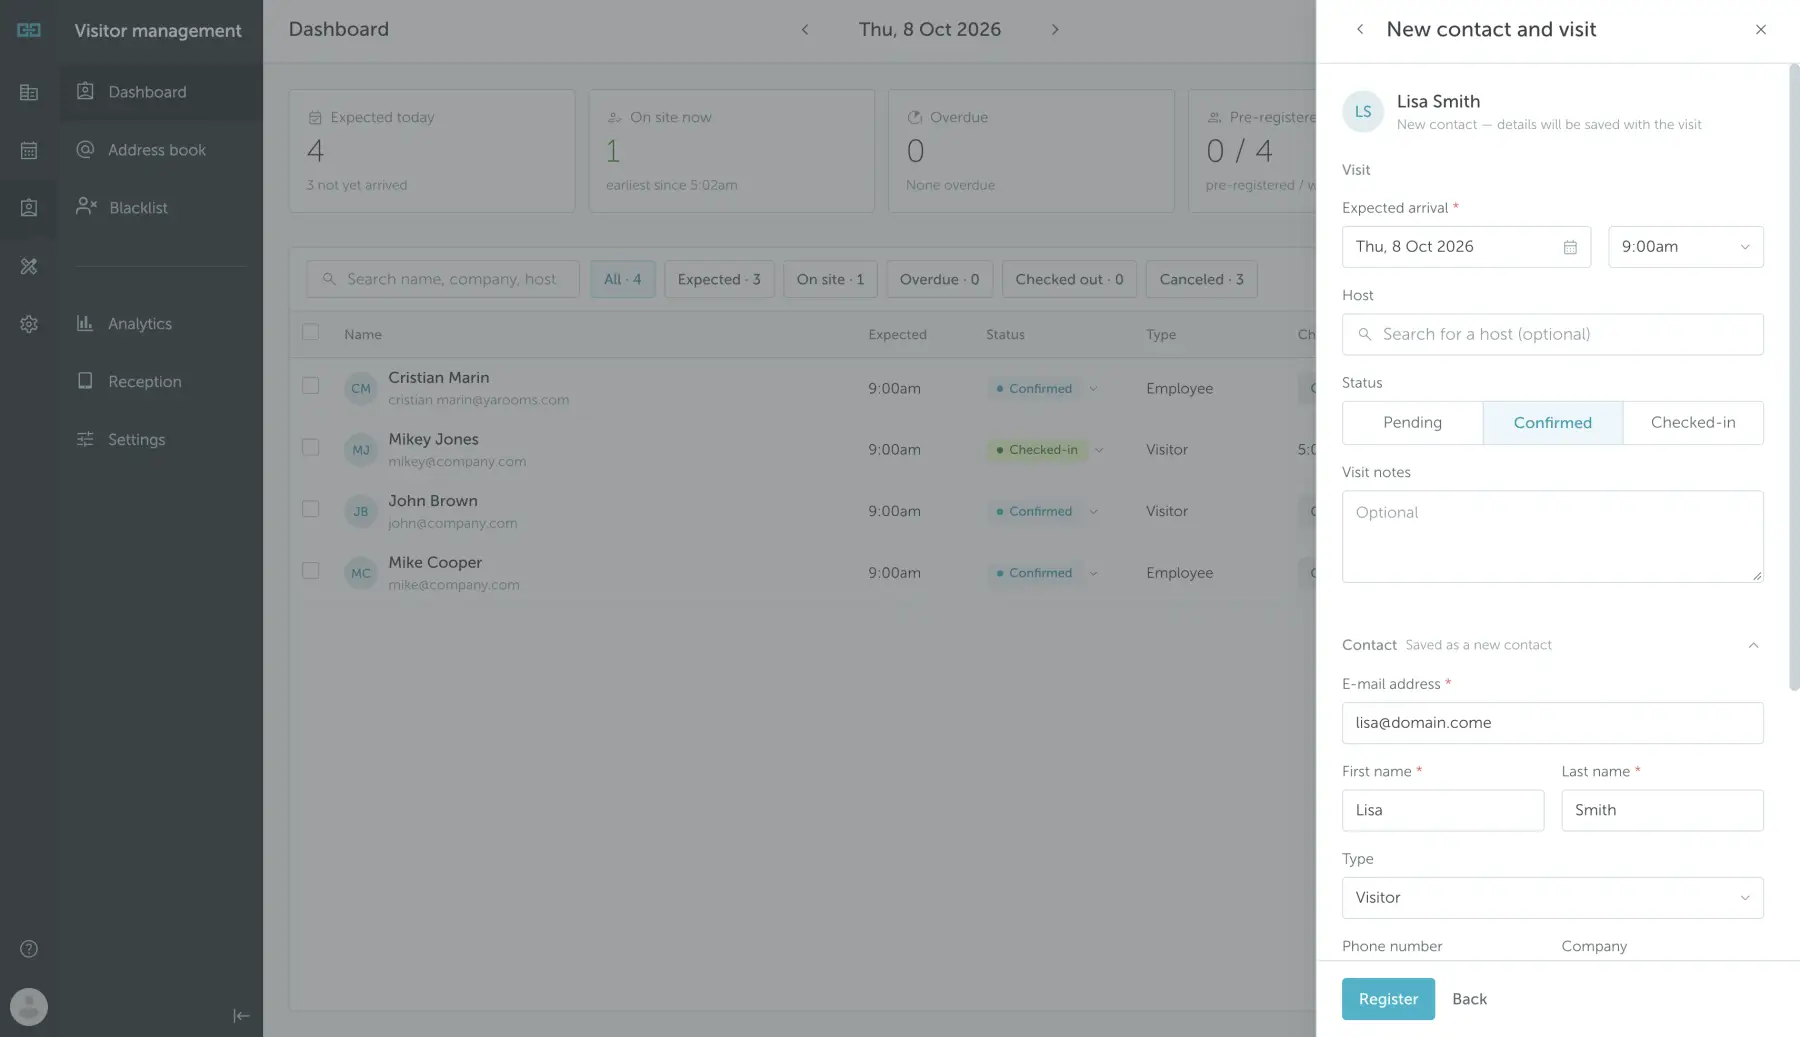
Complete the visit details:
- Set the required Expected arrival date and time.
- Select a Host, if needed.
- Choose the initial Status: Pending, Confirmed, or Checked-in.
- Add any Visit notes.
- If you are creating a new contact, complete their details in the Contact section, including their email address, first name, last name, and type.
- Click Register at the bottom of the panel.
How to check-in/check-out the visitor or cancel their visit
Once a visitor is registered, click Check-in in their row when they arrive. For someone already checked in, the Check-in column shows their arrival time and a Check out action. Click Check out when they leave.
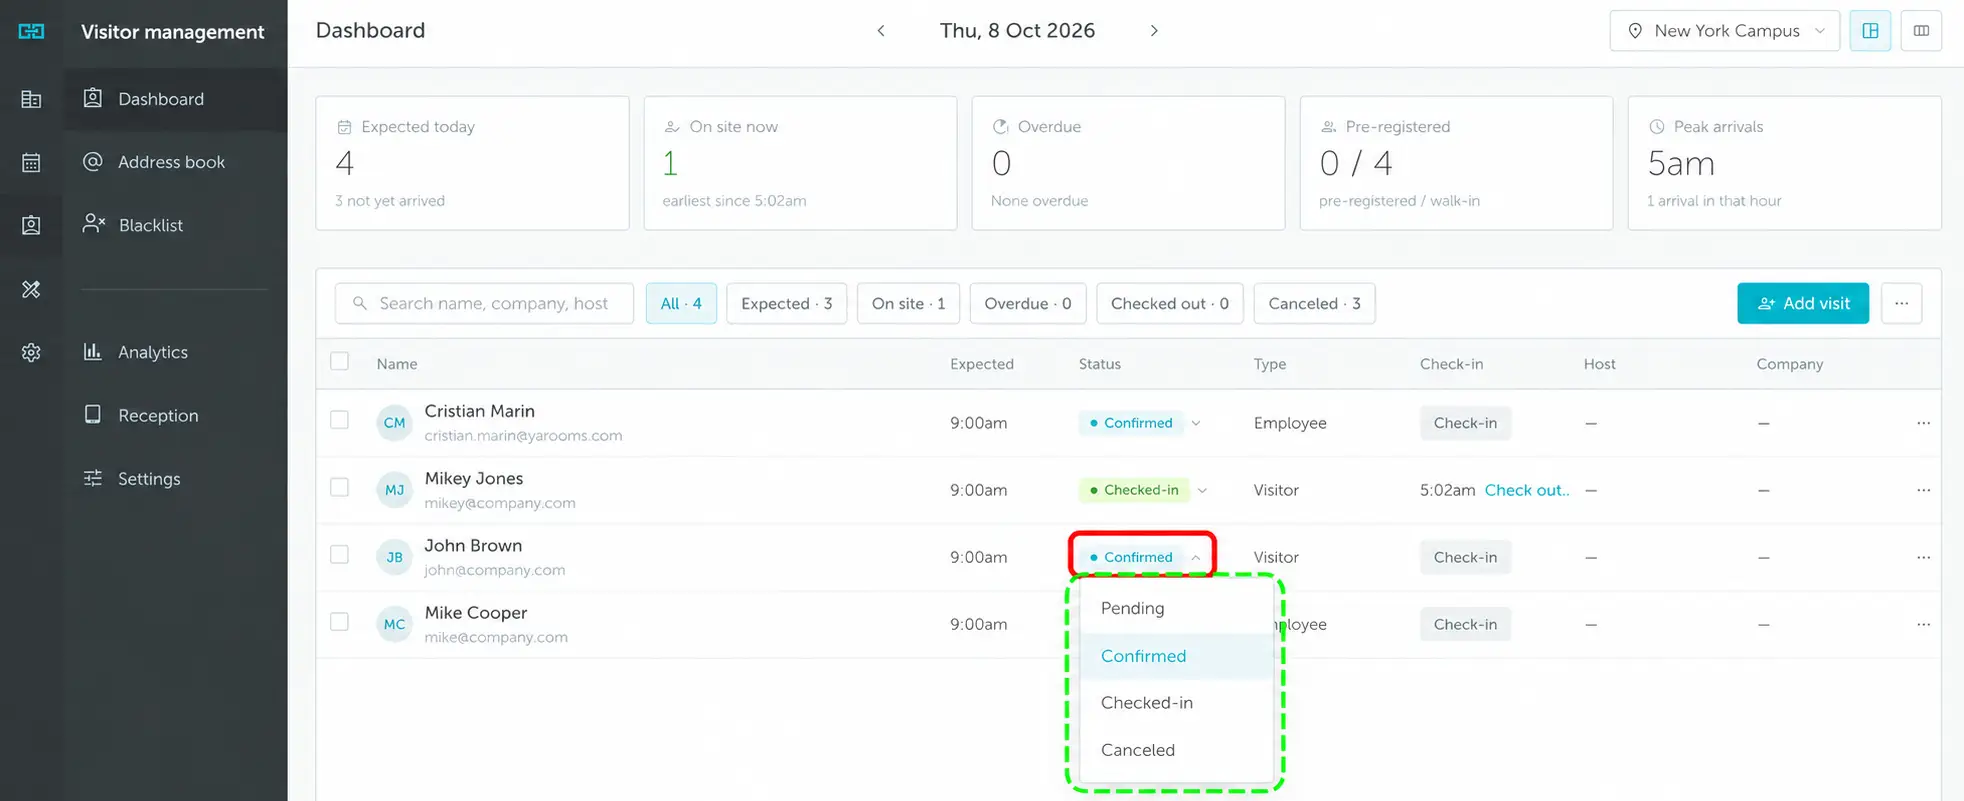
To change a visit’s status, click the arrow next to its status badge. The dropdown in the screenshot below includes Pending, Confirmed, Checked-in, and Canceled. Select Canceled to cancel the visit.
Visitors can also check in themselves using the digital reception app by scanning the QR code sent to their email upon registration. As the host, you will receive an email notification when the visitor arrives.