
Jump to:
1. The Timeline view
The Timeline view (Workplace → Timeline) is an interactive table that contains structured space booking information on a selected day, 7 days interval, or 14 days interval. It is available for each floor of every building in your organization. Just as the map view, it displays floor statistics - its capacity and real-time occupancy.
2. How to navigate the Timeline view
Use the numbered controls below to navigate the timeline.
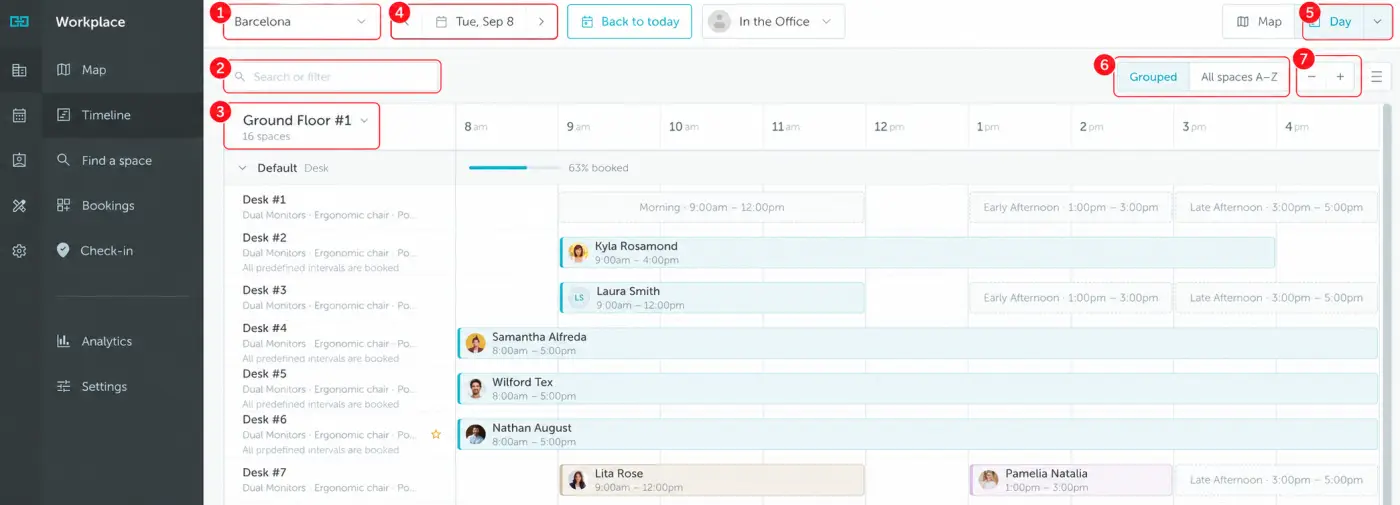
- Location selector: Choose the office location you want to view.
- Search or filter: Find spaces, features, or colleagues. The timeline and floor statistics update to match your results.
- Floor selector: Choose a floor in the selected location. If available, choose All floors to view them together.
- Date selector: Select a date or use the arrows to move between dates. Click Back to today to return to today’s timeline.
- View selector: Use the dropdown beside Day to choose Day, 7 days, or 14 days.
- Space order: Choose Grouped to organize spaces by group, or All spaces A–Z to list them alphabetically. Available options depend on the location’s settings.
- Zoom controls: Use − and + to adjust the timeline scale.
3. How to read the Timeline view
Daily interval
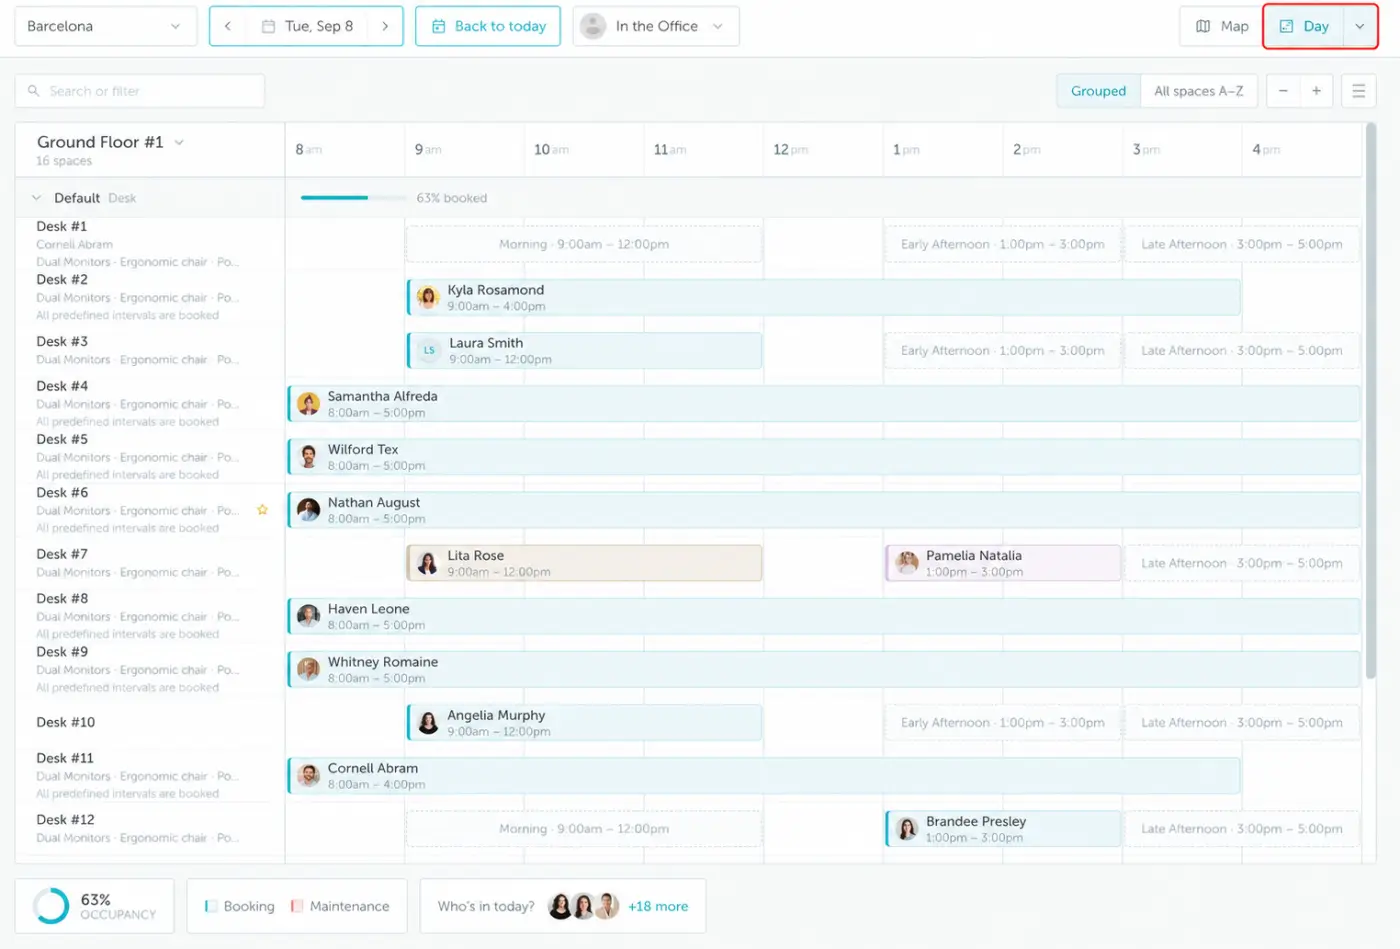
The space is busy (booked): A filled booking bar shows who reserved the space and for which time. In this example, Desk #4 is booked by Samantha Alfreda from 8:00am to 5:00pm.

A booked slot shows the name of the booker only if the visibility settings of your organisation allow.
If your organisation is using emergency roles and the space is booked by the first aid/fire safety responsible, the booked slot will display an emergency role icon.
The space is available: Dashed boxes show available booking intervals. In this example, Desk #1 is available in the Morning, Early Afternoon, and Late Afternoon. Click an available interval to start a booking.

Day, 7 days, and 14 days views
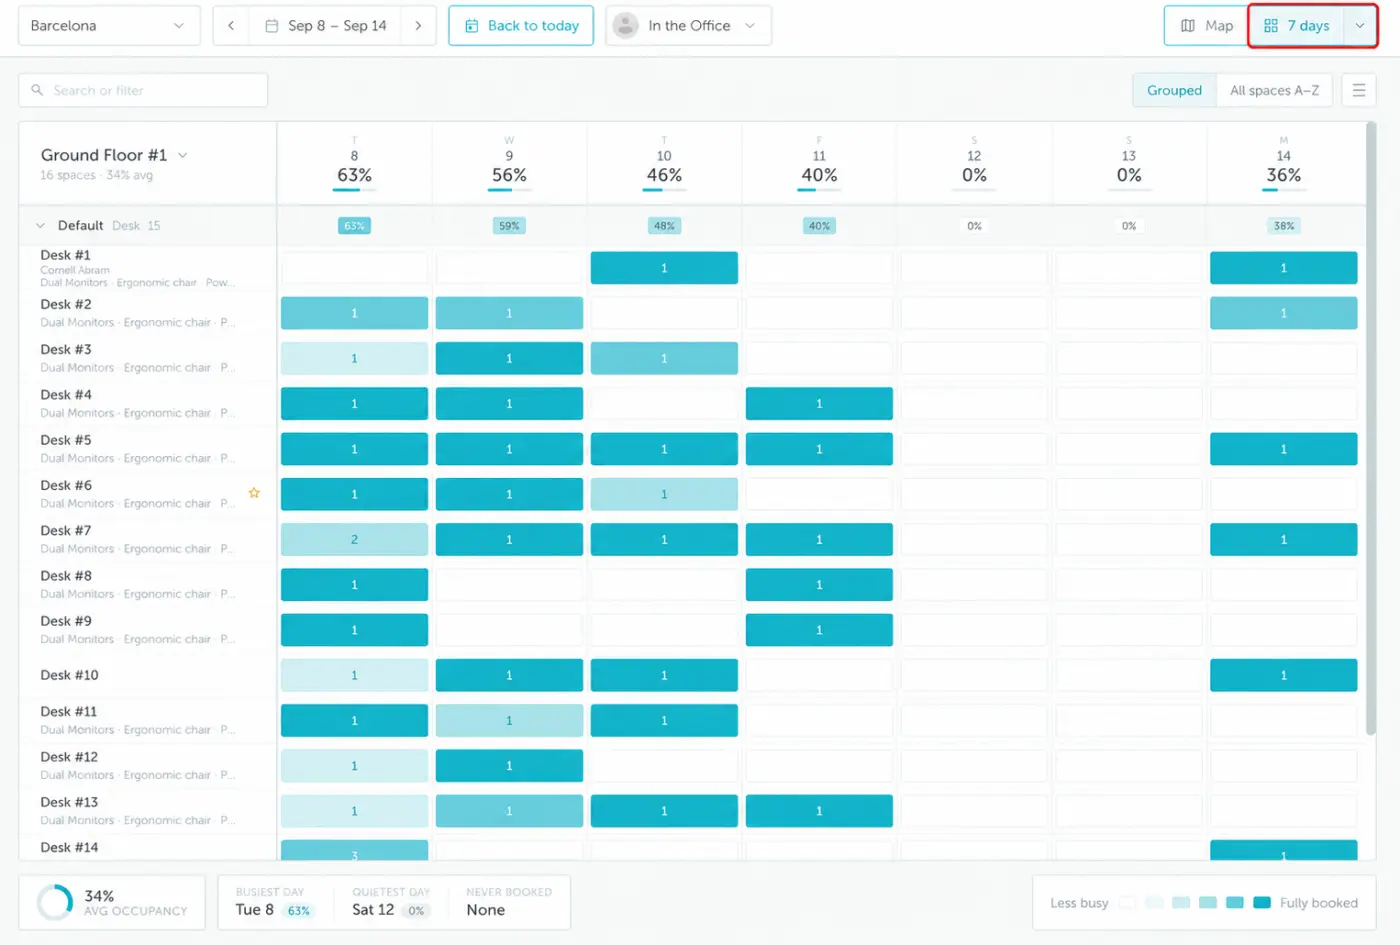
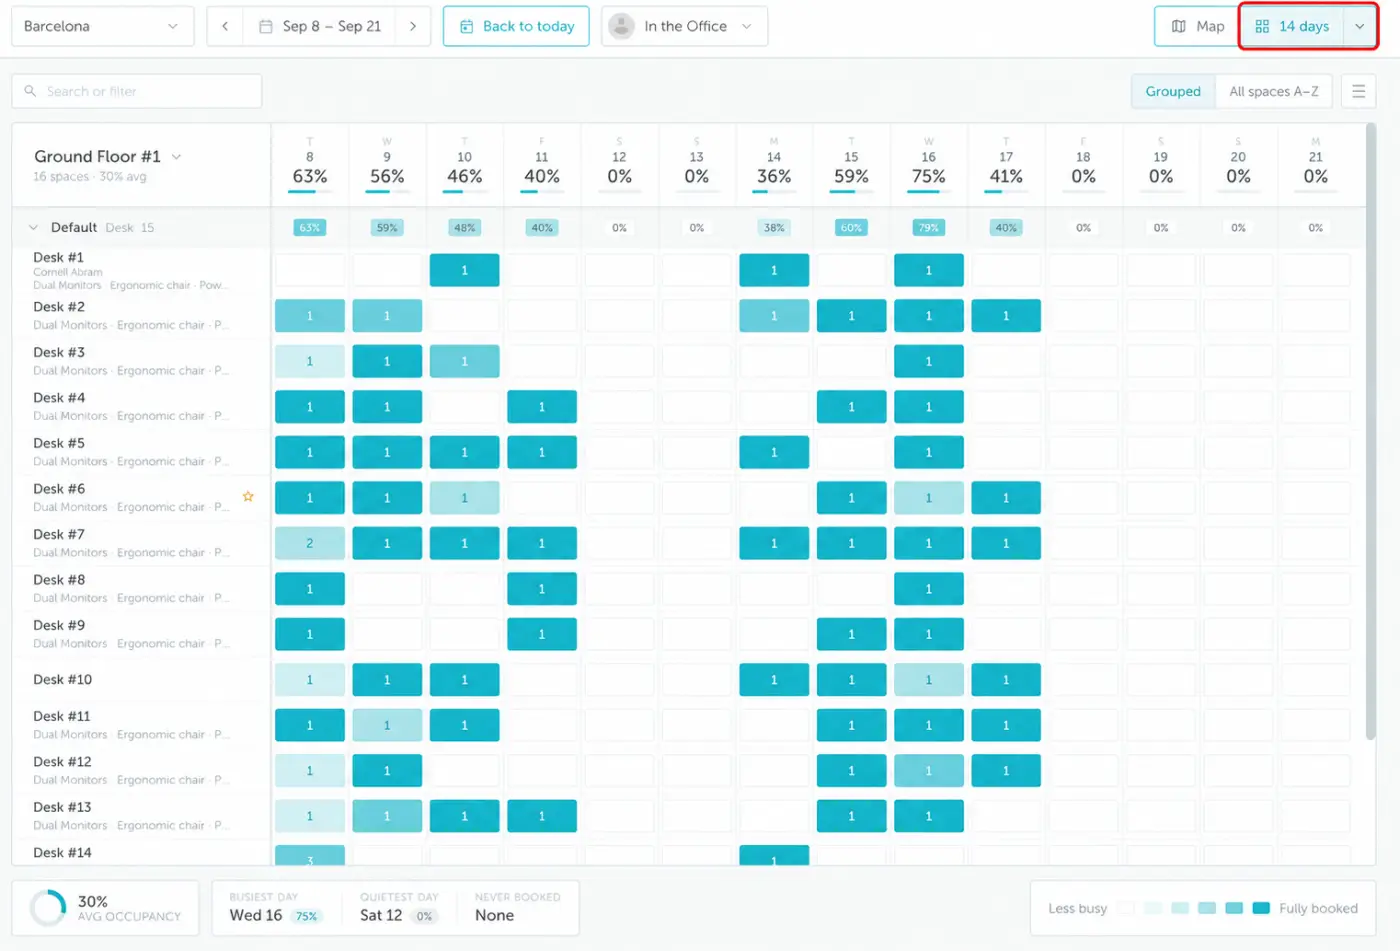
Use the highlighted dropdown in the top-right corner to switch between Day, 7 days, and 14 days. Day shows bookings by time; 7 days and 14 days give an overview of bookings and occupancy across dates. Click a screenshot to enlarge it.
4. How to book a space via the Timeline view
To make a booking via the timeline view, press any empty time slot in the row of your desired available space. For more information, read our step-by-step guide to space booking.
5. Viewing all floors at once
If your location has more than one floor, you no longer have to switch between floors one at a time. Open the Floor selector (3) and choose All floors to see the whole building on a single timeline.
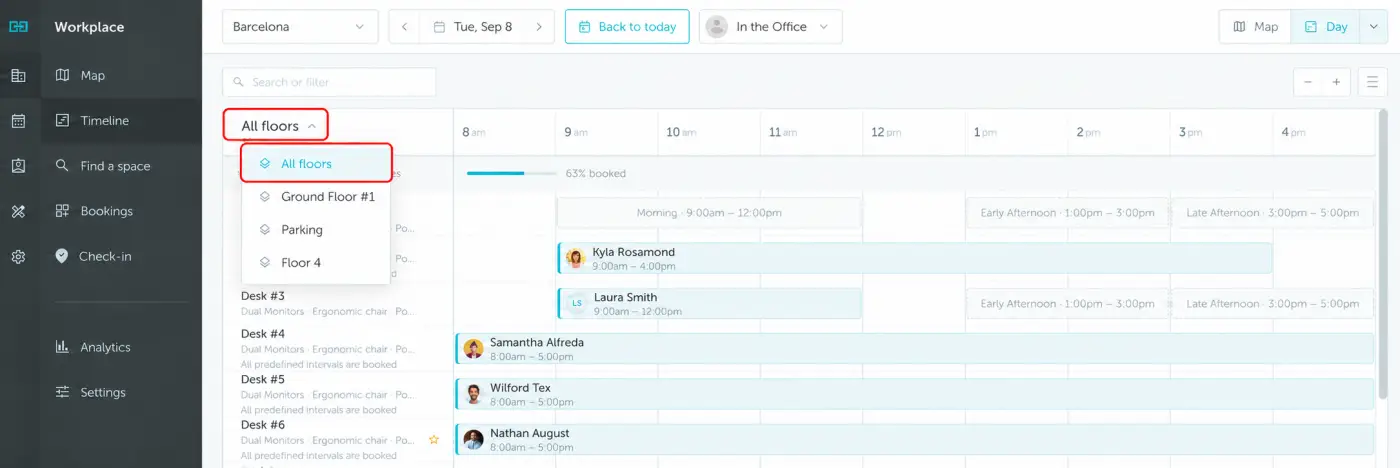
In All floors mode:
- Each floor appears as a header row, listed in the order your administrator set in the location settings.
- Expand a floor to see its space groups and spaces, with the same layout, statuses, and booking actions as the single-floor view. Collapse it to keep just the floor header visible.
- Your expanded and collapsed floors are remembered, so the timeline opens the way you left it the next time.
- Floors load as you scroll, so even large buildings stay quick to open.
Everything else works as usual: date navigation, booking, search, and filters all behave the same in All floors mode.