1. Creating a team
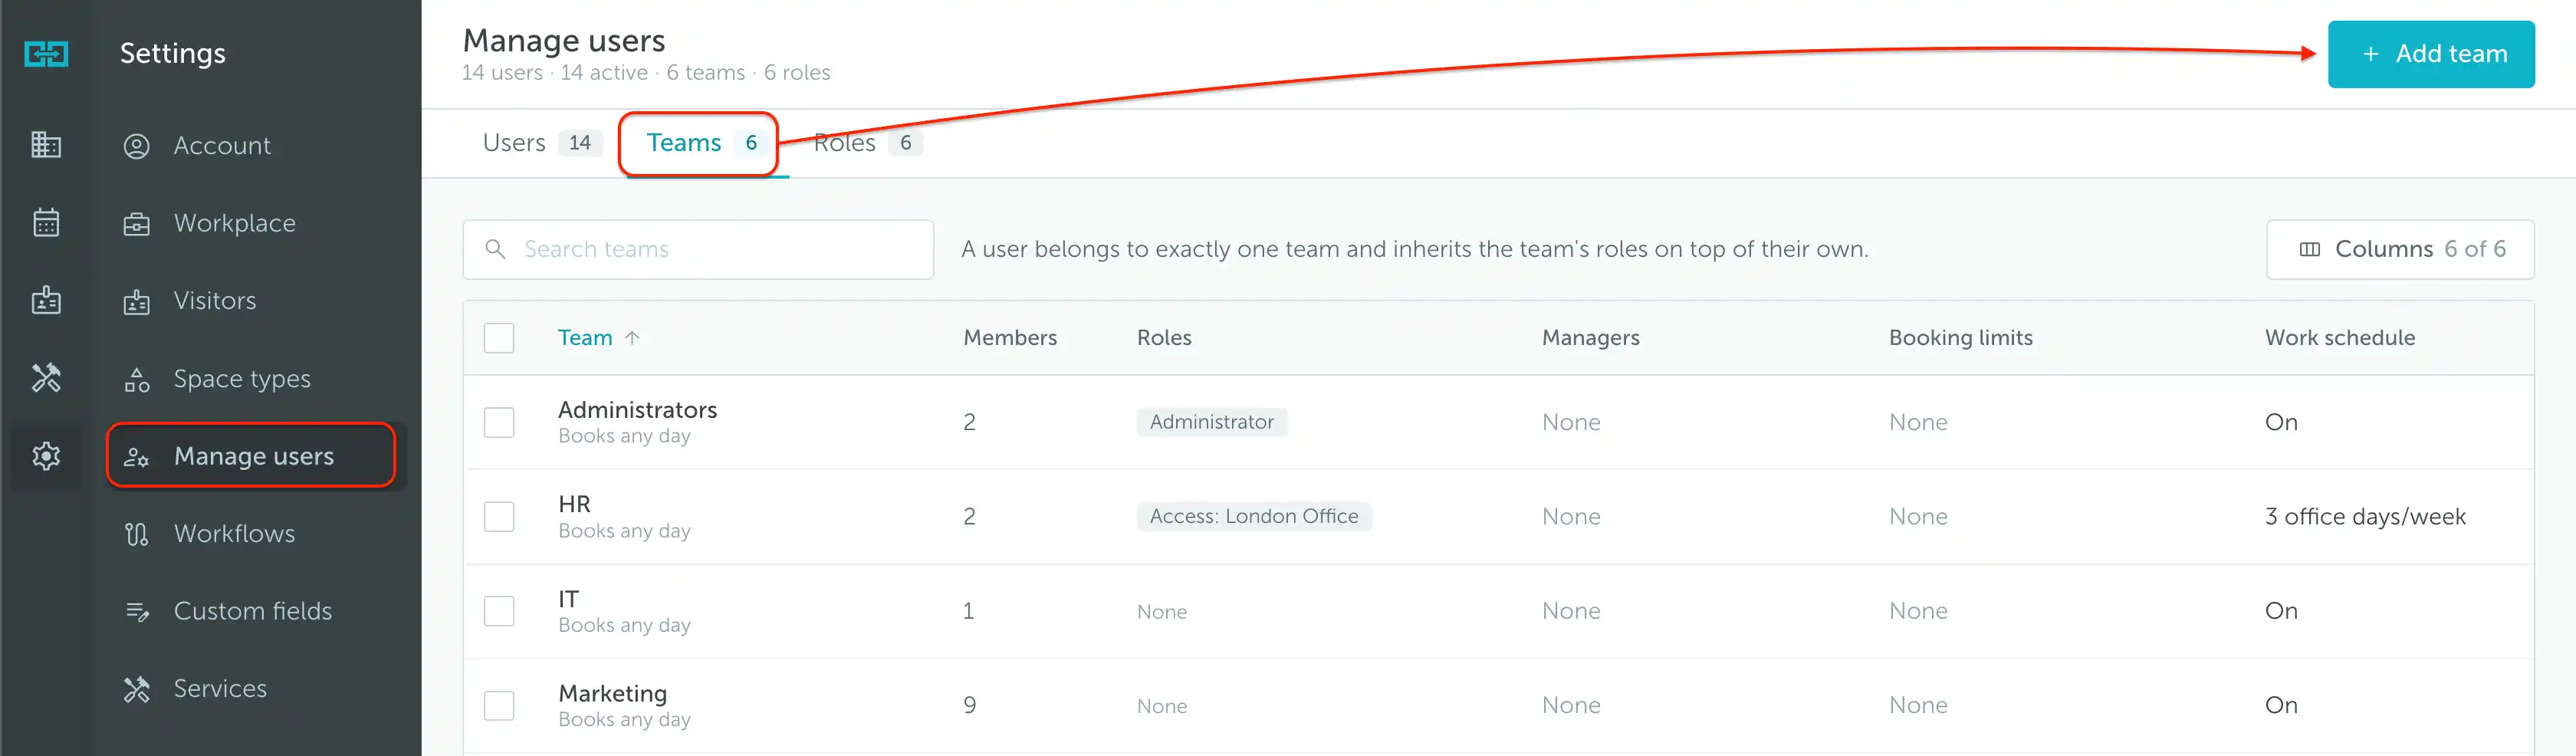
Teams group users together so you can give them shared roles and booking settings. To create one, go to Settings → Manage users → Teams and click Add team.
On the New team page, configure:
- Name: a recognizable team name, such as Marketing.
- Managers: optionally select the people who manage the team’s bookings and can view its analytics.
- Roles every member gets: choose the roles inherited by everyone in the team. These determine their shared access and permissions. See Setting up user access.
- Booking rules: choose which days members can book and add booking limits if needed. These limits apply in addition to the space group’s rules. Beach-toweling protection can exclude recently used workspaces from new bookings.
- Work schedule: enable office and remote-day planning for the team when needed.
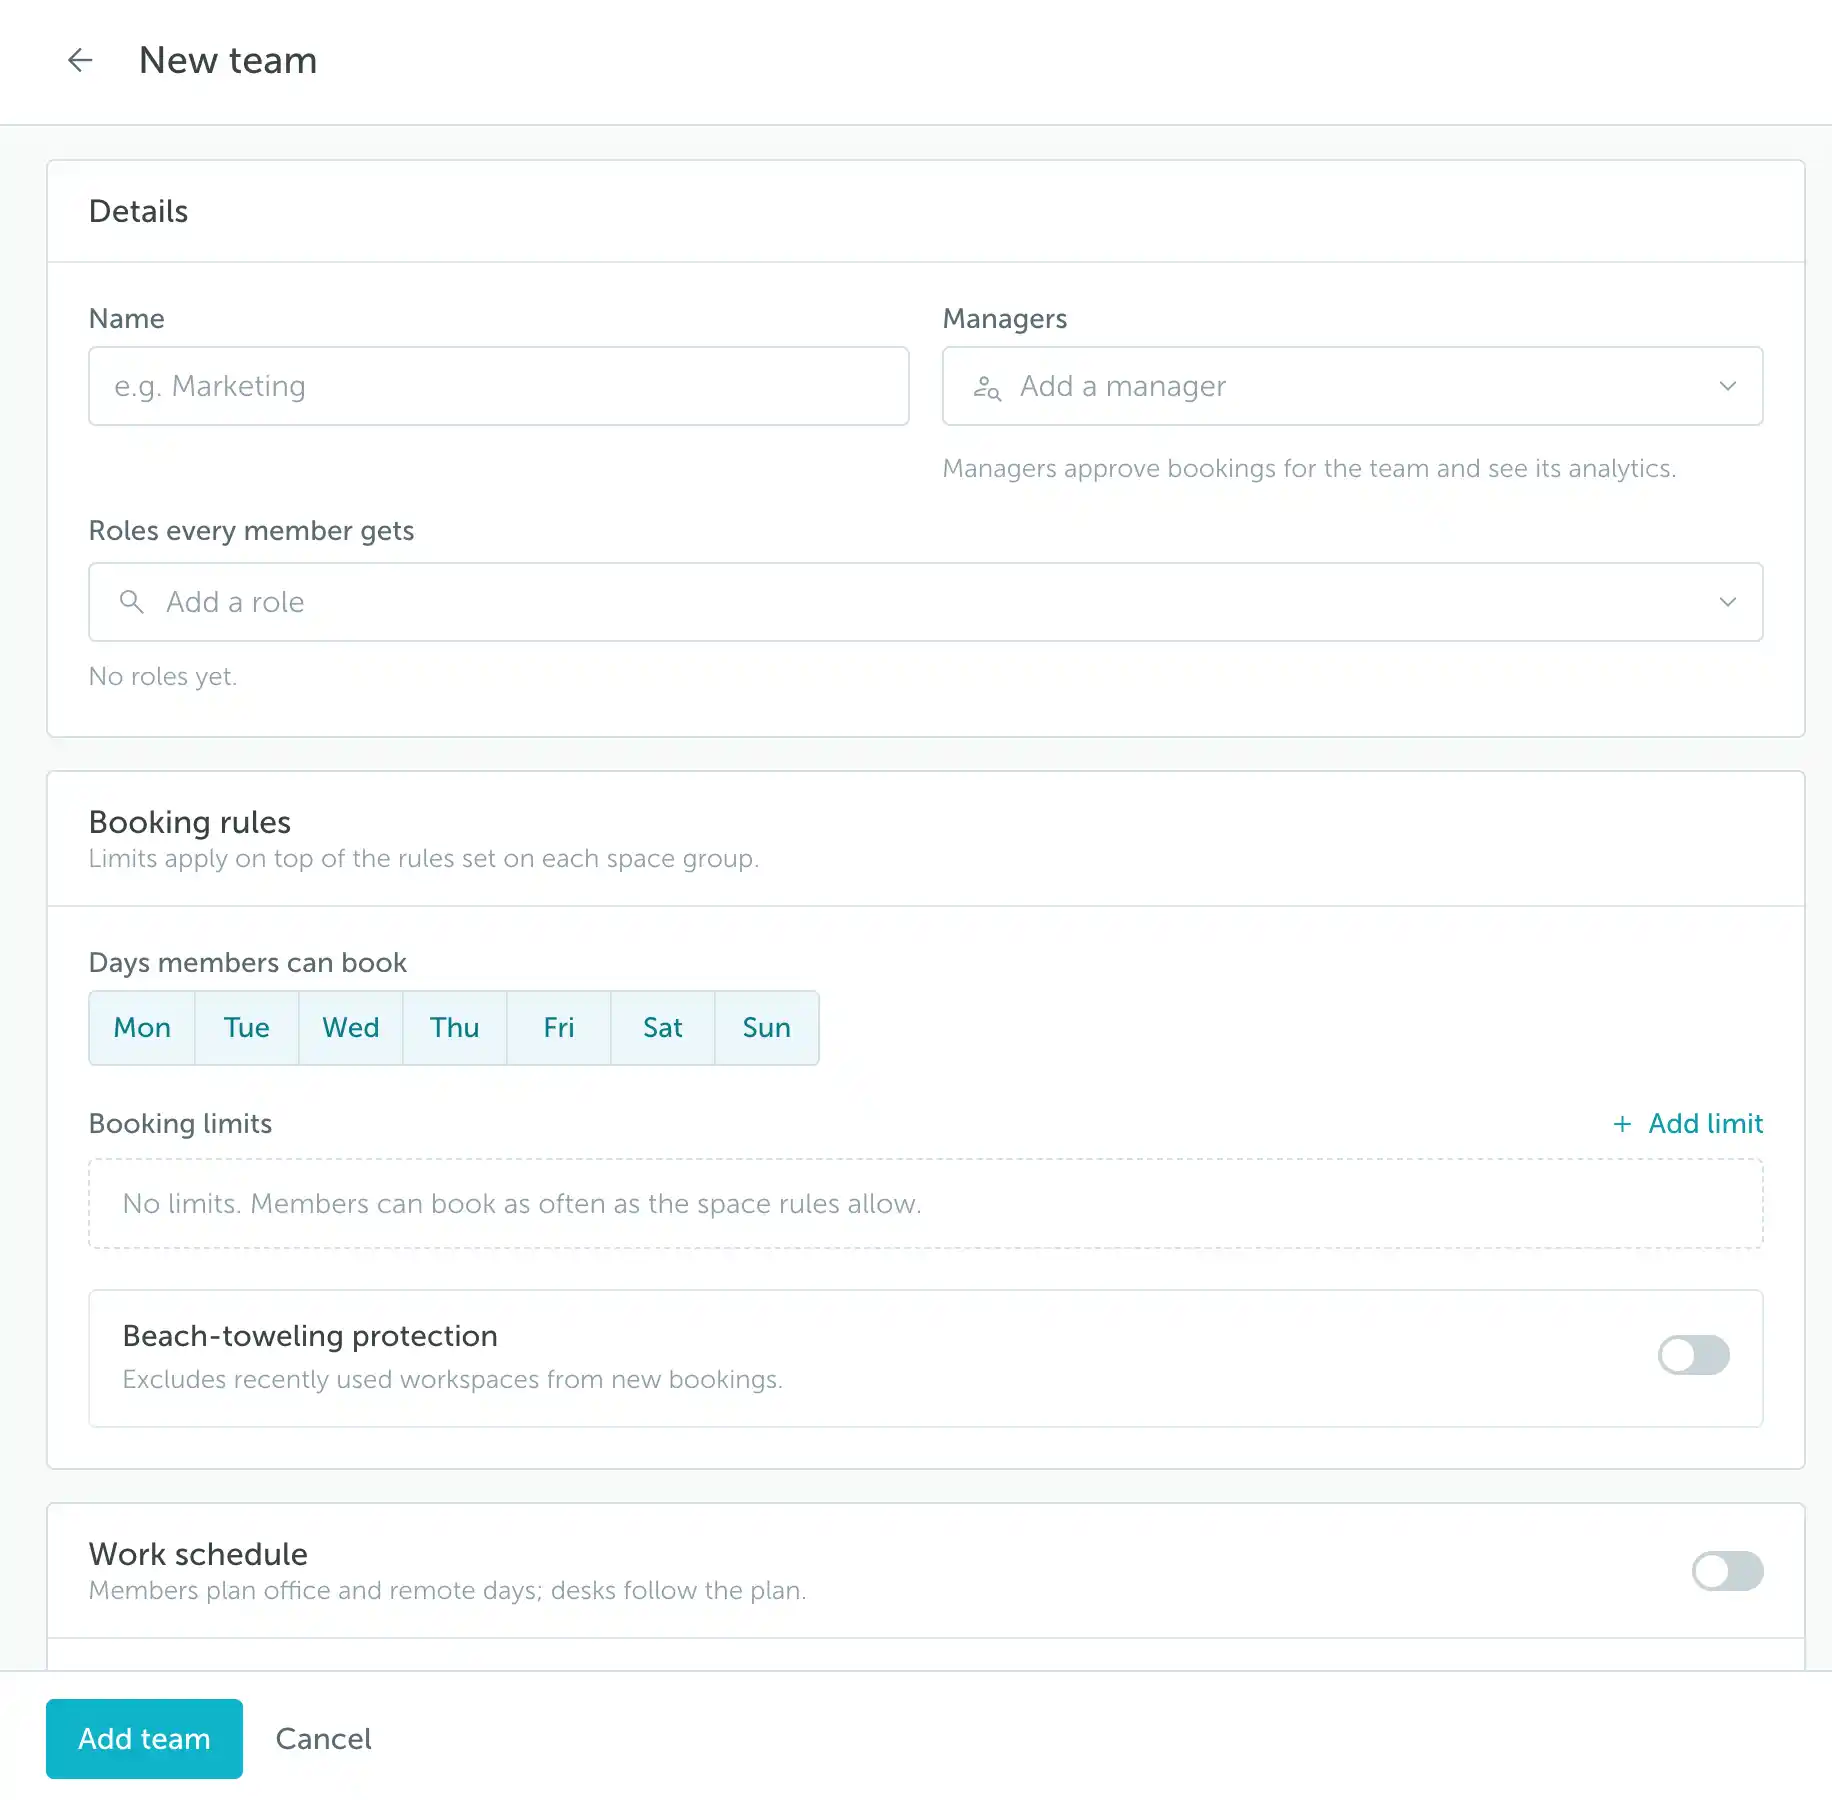
Click Add team to save it. You can then select this team when adding or inviting users, or assign an existing user to it from their Workplace settings.
Each user belongs to one team and inherits its roles in addition to any roles assigned to them individually.
2. Adding new users
From Settings → Manage users, you can add users individually, invite them by email, or import a CSV file.
Add a single user
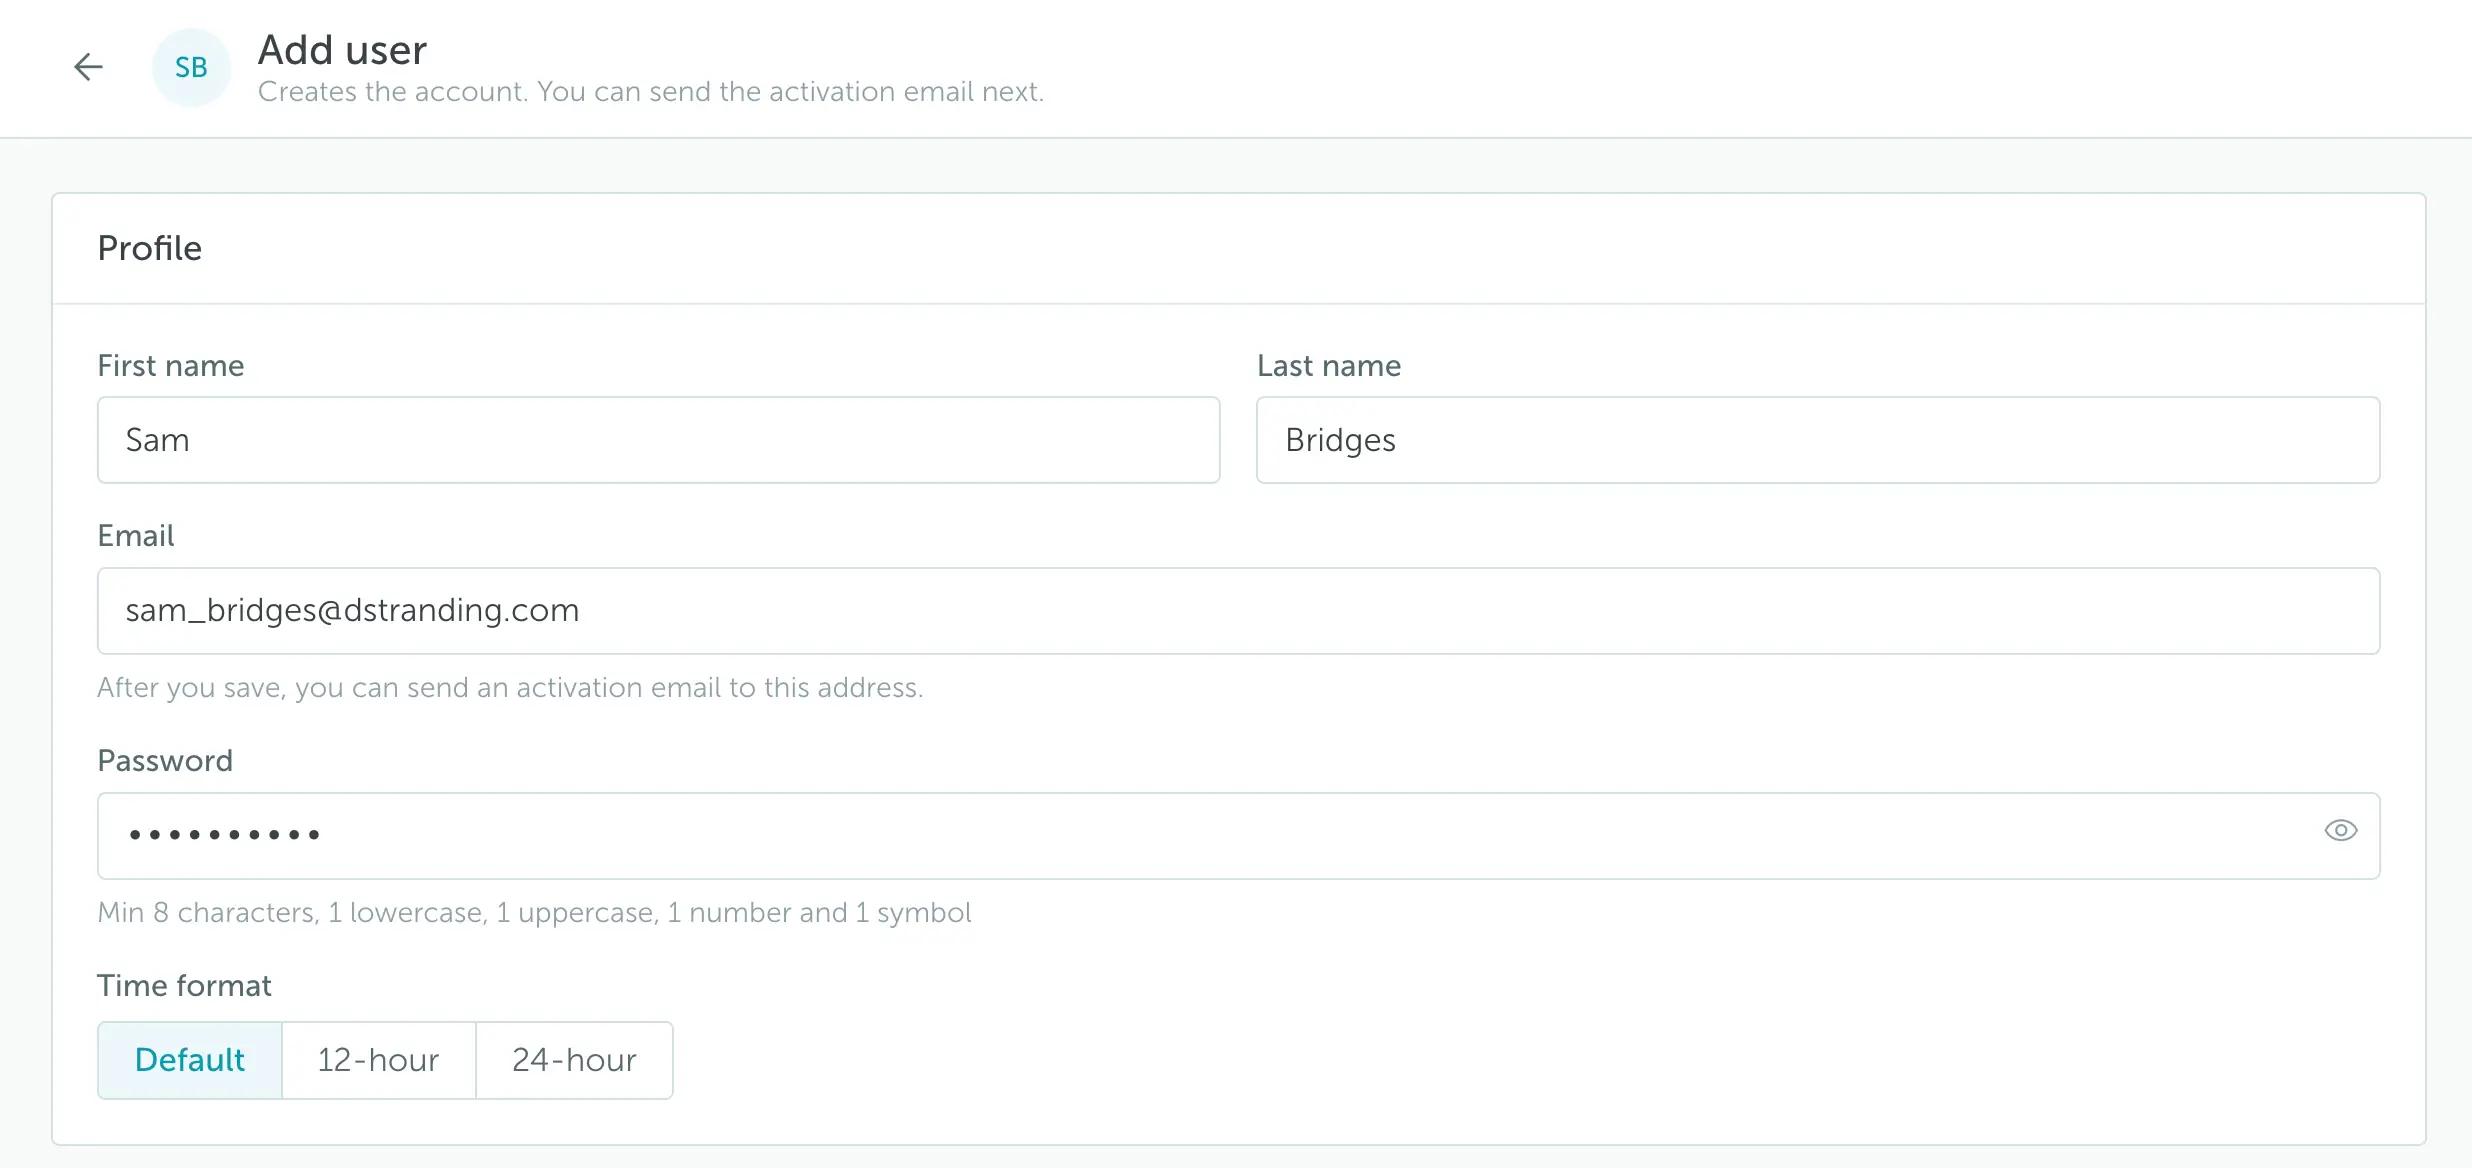
Click Add user. In Profile, enter the user’s first name, last name, email address, and password. You can also choose their time format.
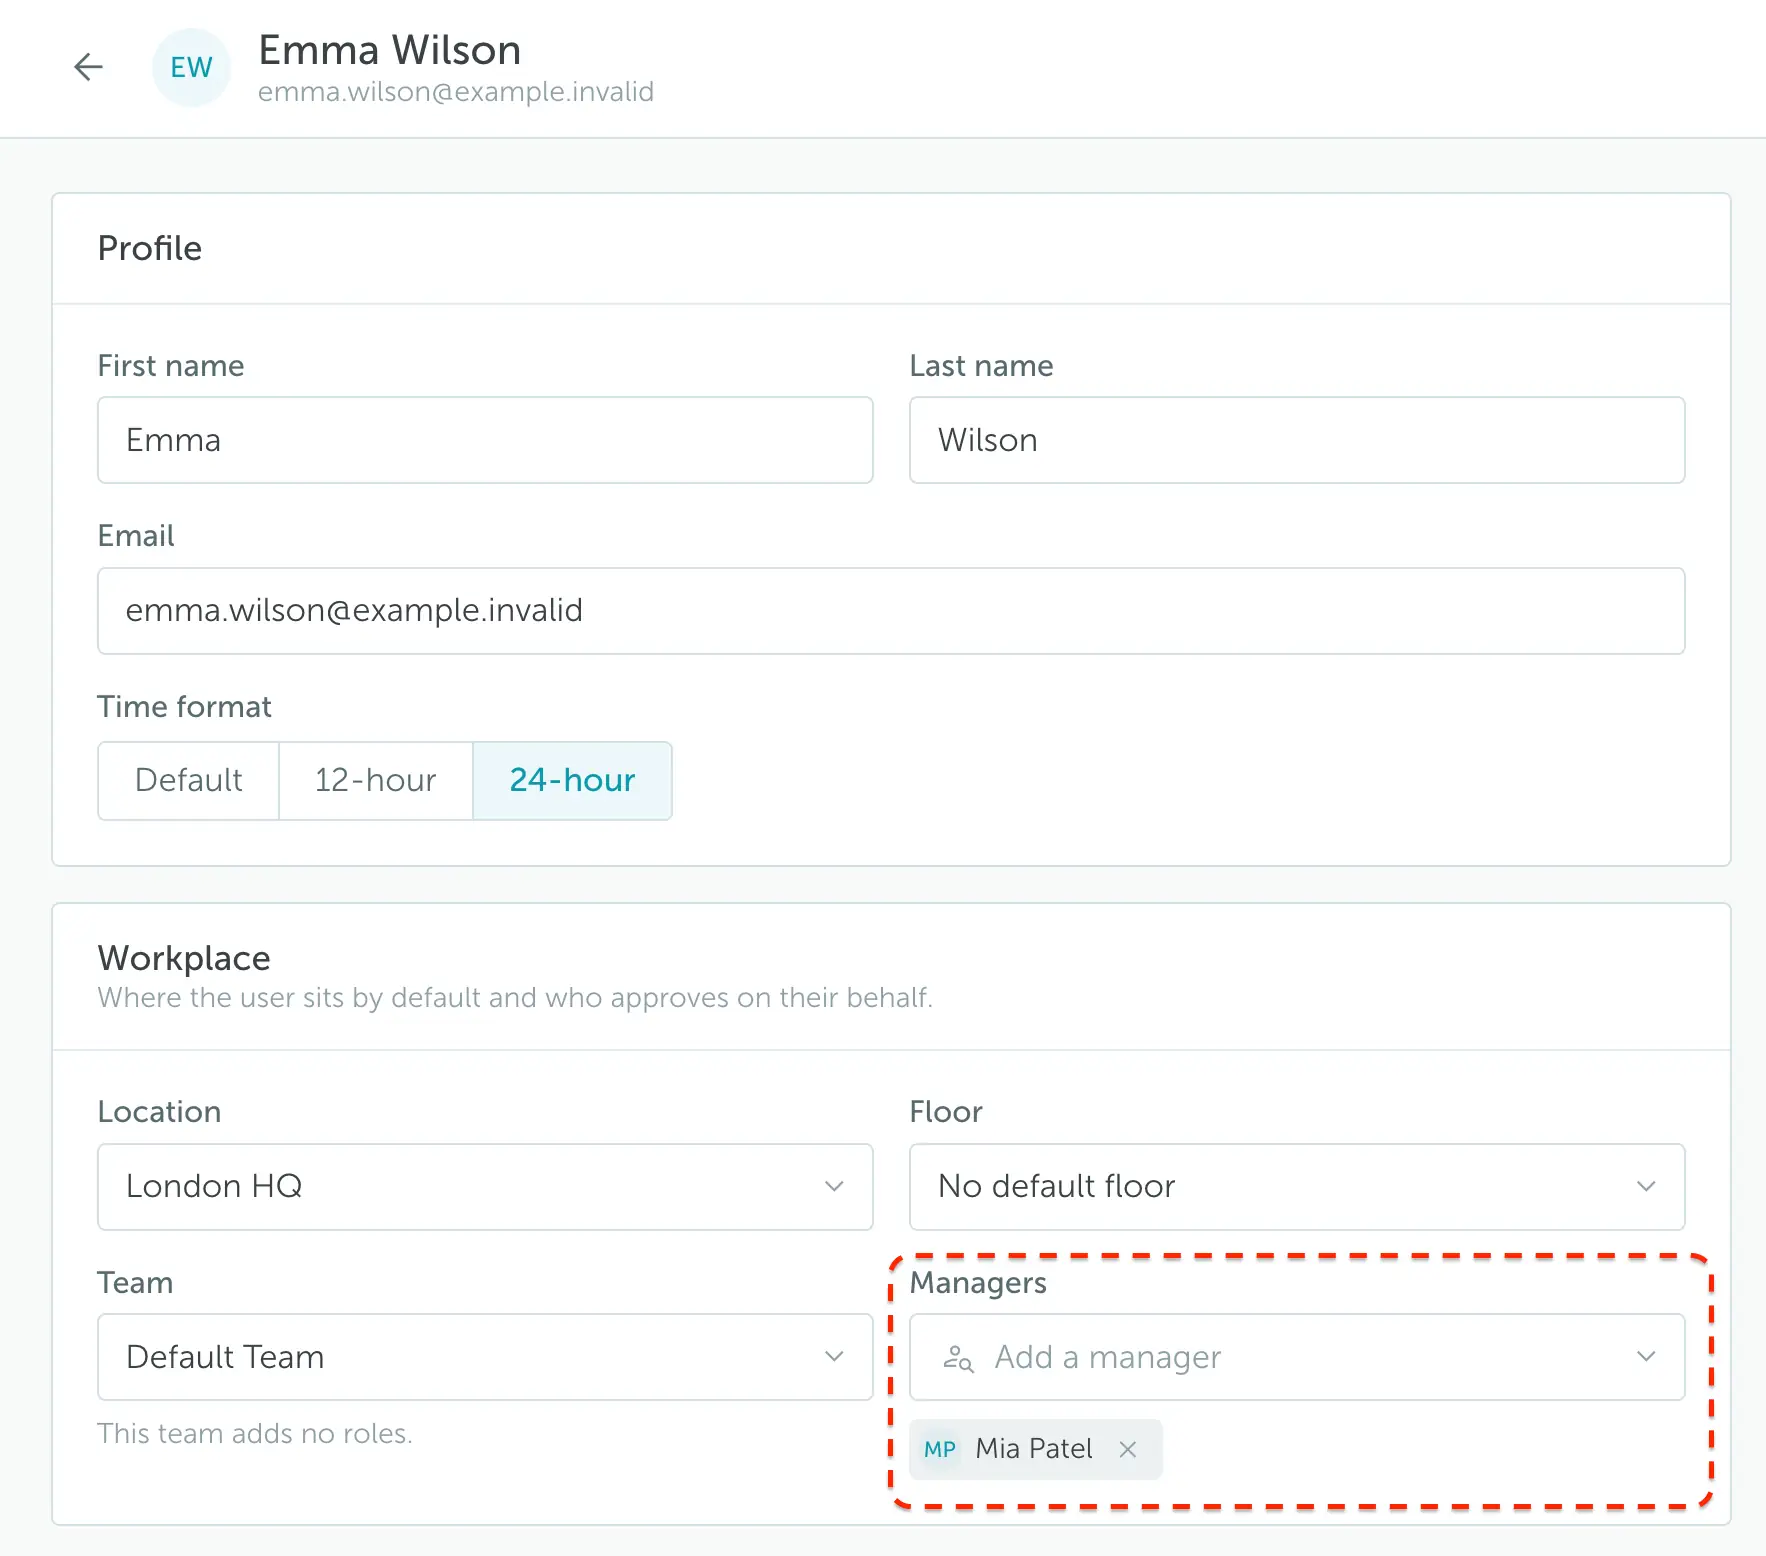
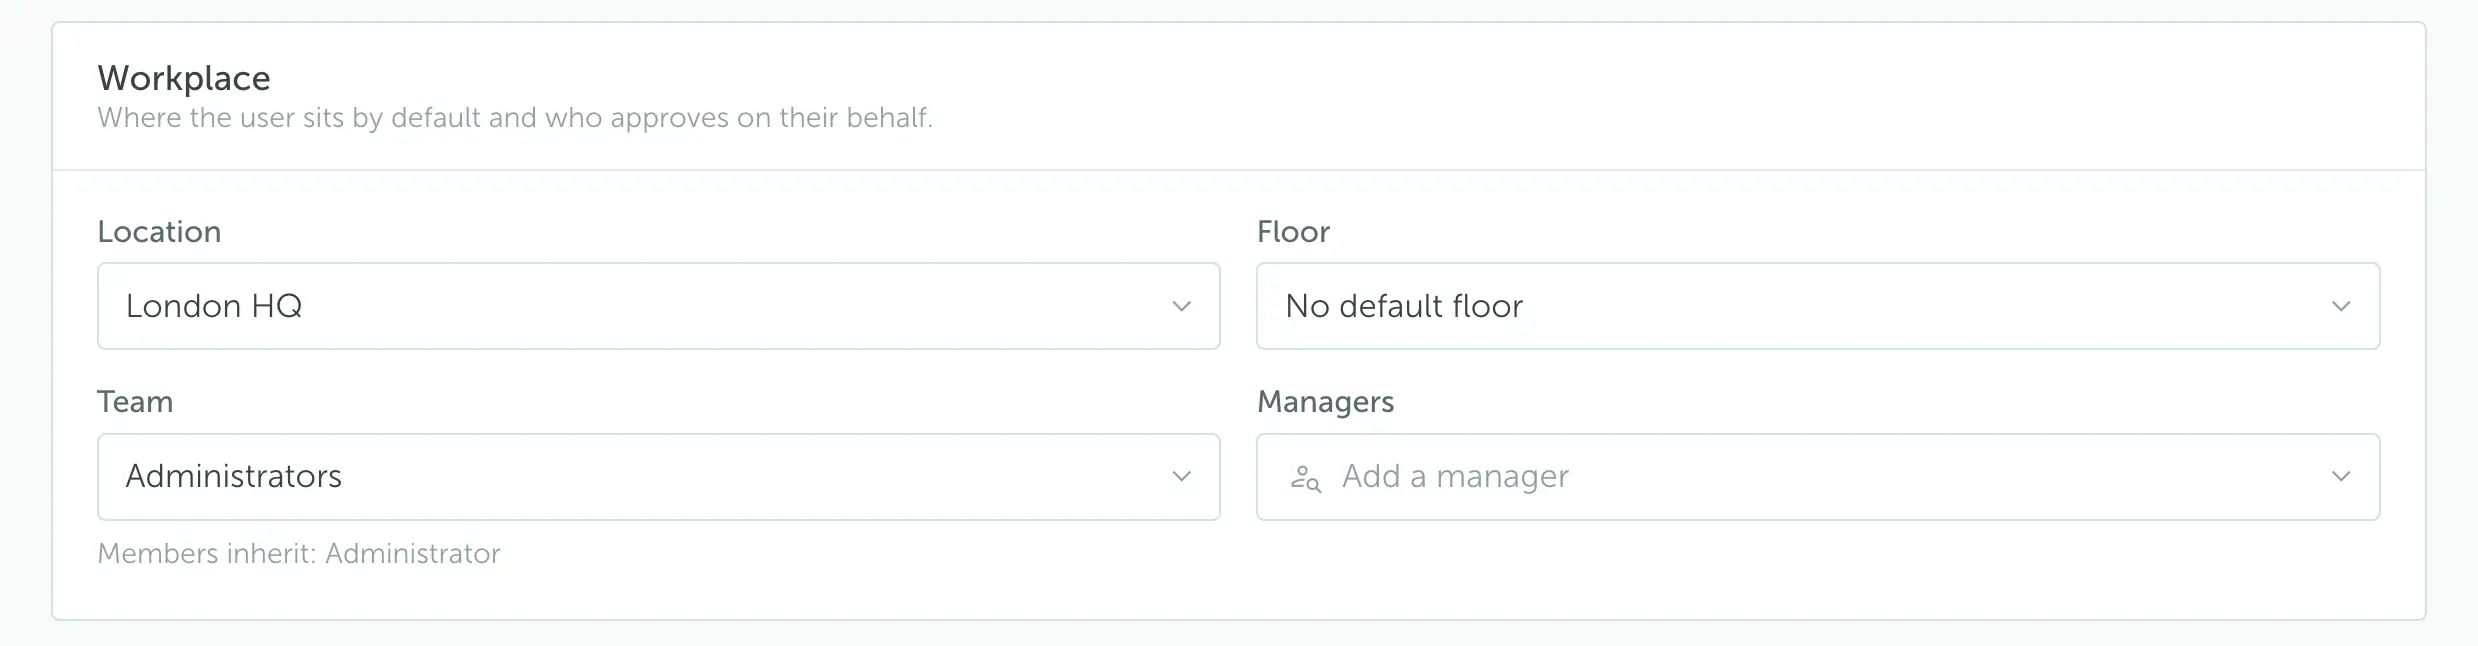
In Workplace, choose their location, default floor, and team. You can also assign personal managers here. The team determines which roles the user inherits.
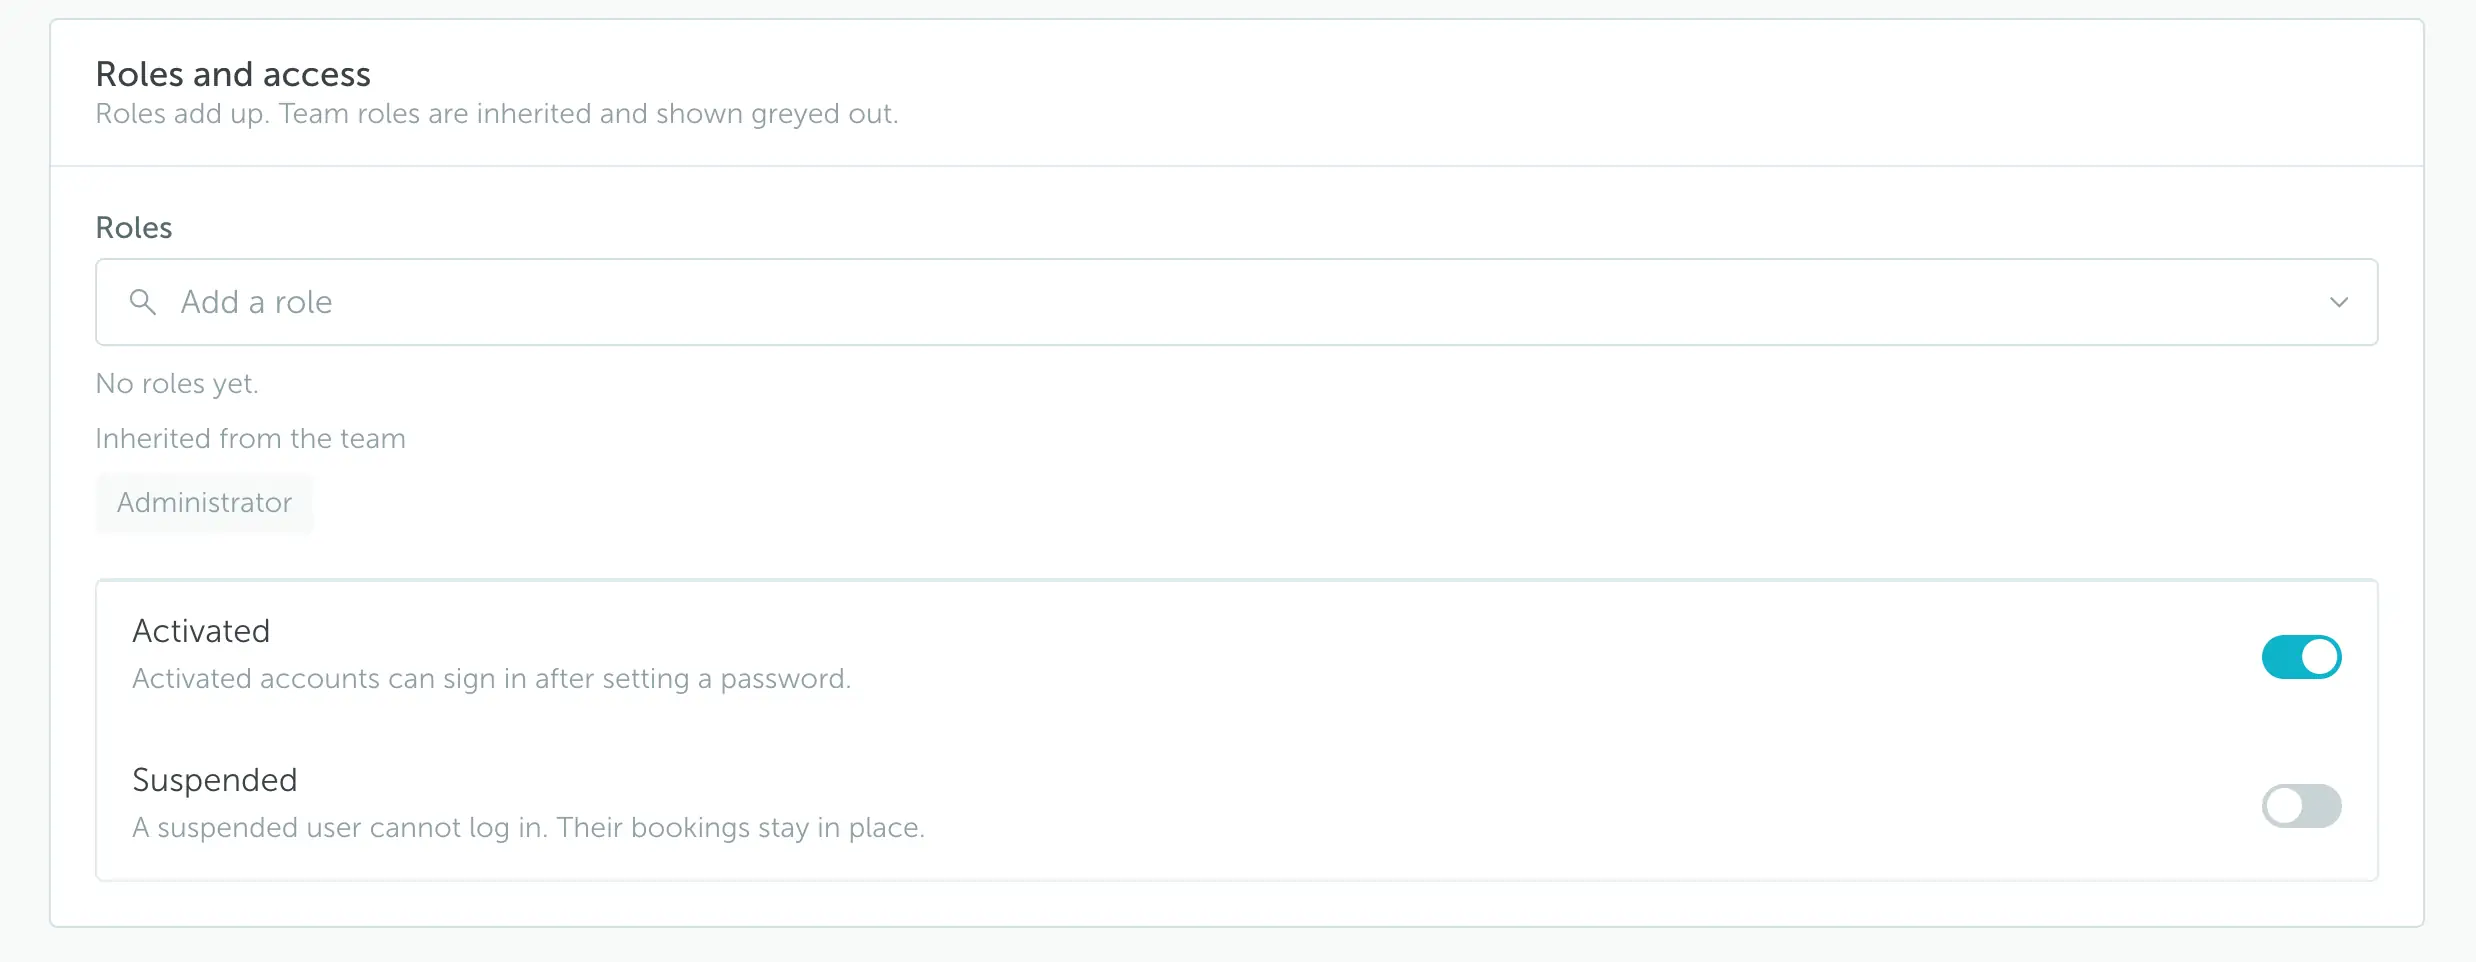
In Roles and access, add any individual roles the user needs. Roles inherited from their team appear greyed out. This section also contains the Activated and Suspended account controls.
Save the user. You can then send an activation email to help them get started.
Note: Suspending a user prevents them from signing in, but their existing bookings stay in place.
Invite users by email
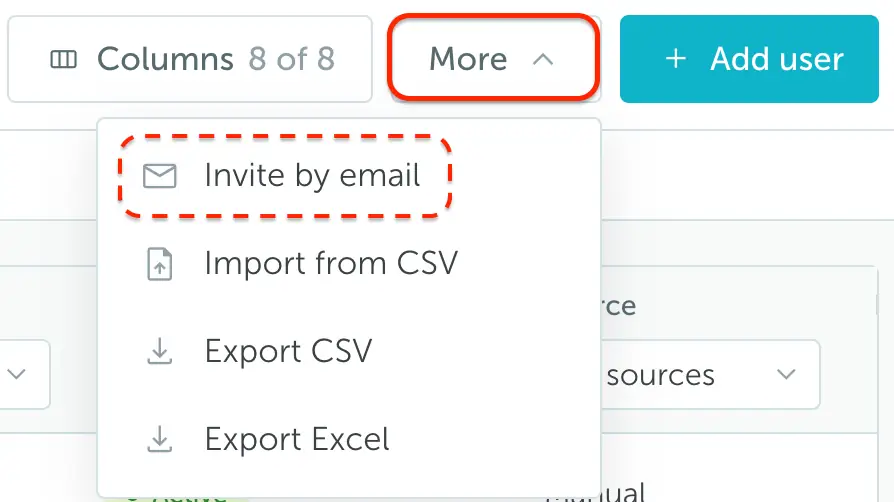
Open More → Invite by email from the users list.
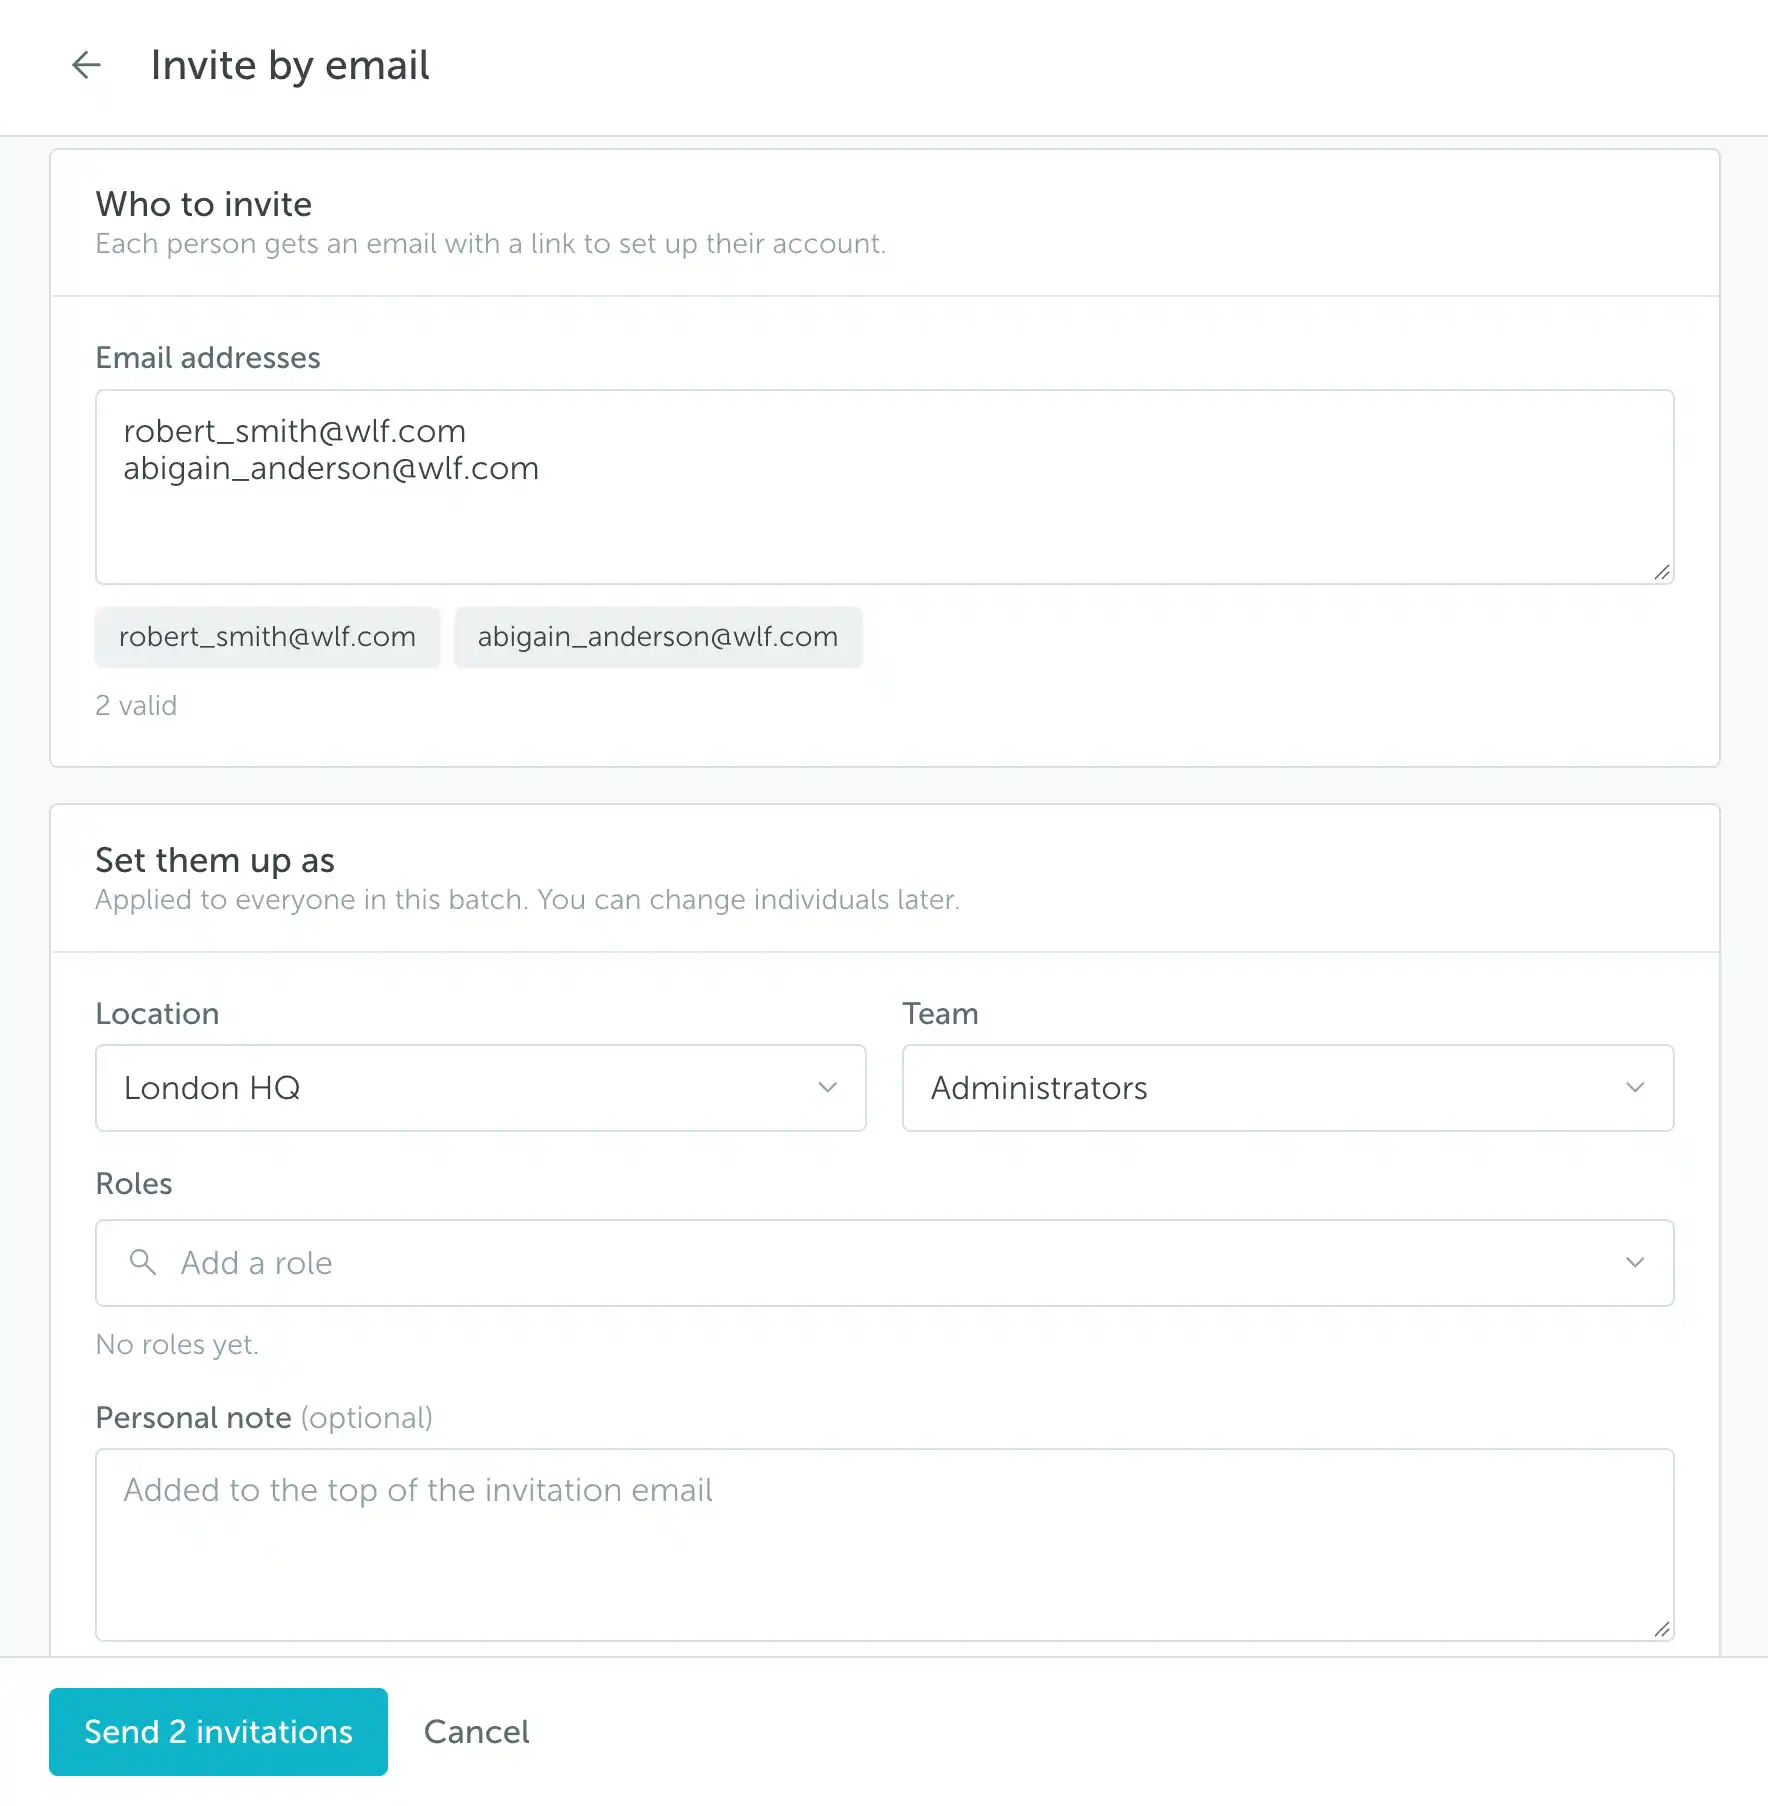
Enter the email addresses, then choose the Location, Team, and any additional Roles for this batch. You can include a Personal note in the invitation email. Click Send invitations (the button includes the number of recipients). Each person receives a link to set up their account.
Import users from CSV
Open More → Import from CSV. Use Download sample CSV as a starting point, then upload your file.
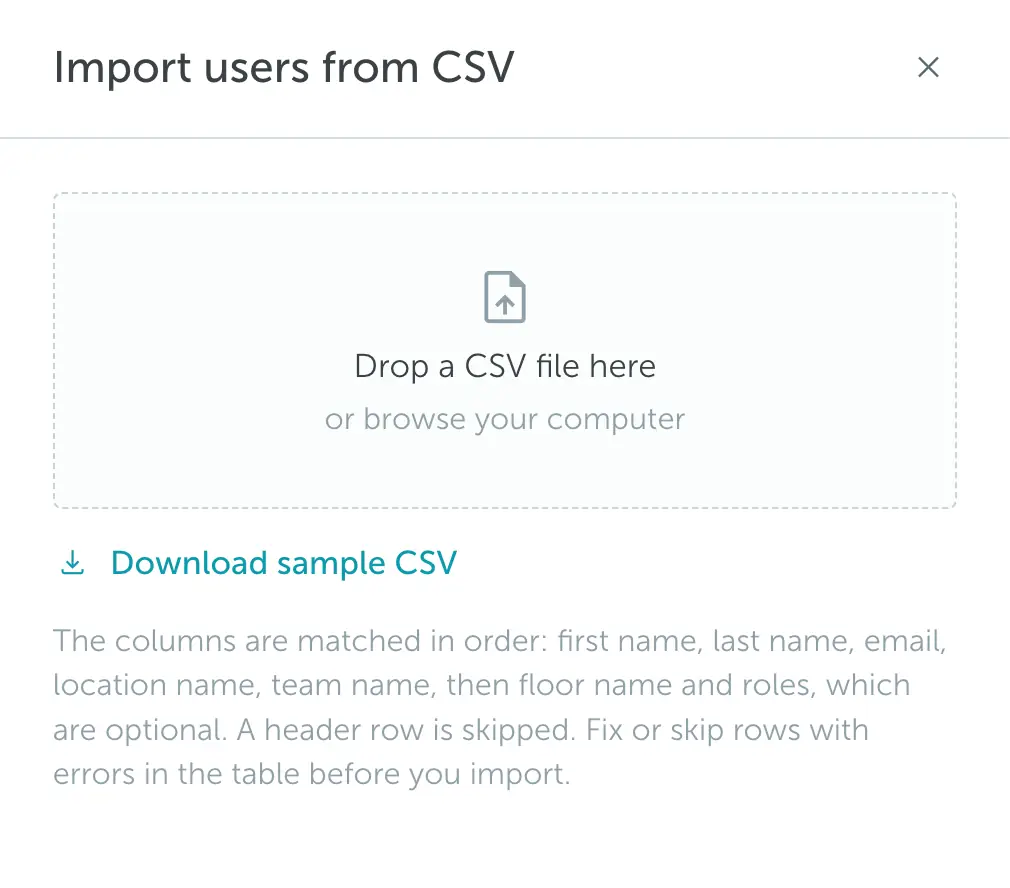
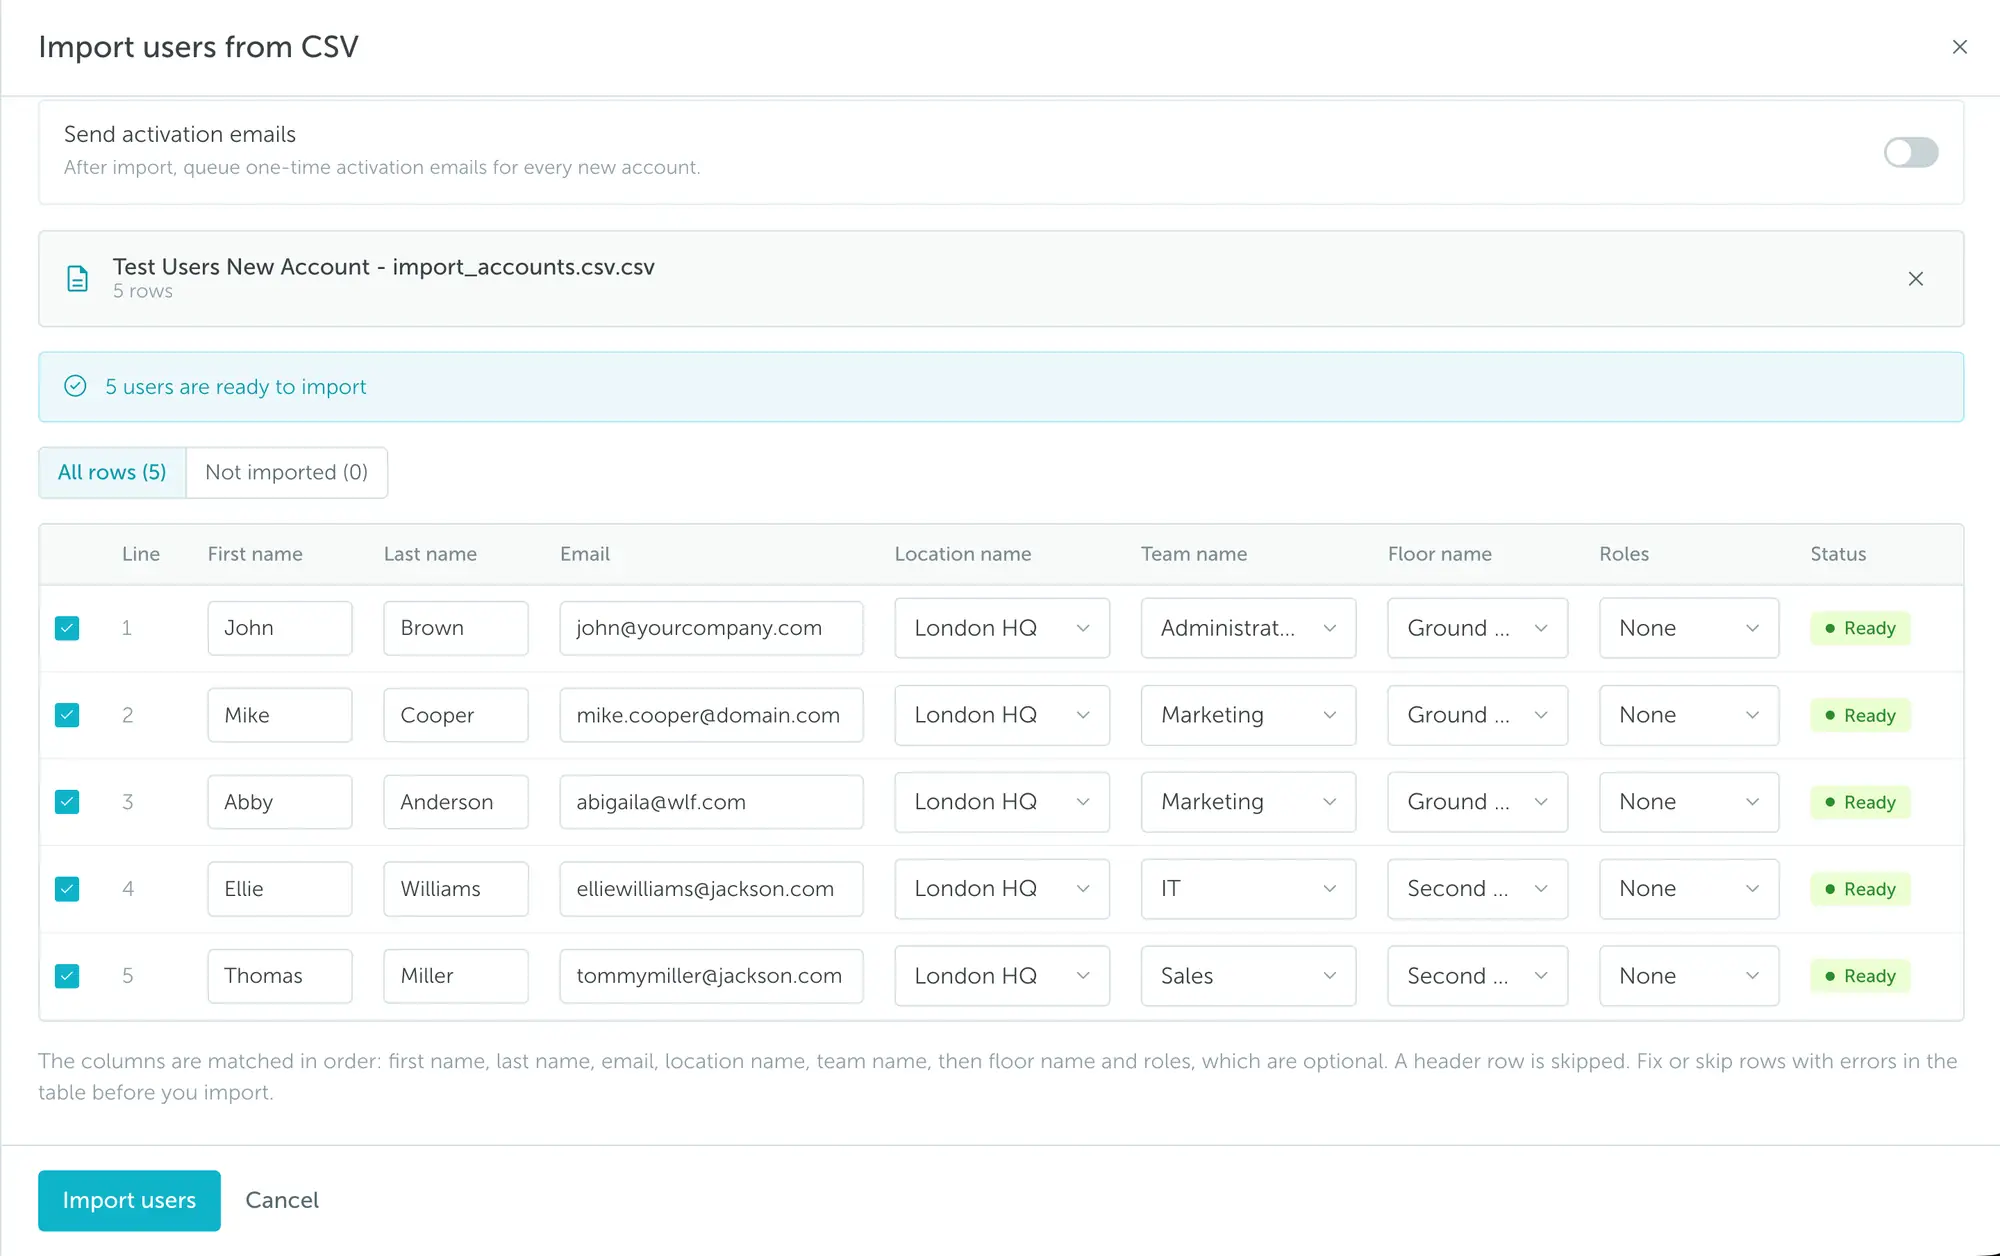
Columns are matched in this order: first name, last name, email, location name, team name, followed by optional floor name and roles. A header row is skipped. Use location and team names that match your account.
Review the table and fix or skip any rows with errors. Enable Send activation emails if you want new users to receive an activation email after the import, then click Import users.
3. Types of users
Roles determine a user’s access and permissions. They can be inherited from a team or assigned individually in Roles and access. Here are the primary types of users:
Administrator (super-user) can manage users, locations, floors or spaces. Has access to all spaces, regardless of assignment or booking permissions. Can book on behalf of anyone, has full control over all bookings and has access to the billing area.
Supervisor (super-user) can change, approve and delete everyone’s bookings. Has access to all spaces, regardless of assignment or booking permissions.
Regular users follow the booking restrictions and space access permissions configured for their teams and roles under Settings → Manage users.
4. Managers
Users can also be given management responsibilities:
Location Manager: There is no longer a specific section for assigning this type of manager. However, you can still achieve the same result by creating a custom access role that includes all the permissions of a location manager. Once you define that role, give it to any user/team you want.
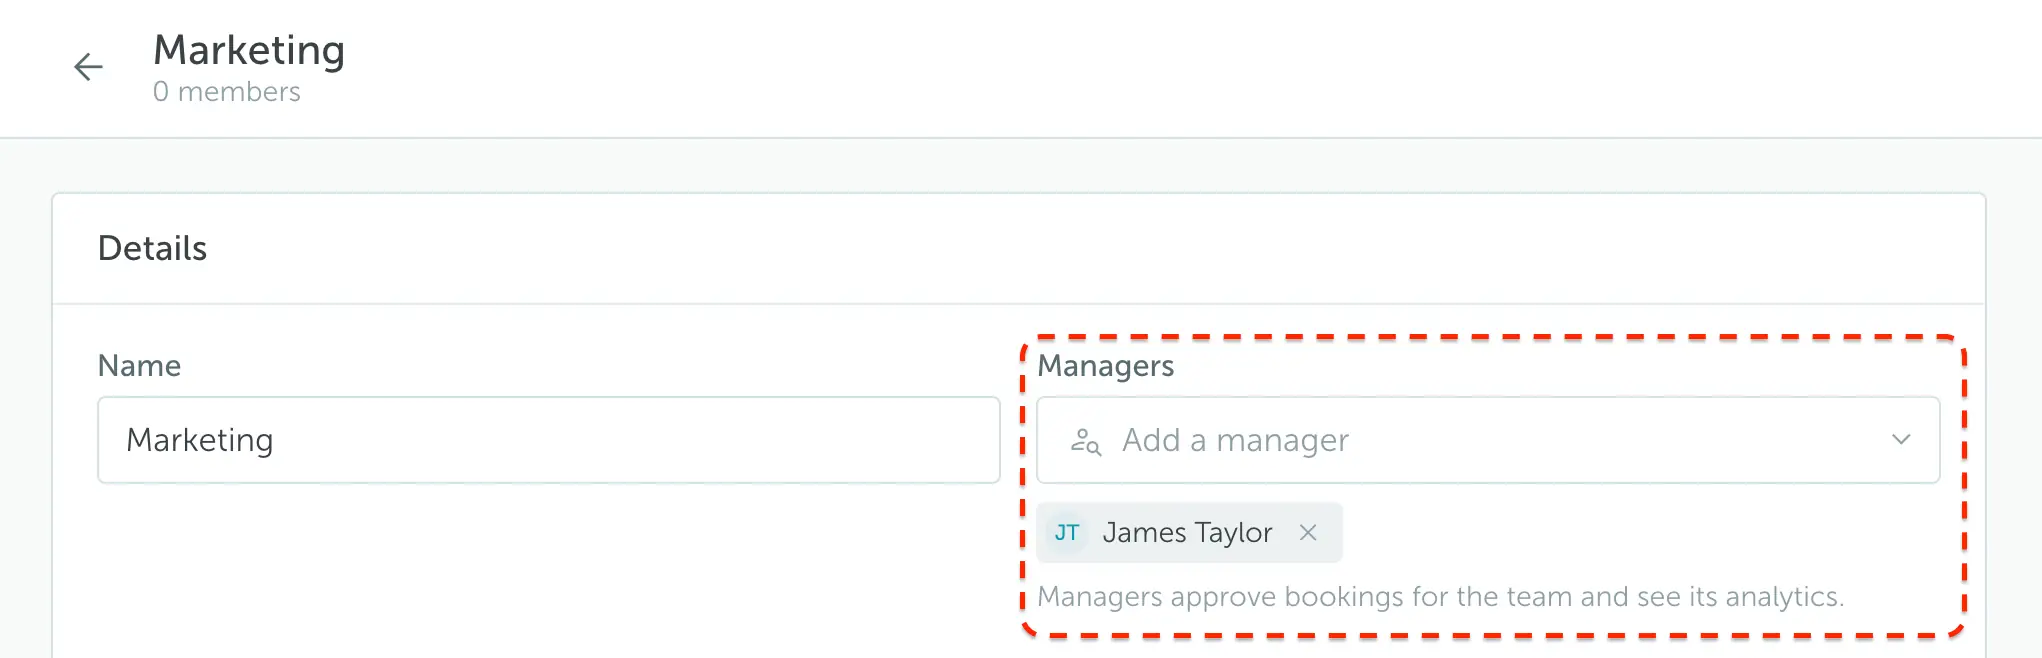
Team Manager: manages bookings for their team, can book on members’ behalf, and can access the team’s analytics.
Go to Settings → Manage users → Teams, select the team, then use Managers → Add a manager in Details. Save your changes.
- User Personal Manager: controls the bookings of the person that they manage, can book and check-in on their behalf.
Go to Settings → Manage users and open the user. In Workplace, use Managers → Add a manager, then save your changes.