
Jump to:
1. Floor plan edit mode
Use edit mode to place desks, meeting rooms, and capacity-limited areas directly on your floor plan.
Go to Workplace > Map, select your location and floor, then click the pencil icon (Edit mode) above the map.
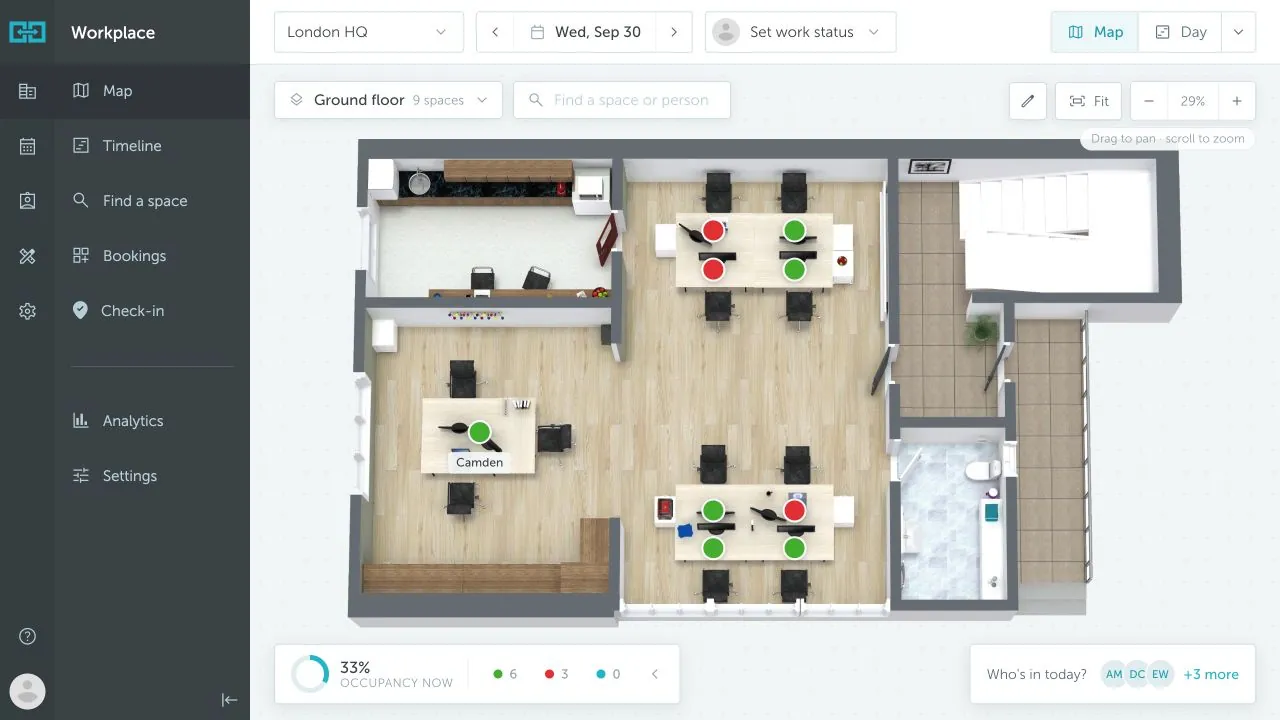
Upload your floor plan first in Workplace settings. Configure your space types and groups before placing spaces, so you can select the right settings as you go.
Use the selector above the map to choose what to edit:
- Spaces: bookable desks, meeting rooms, and other resources.
- POIs: points of interest, such as entrances or kitchens.
- Areas: sections of the floor with their own capacity limits.
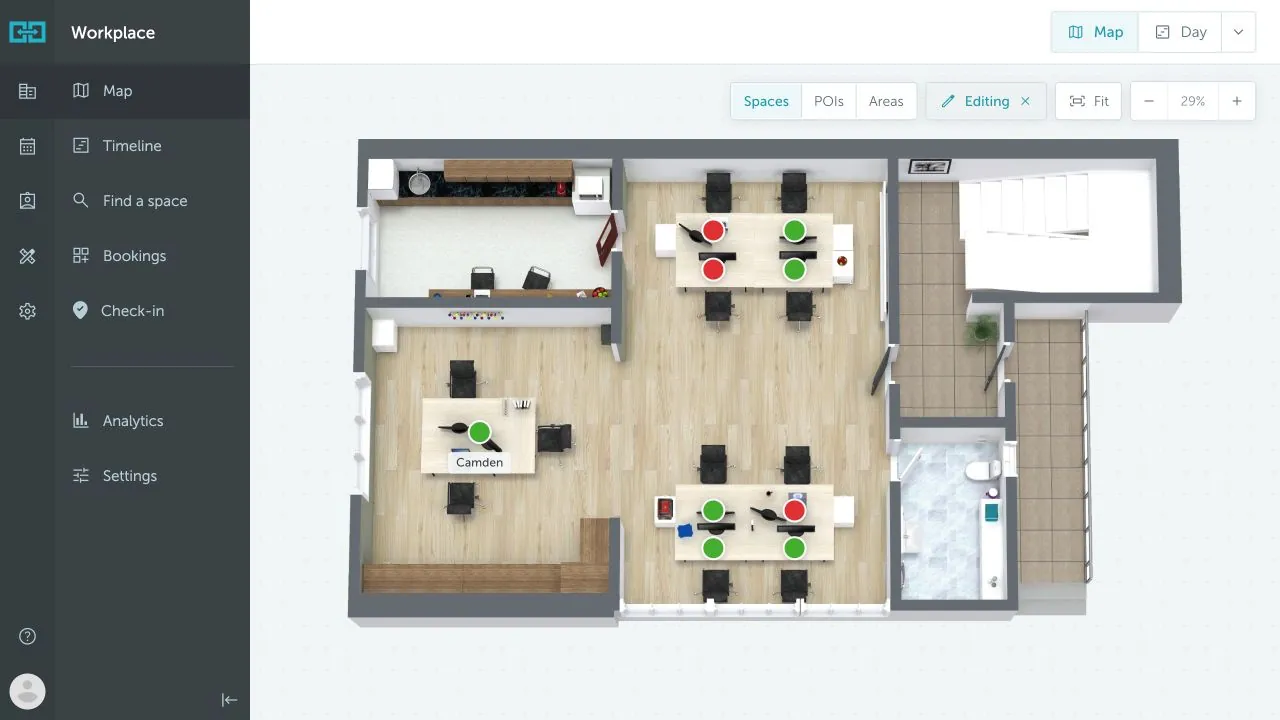
When you have finished, click Editing (the Done editing control) to return to the regular map.
2. How to add new spaces
Select Spaces, then click an empty spot on the floor plan where you want the space to appear.
In New space, choose the Space type and Space group, enter a Name, and select any available Features, such as a monitor or standing desk.
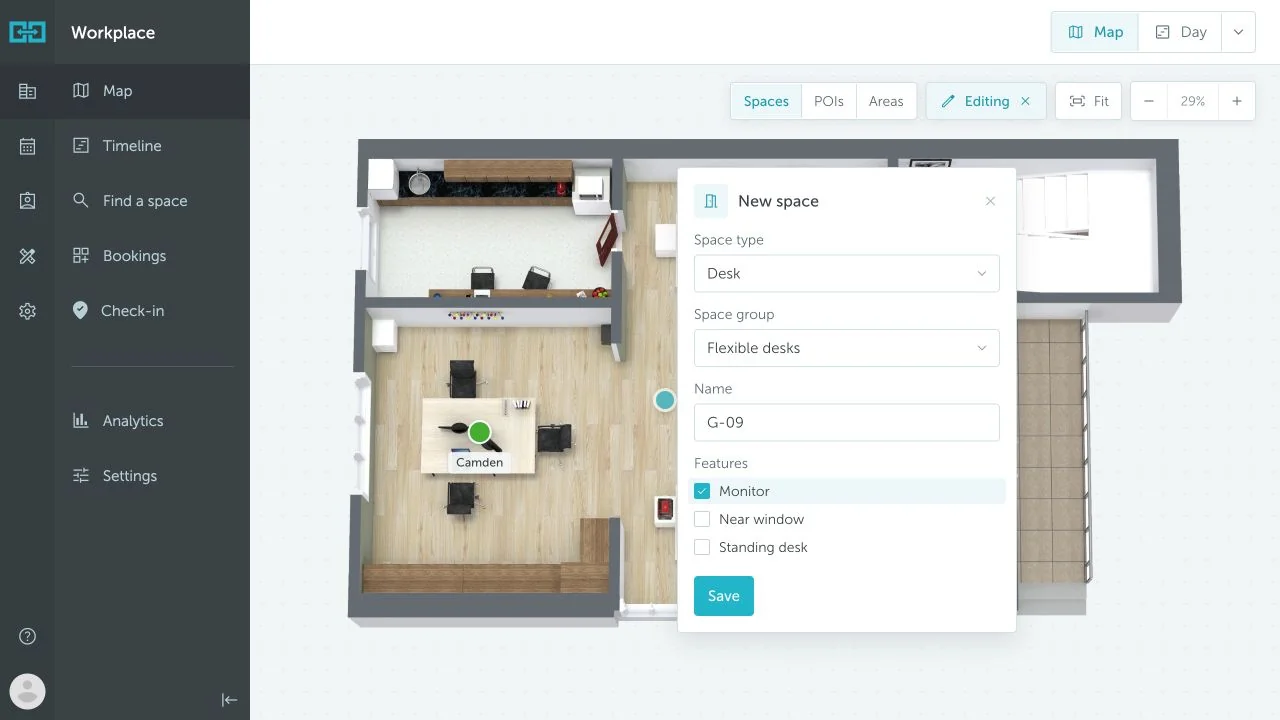
Click Save. You can reposition the space by dragging its marker while in edit mode.
3. How to edit and delete spaces
With Spaces selected in edit mode, click a space marker. Update its name, group, or features, then click Save.
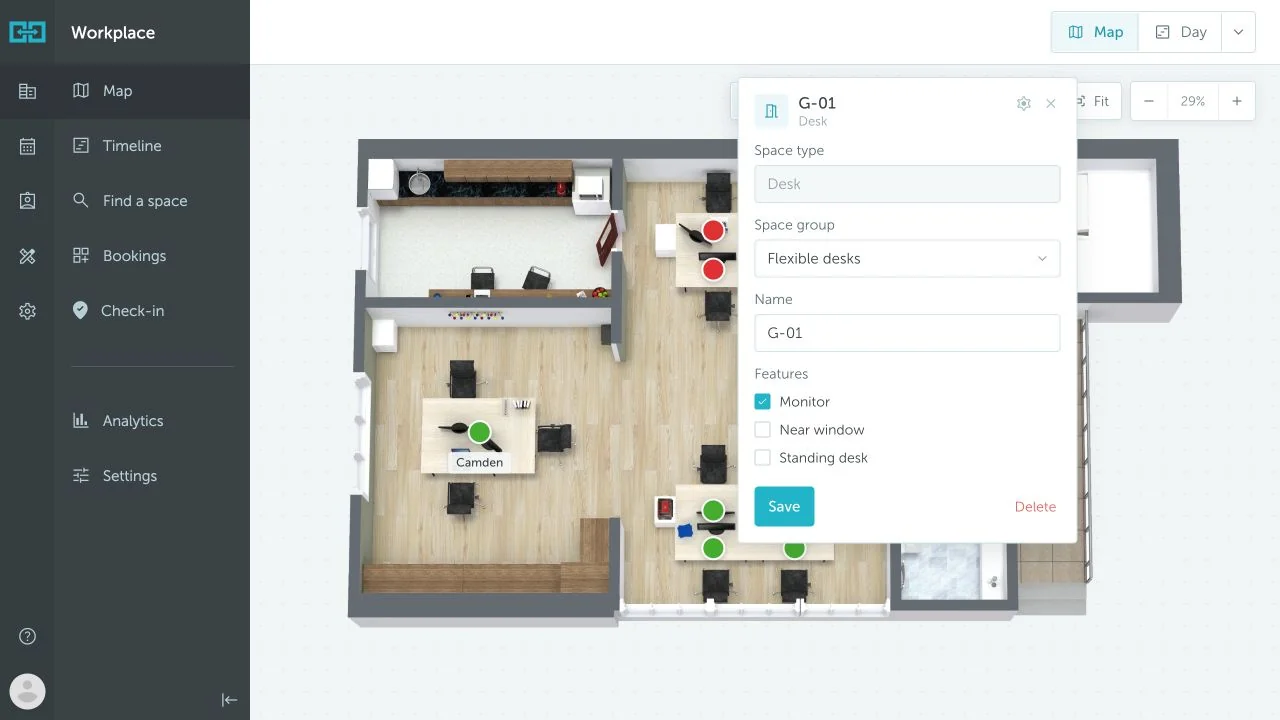
For more options, click the gear icon (Edit more settings in a new window). The space settings panel includes:
- Details: change the floor or group, adjust the map coordinates, select features, and add Email info to booking confirmations.
- Assignment: assign the space to a user and configure auto-booking.
- Pictures: add pictures of the space.
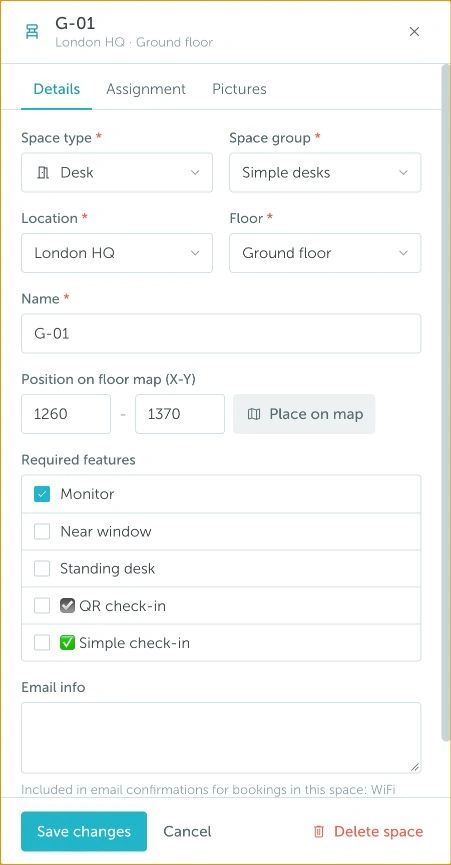
Click Save changes when you finish. For meeting spaces, see meeting room capacity settings for attendee limits.
To remove a space, use Delete in the map editor or Delete space in the full settings panel.
Warning: Deleting a space is different from moving its marker. To change its position, drag the marker or edit its map coordinates instead.
4. How to add and edit points of interest
Select POIs to mark amenities such as kitchens, printers, or restrooms on your map; for the steps, see Adding and editing points of interest.
5. How to add and edit areas
Areas let you set capacity limits for different sections of a floor.
Select Areas in edit mode, then click and drag across the map to draw a rectangle around the spaces you want to include.
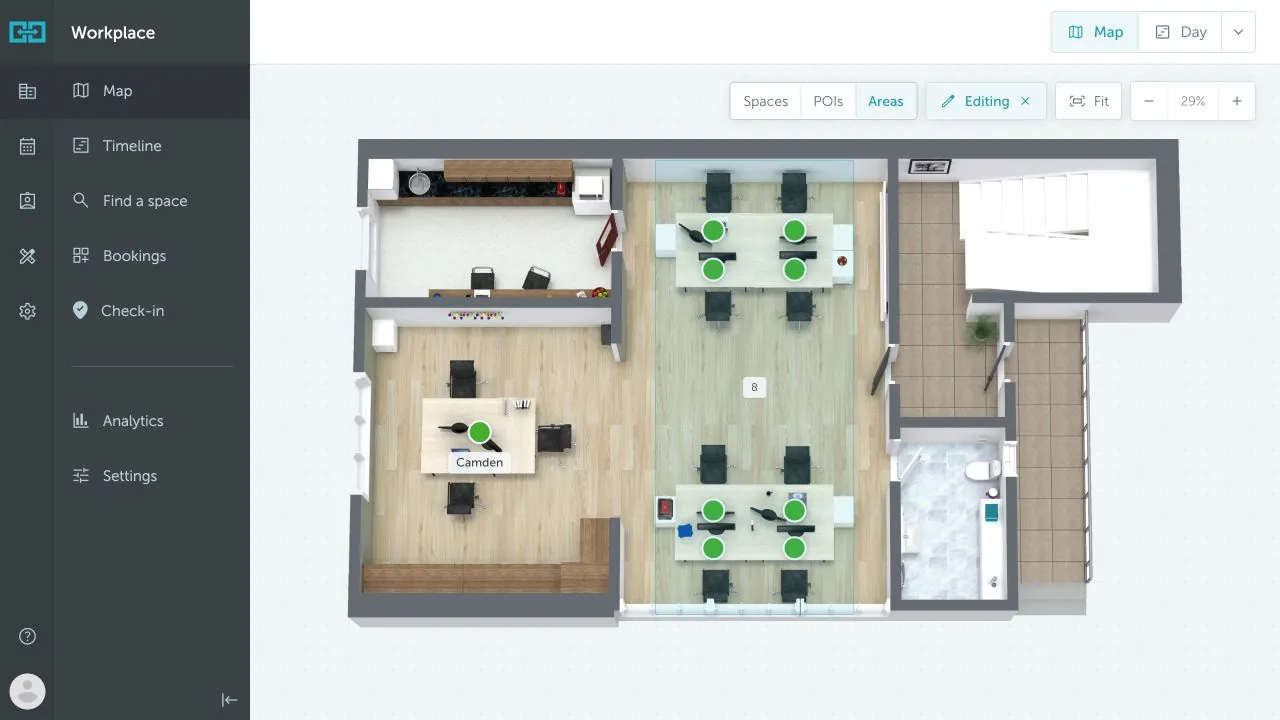
Click the area’s number to open Edit capacity. Enter the capacity and click Save.
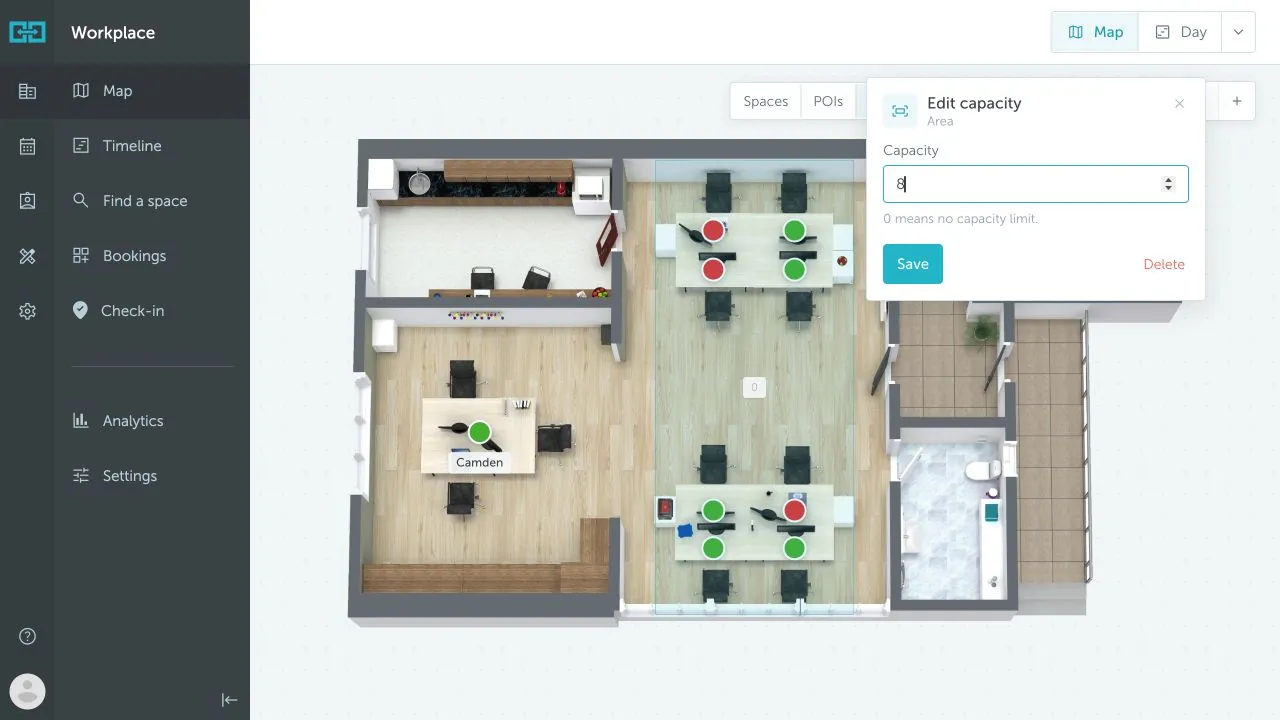
Note: A capacity of 0 means no capacity limit. One floor can contain multiple areas with different limits.
To remove an area, open Edit capacity and click Delete. When finished, click Editing to leave edit mode.