Jump to:
1. Applicability
The Outlook calendar integration helps keep the Outlook calendar synced with YAROOMS. A common use case is syncing all the room bookings from YAROOMS to Outlook, and vice versa.
2. How it works
After activating this integration, YAROOMS will have the ability to write event data to your Outlook calendar resources. Mapping the spaces in YAROOMS to Outlook resources will keep the calendars in sync. Steps to successful setup:
- Setup the Outlook Calendar integration
- Map the Outlook resources to spaces in YAROOMS
- Keep Outlook resources in sync with YAROOMS spaces
3. Activating the Outlook Calendar integration
3.1. Setup the Azure portal app and access rights
In the Azure Portal , go to Azure AD (Manage Microsoft Entra ID) → App registrations and press the "+ New registration" button.
Give the app a name, leave the Redirect URI empty and press Register.
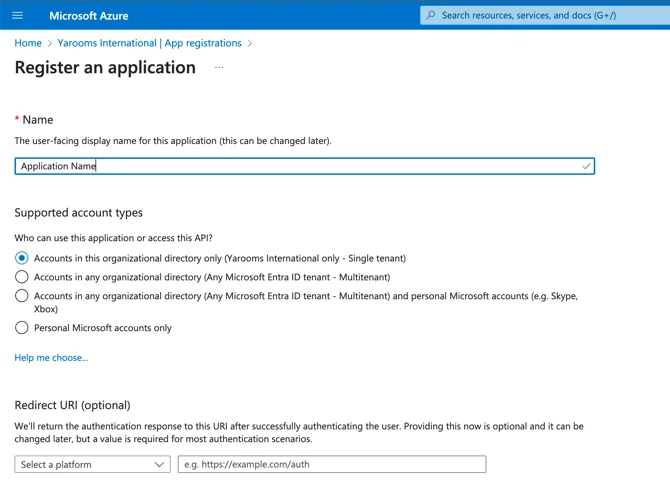
From the app details page, extract the following information:
- Application (client) ID → Client ID
- Directory (tenant) ID → Tenant ID

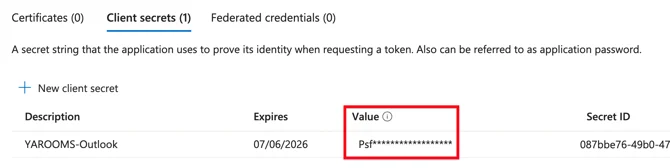
Go to “Certificates & secrets” in the left menu. Click on “New client secret.” Give it an expiration date far in the future and press “Generate.” Extract the generated secret (we’ll call it Client secret (its VALUE, not ID)).
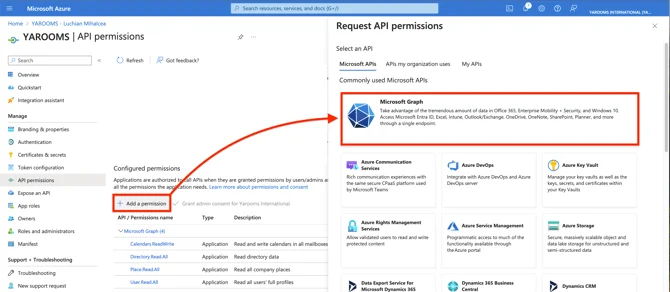
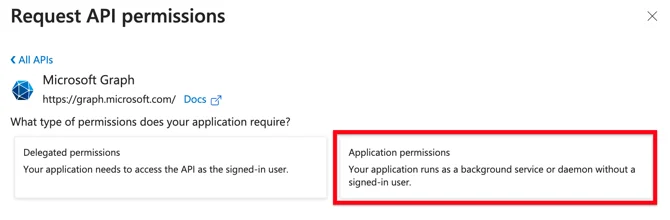
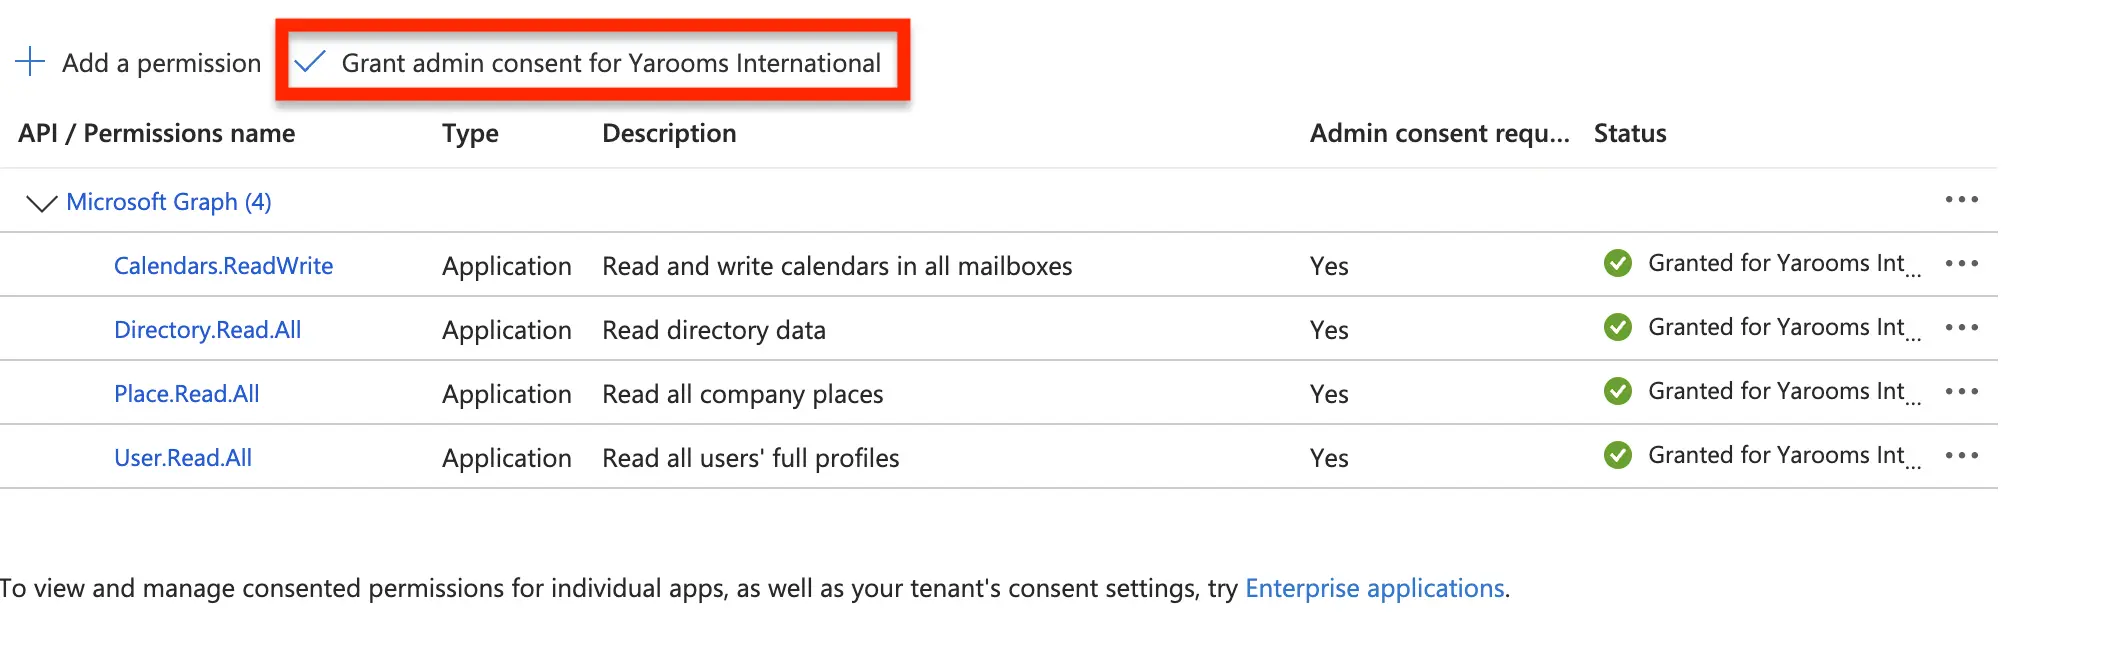
Go to “API permissions” in the left menu. Click on "+ Add a permission", then on “Microsoft Graph”:

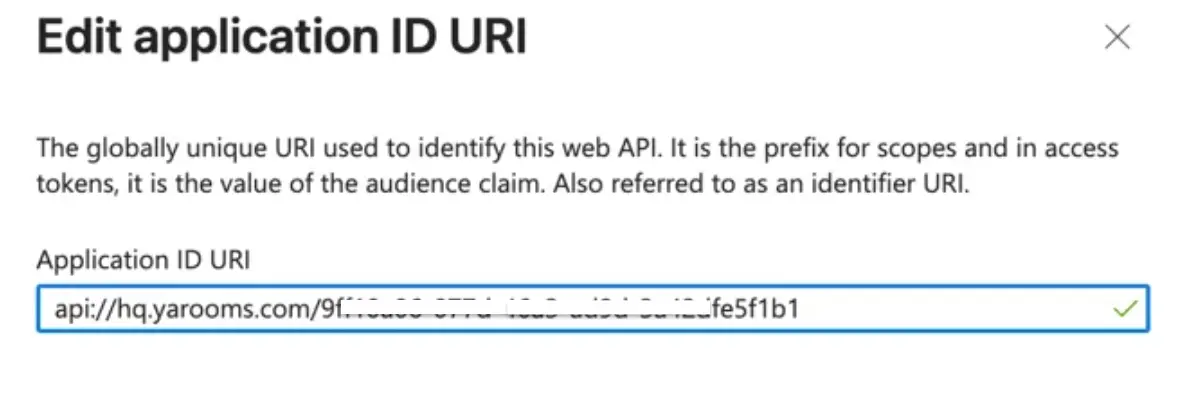
Application ID URI, click on “Add”, and enter the following:
“api://tenant.yarooms.com/application_client_id”
Example: api://CompanyName.yarooms.com/9f*******-*****-******5f1b1
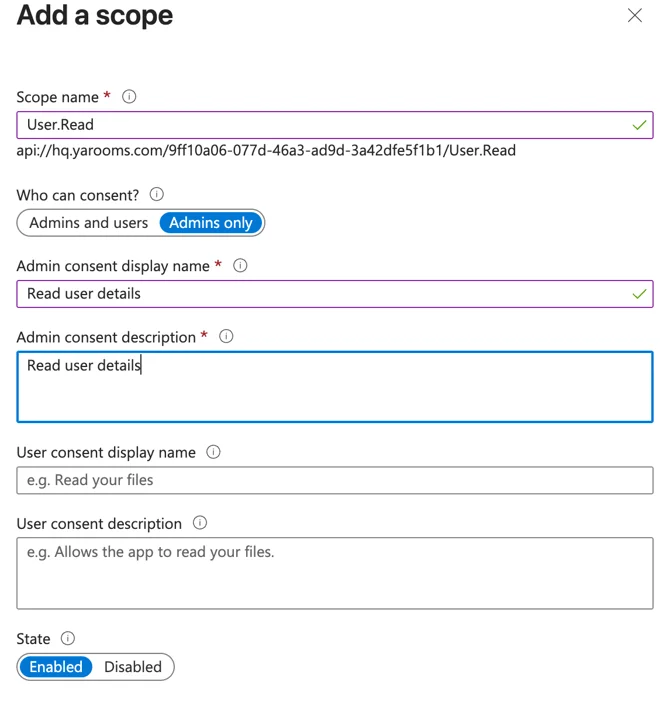
+ Add a scope and enter with the following:
- Scope name: User.Read
- Who can consent? Admins only
- Admin consent display name: Read user details
- Admin consent description: Read user details
- State: Enabled
Add a client application
- d3590ed6-52b3-4102-aeff-aad2292ab01c AND check Authorized scopes
- bc59ab01-8403-45c6-8796-ac3ef710b3e3 AND check Authorized scopes
- 0ec893e0-5785-4de6-99da-4ed124e5296c AND check Authorized scopes
- 4765445b-32c6-49b0-83e6-1d93765276ca AND check Authorized scopes
- 5e3ce6c0-2b1f-4285-8d4b-75ee78787346 AND check Authorized scopes
- 1fec8e78-bce4-4aaf-ab1b-5451cc387264 AND check Authorized scopes
- 27922004-5251-4030-b22d-91ecd9a37ea4 AND check Authorized scopes
Explanation of client IDs:
- d3590ed6-52b3-4102-aeff-aad2292ab01c → Microsoft 365 mobile application
- bc59ab01-8403-45c6-8796-ac3ef710b3e3 → Outlook on the web
- 0ec893e0-5785-4de6-99da-4ed124e5296c → Microsoft 365 desktop application
- 4765445b-32c6-49b0-83e6-1d93765276ca → Microsoft 365 web application
- 5e3ce6c0-2b1f-4285-8d4b-75ee78787346 → Teams web application
- 1fec8e78-bce4-4aaf-ab1b-5451cc387264 → Teams mobile or desktop application
- 27922004-5251-4030-b22d-91ecd9a37ea4 → Outlook mobile application
3.2. Setup the Outlook Calendar integration in YAROOMS
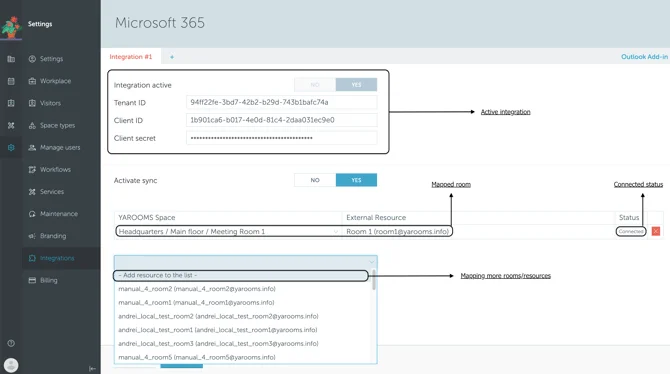
In your YAROOMS account go to Settings → Integrations and choose the “Outlook Calendar” integration. Switch the “Integration active” field to YES and fill in the details obtained at previous steps in the Azure portal:
- Tenant ID
- Client ID
- Client secret (Value)
4. Resource mapping
Once the Outlook Calendar integration settings are saved, a new External resource pairing field will appear (if your company is using the YAROOMS spaces module).
Go to: Settings → Integrations → Outlook Calendar → Integration #1 (below the Client Secret)
By default, Outlook calendar sync is not enabled. Activate it by pressing “Yes”.
To map Outlook resources to YAROOMS, select an External Resource from the drop-down list, and assign a YAROOMS space to it. To keep everything in sync, a connection between the two must be established.
Please note that it may take up to 24 hours for the rooms to appear in the resource mapping dropdown after you have activated the integration.
Once you selected and paired the resources from Outlook with the rooms from Yarooms, the link can be done by manually clicking the “+Connect” button. The appearance of the “Connected” status represents a successful connection.