Jump to:
This article covers the Microsoft Teams integration: making YAROOMS views available as tabs inside the Teams app, both desktop and web. The integration generates a Teams app package (manifest + icons) that you upload to your Teams tenant.
Until the Teams integration is configured, users who open a YAROOMS Teams tab will see an “Inactive Teams Integration” message.
1. Requirements
You need:
- Admin access to your Microsoft Entra ID tenant (Azure Portal).
- Admin access to your YAROOMS workspace.
- Permission to upload a custom app package to your Microsoft Teams tenant.
2. Register the app in Azure Portal
In Azure Portal go to Manage Microsoft Entra ID → App Registrations and click + New Registration.
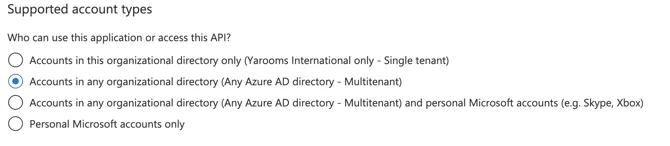
Under Supported account types, choose Multitenant.
Certificates and secrets
Open the Certificates & Secrets tab, create a New Client Secret, and copy the string from the Value column.
The client secret value is only shown once, at creation time. After you navigate away it becomes permanently obscured. Copy it into a safe place before leaving the page, then paste it into YAROOMS in step 3.
Make sure you copy the VALUE, not the Secret ID.
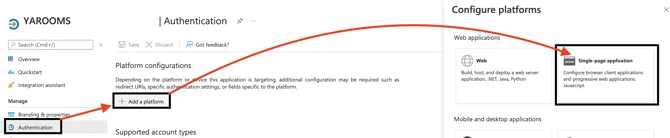
Authentication
Open the Authentication tab and click + Add a platform → Single-page application.
- Redirect URI:
https://[domain].yarooms.com/account/login(replace[domain]with your YAROOMS subdomain). - Under Implicit grant and hybrid flows, check Access tokens and ID tokens.
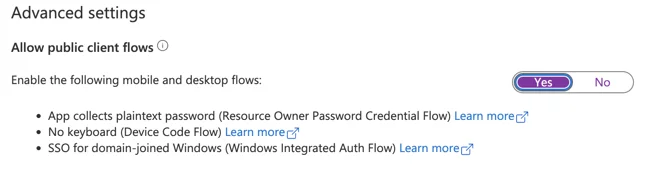
- Under Advanced settings, set Allow public client flows to Yes.
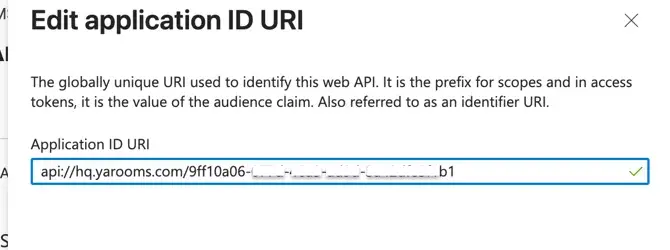
Expose an API
Open the Expose an API tab.
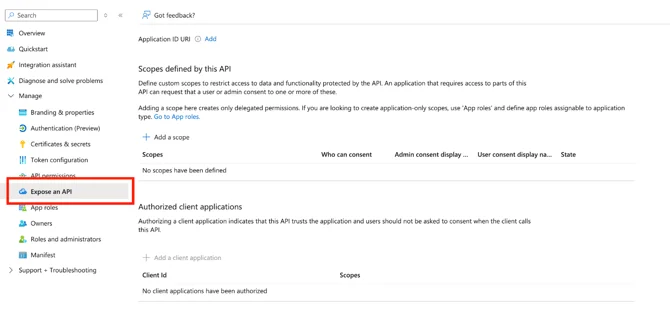
Set Application ID URI to:
api://[subdomain].yarooms.com/[application-client-id]
For example: api://CompanyName.yarooms.com/9ff10a06-077d-46a3-ad9d-3a42dfe5f1b1.
Click + Add a scope and fill in:
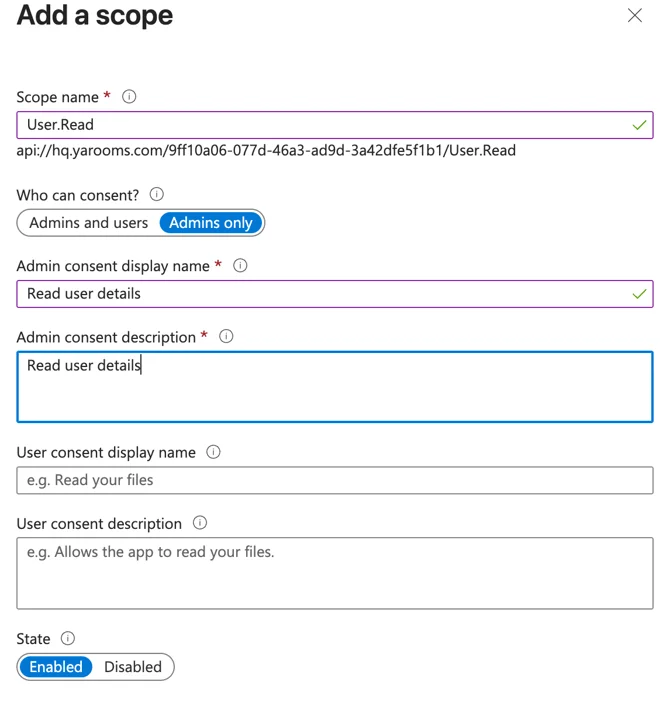
- Scope name:
User.Read - Who can consent?: Admins only
- Admin consent display name: Read user details
- Admin consent description: Read user details
- State: Enabled
Under Authorized client applications, add the Teams client IDs with the scope you just created checked:
| Client ID | Application |
|---|---|
5e3ce6c0-2b1f-4285-8d4b-75ee78787346 | Teams web application |
1fec8e78-bce4-4aaf-ab1b-5451cc387264 | Teams mobile or desktop application |
3. Configure the integration in YAROOMS (Teams Add-in)
Log in to YAROOMS as an administrator and navigate to Settings → Integrations → Microsoft Teams Add-in.
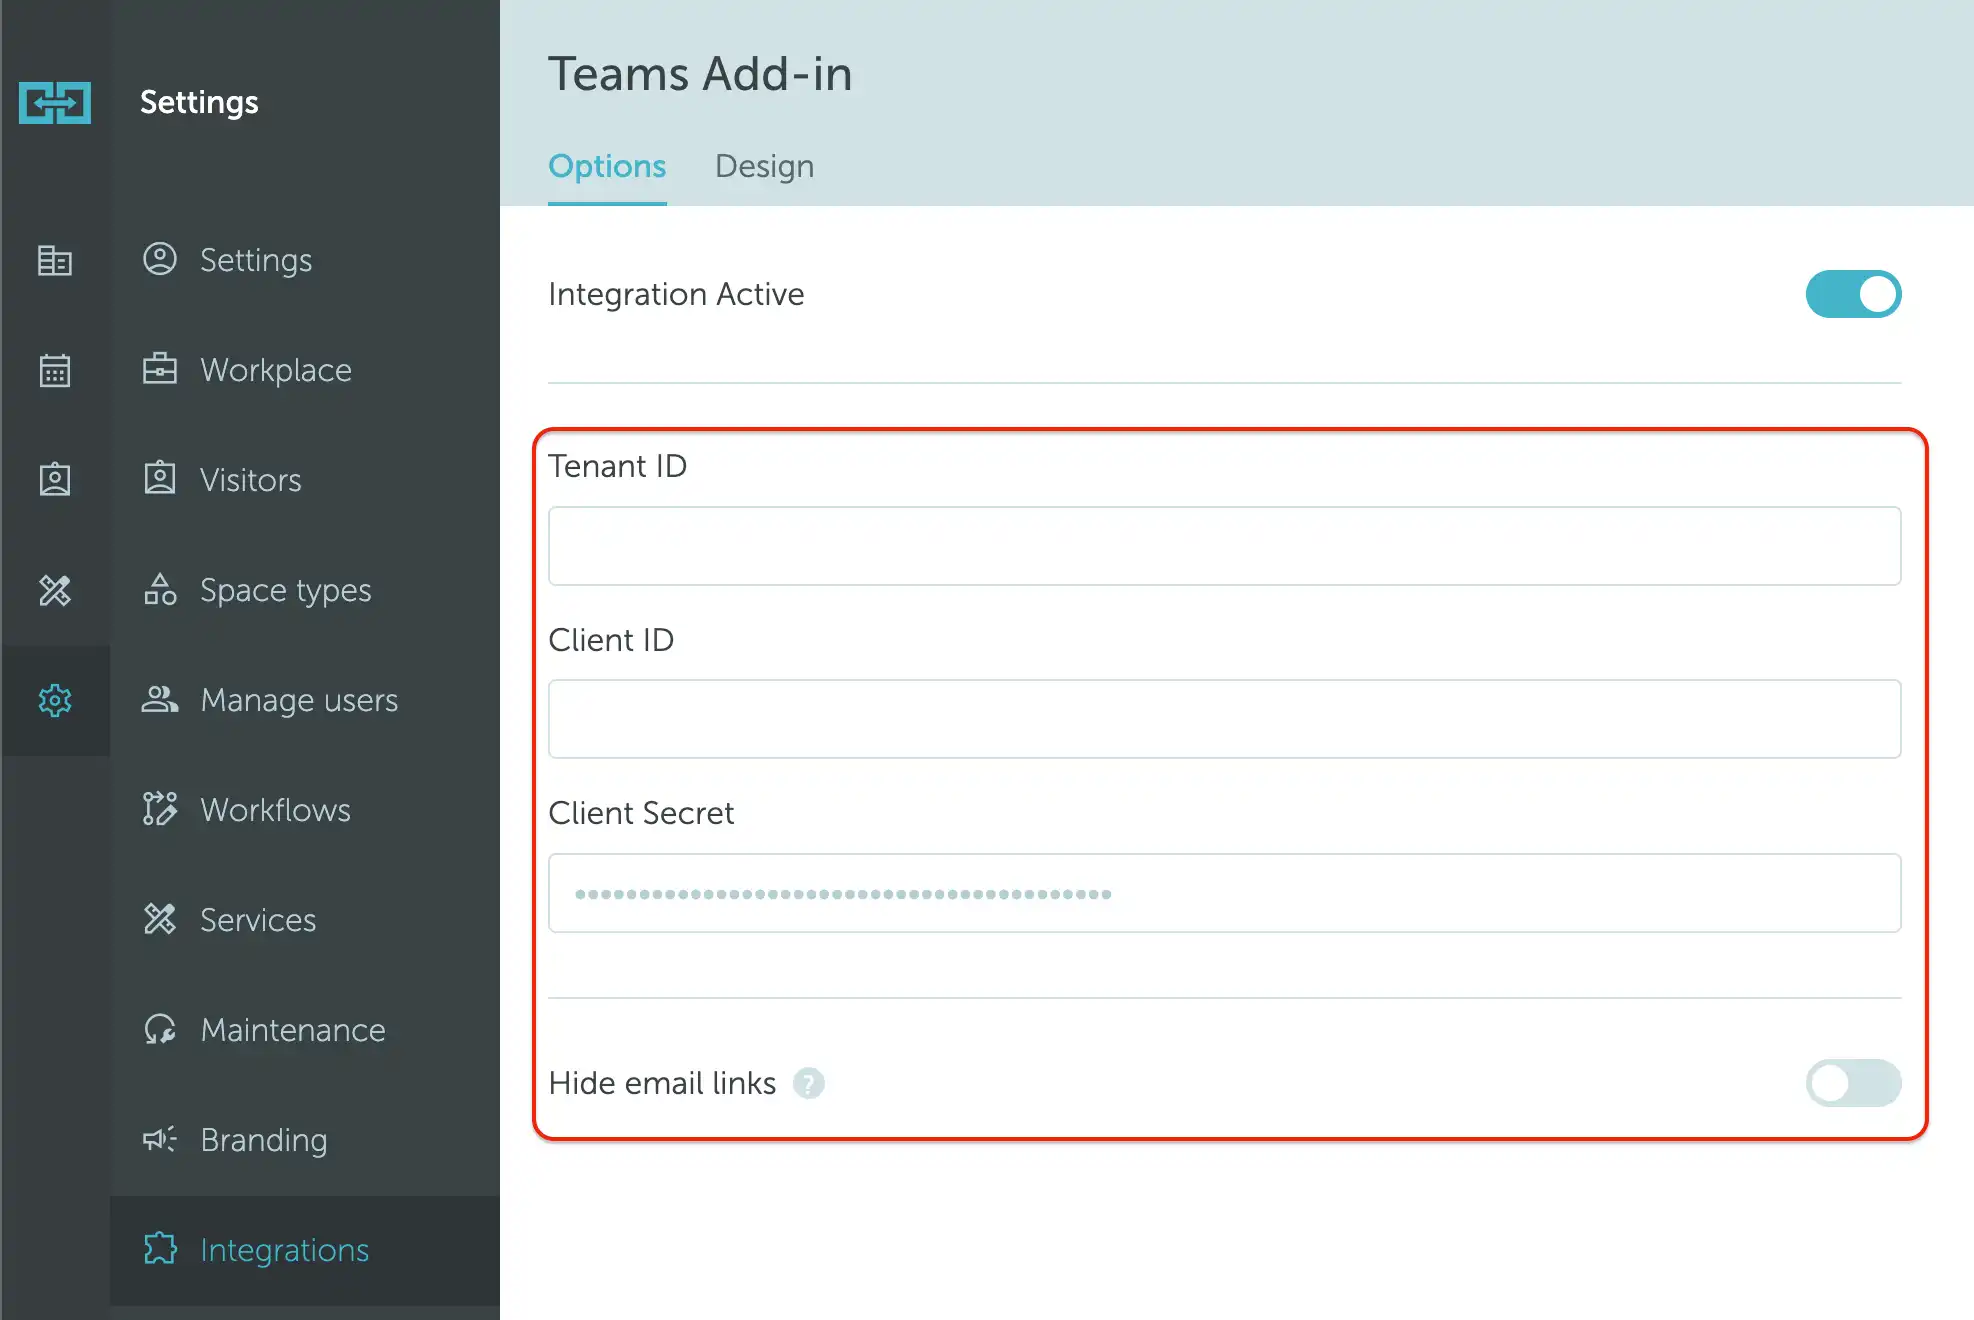
Fill in the Options tab:
- Integration Active: turn on.
- Tenant ID: the Directory (tenant) ID from step 2.
- Client ID: the Application (client) ID from step 2.
- Client Secret: the secret Value (not Secret ID) from step 2.
- Hide email links: when enabled, bookings created from the Teams add-in will not include a link back to YAROOMS in the email confirmations.
Click Save.
4. Customize the Teams Add-in app package
Open the Design tab to customize how YAROOMS appears in Teams.
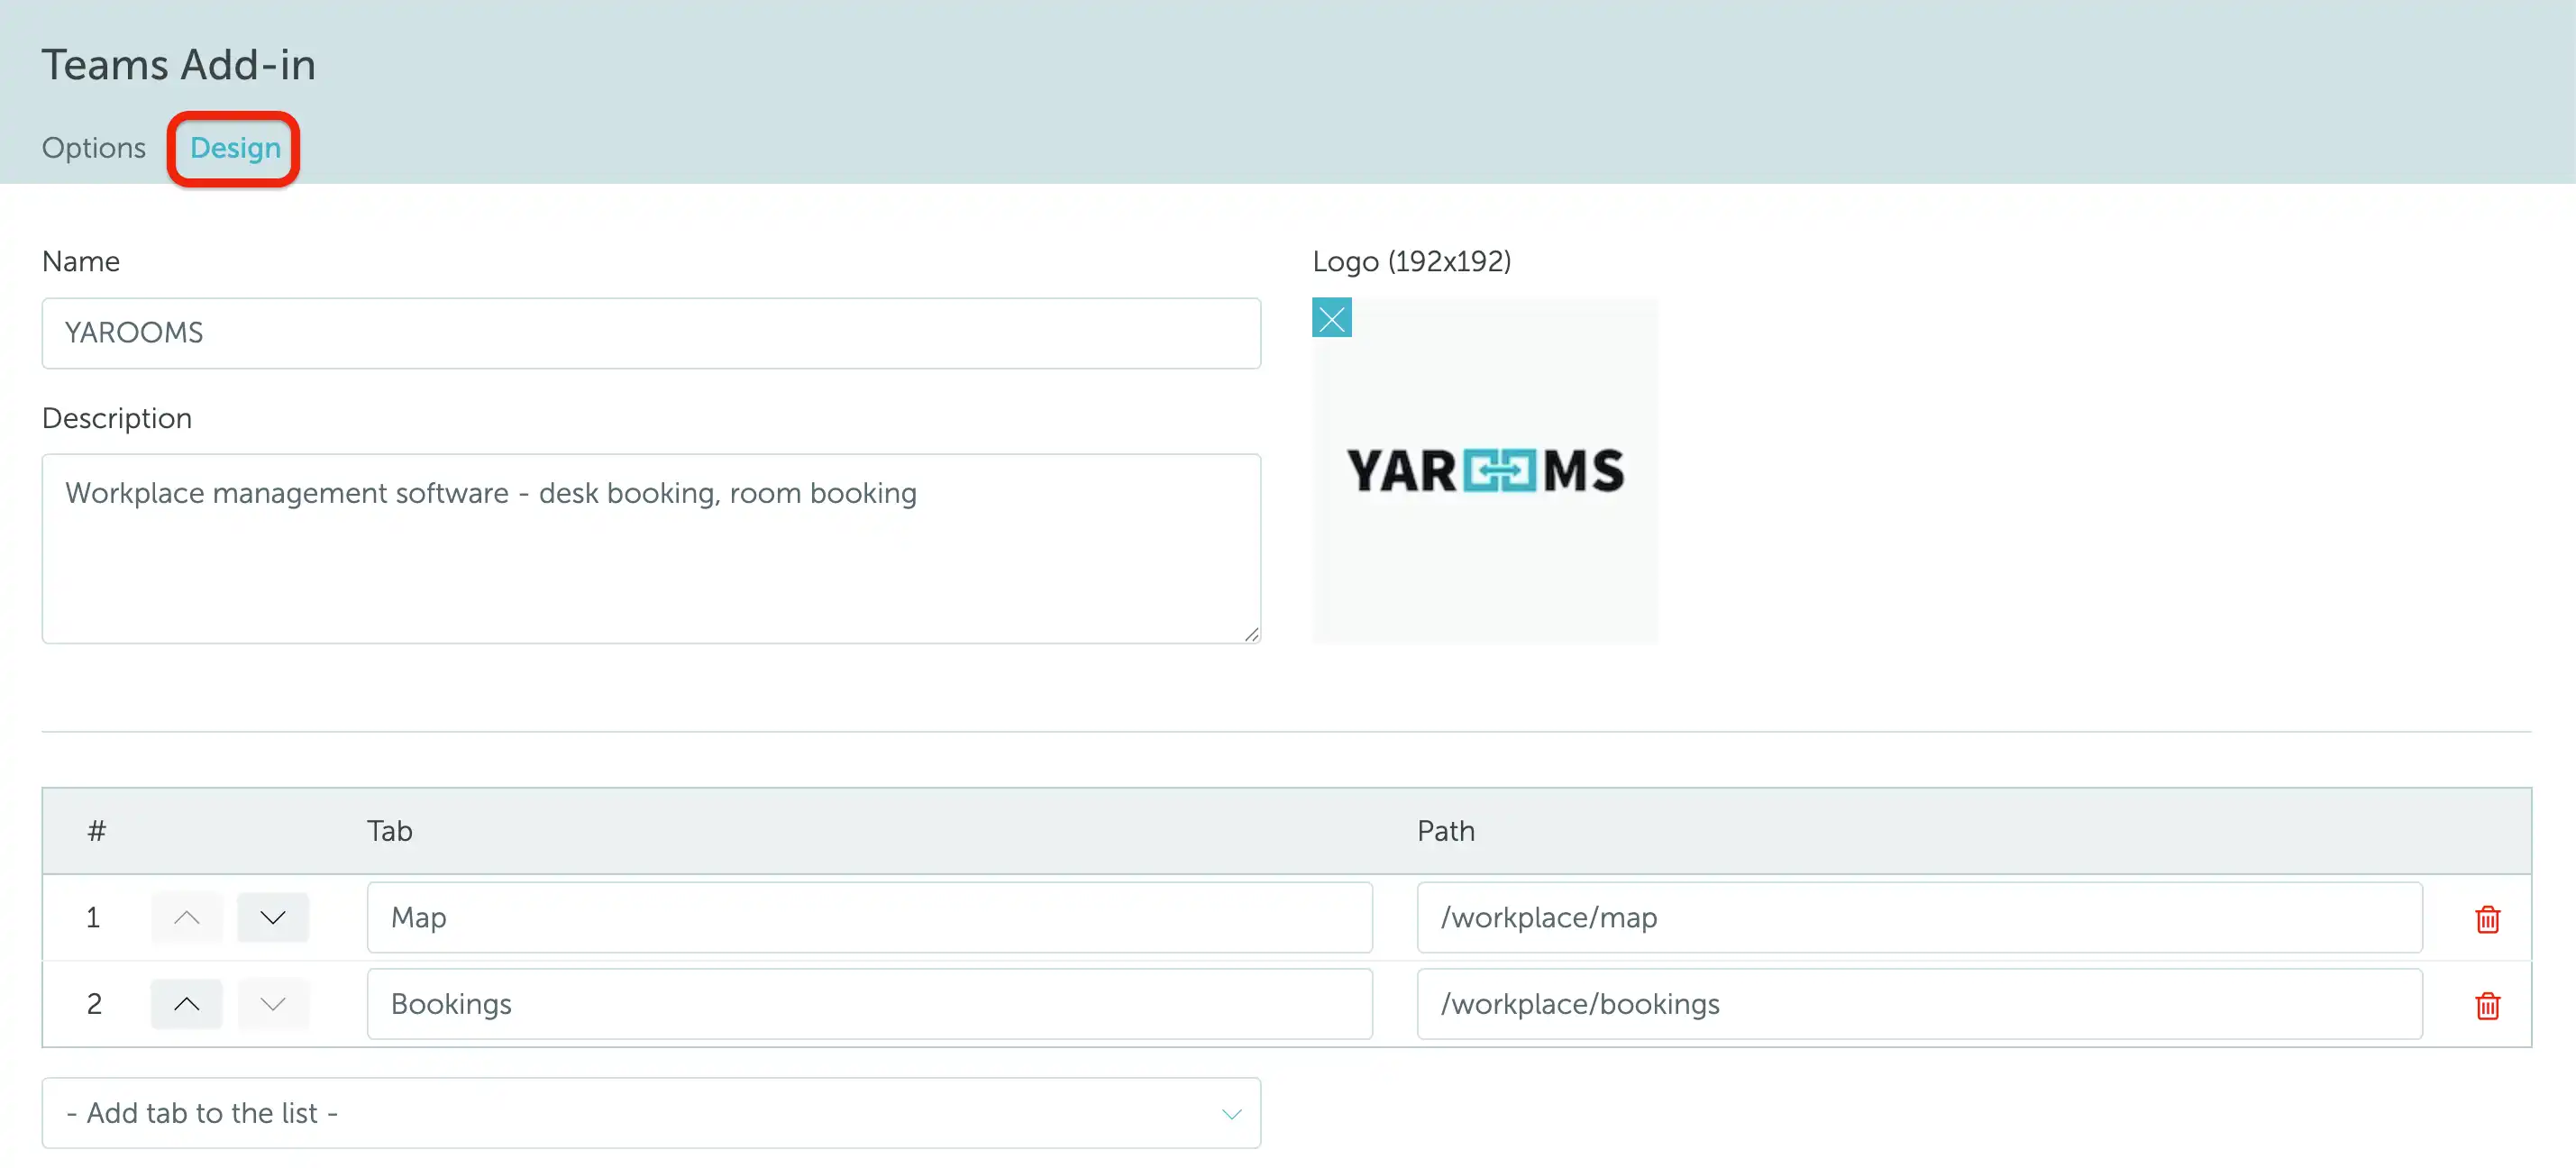
Name: short app name users will see in the Teams app bar (e.g., “YAROOMS”).
Description: short description shown during installation.
Logo: upload a 192x192 PNG. Used as the Teams app icon.
Tabs: the list of YAROOMS views that will appear as tabs. For each tab, set:
- Tab name (shown as the tab label).
- Path (relative YAROOMS path, e.g.,
/workplace/map,/workplace/timeline,/calendar/calendar).
Use the arrows in the list to reorder tabs. Click the trash icon to remove a tab, or pick a new entry from the Add tab to the list dropdown to add one.
Click Save to persist your changes, then click Download application to generate the Teams app package.
5. Install YAROOMS in Teams
You have two ways to surface YAROOMS inside Microsoft Teams:
Option A. Install the Teams Add-in custom app package (recommended)
Upload the app package you downloaded in step 4 to your Teams tenant. Once installed, YAROOMS appears as an app with the tabs you configured.
For step-by-step instructions, see Adding YAROOMS to your Teams sidebar .
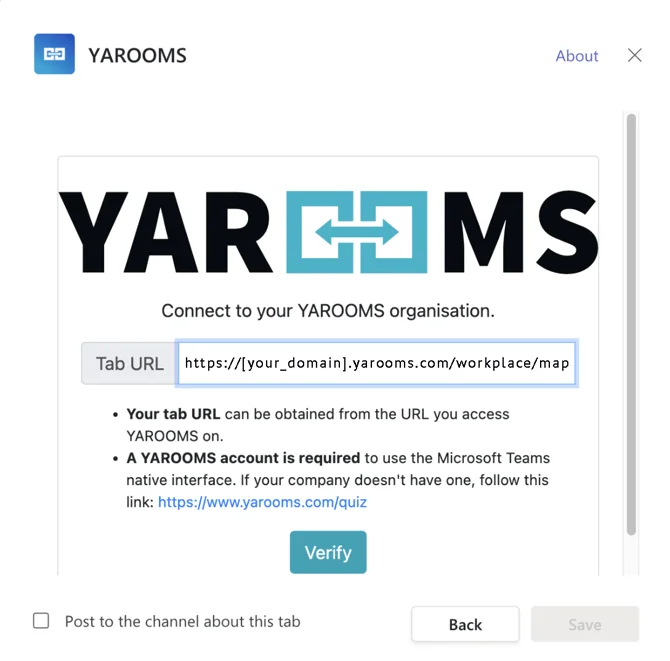
Option B. Add individual website tabs
Alternatively, open any Teams channel or chat, click + to add a tab, choose Website, and enter one of the URLs below:
https://[domain].yarooms.com/workplace/maphttps://[domain].yarooms.com/workplace/timeline
Replace [domain] with your YAROOMS subdomain. A website tab can only display one view, so create multiple tabs if users need quick access to several YAROOMS screens.