
Choose the approach that suits your update: replace the image and move any affected markers, or prepare the image first to reduce repositioning. You do not need to follow both methods.
Option 1: Replace the map and reposition spaces
The straightforward update. Upload your new floor plan, check the result, and move any markers that need adjusting. Use this approach when you are happy to reposition spaces directly on the map.
- Go to Settings → Workplace and select the location and floor.
- Open Edit floor → Floor map.
- Upload your new plan in the Image field, then click Save changes.
- Open Workplace → Map and select that floor to check the result.
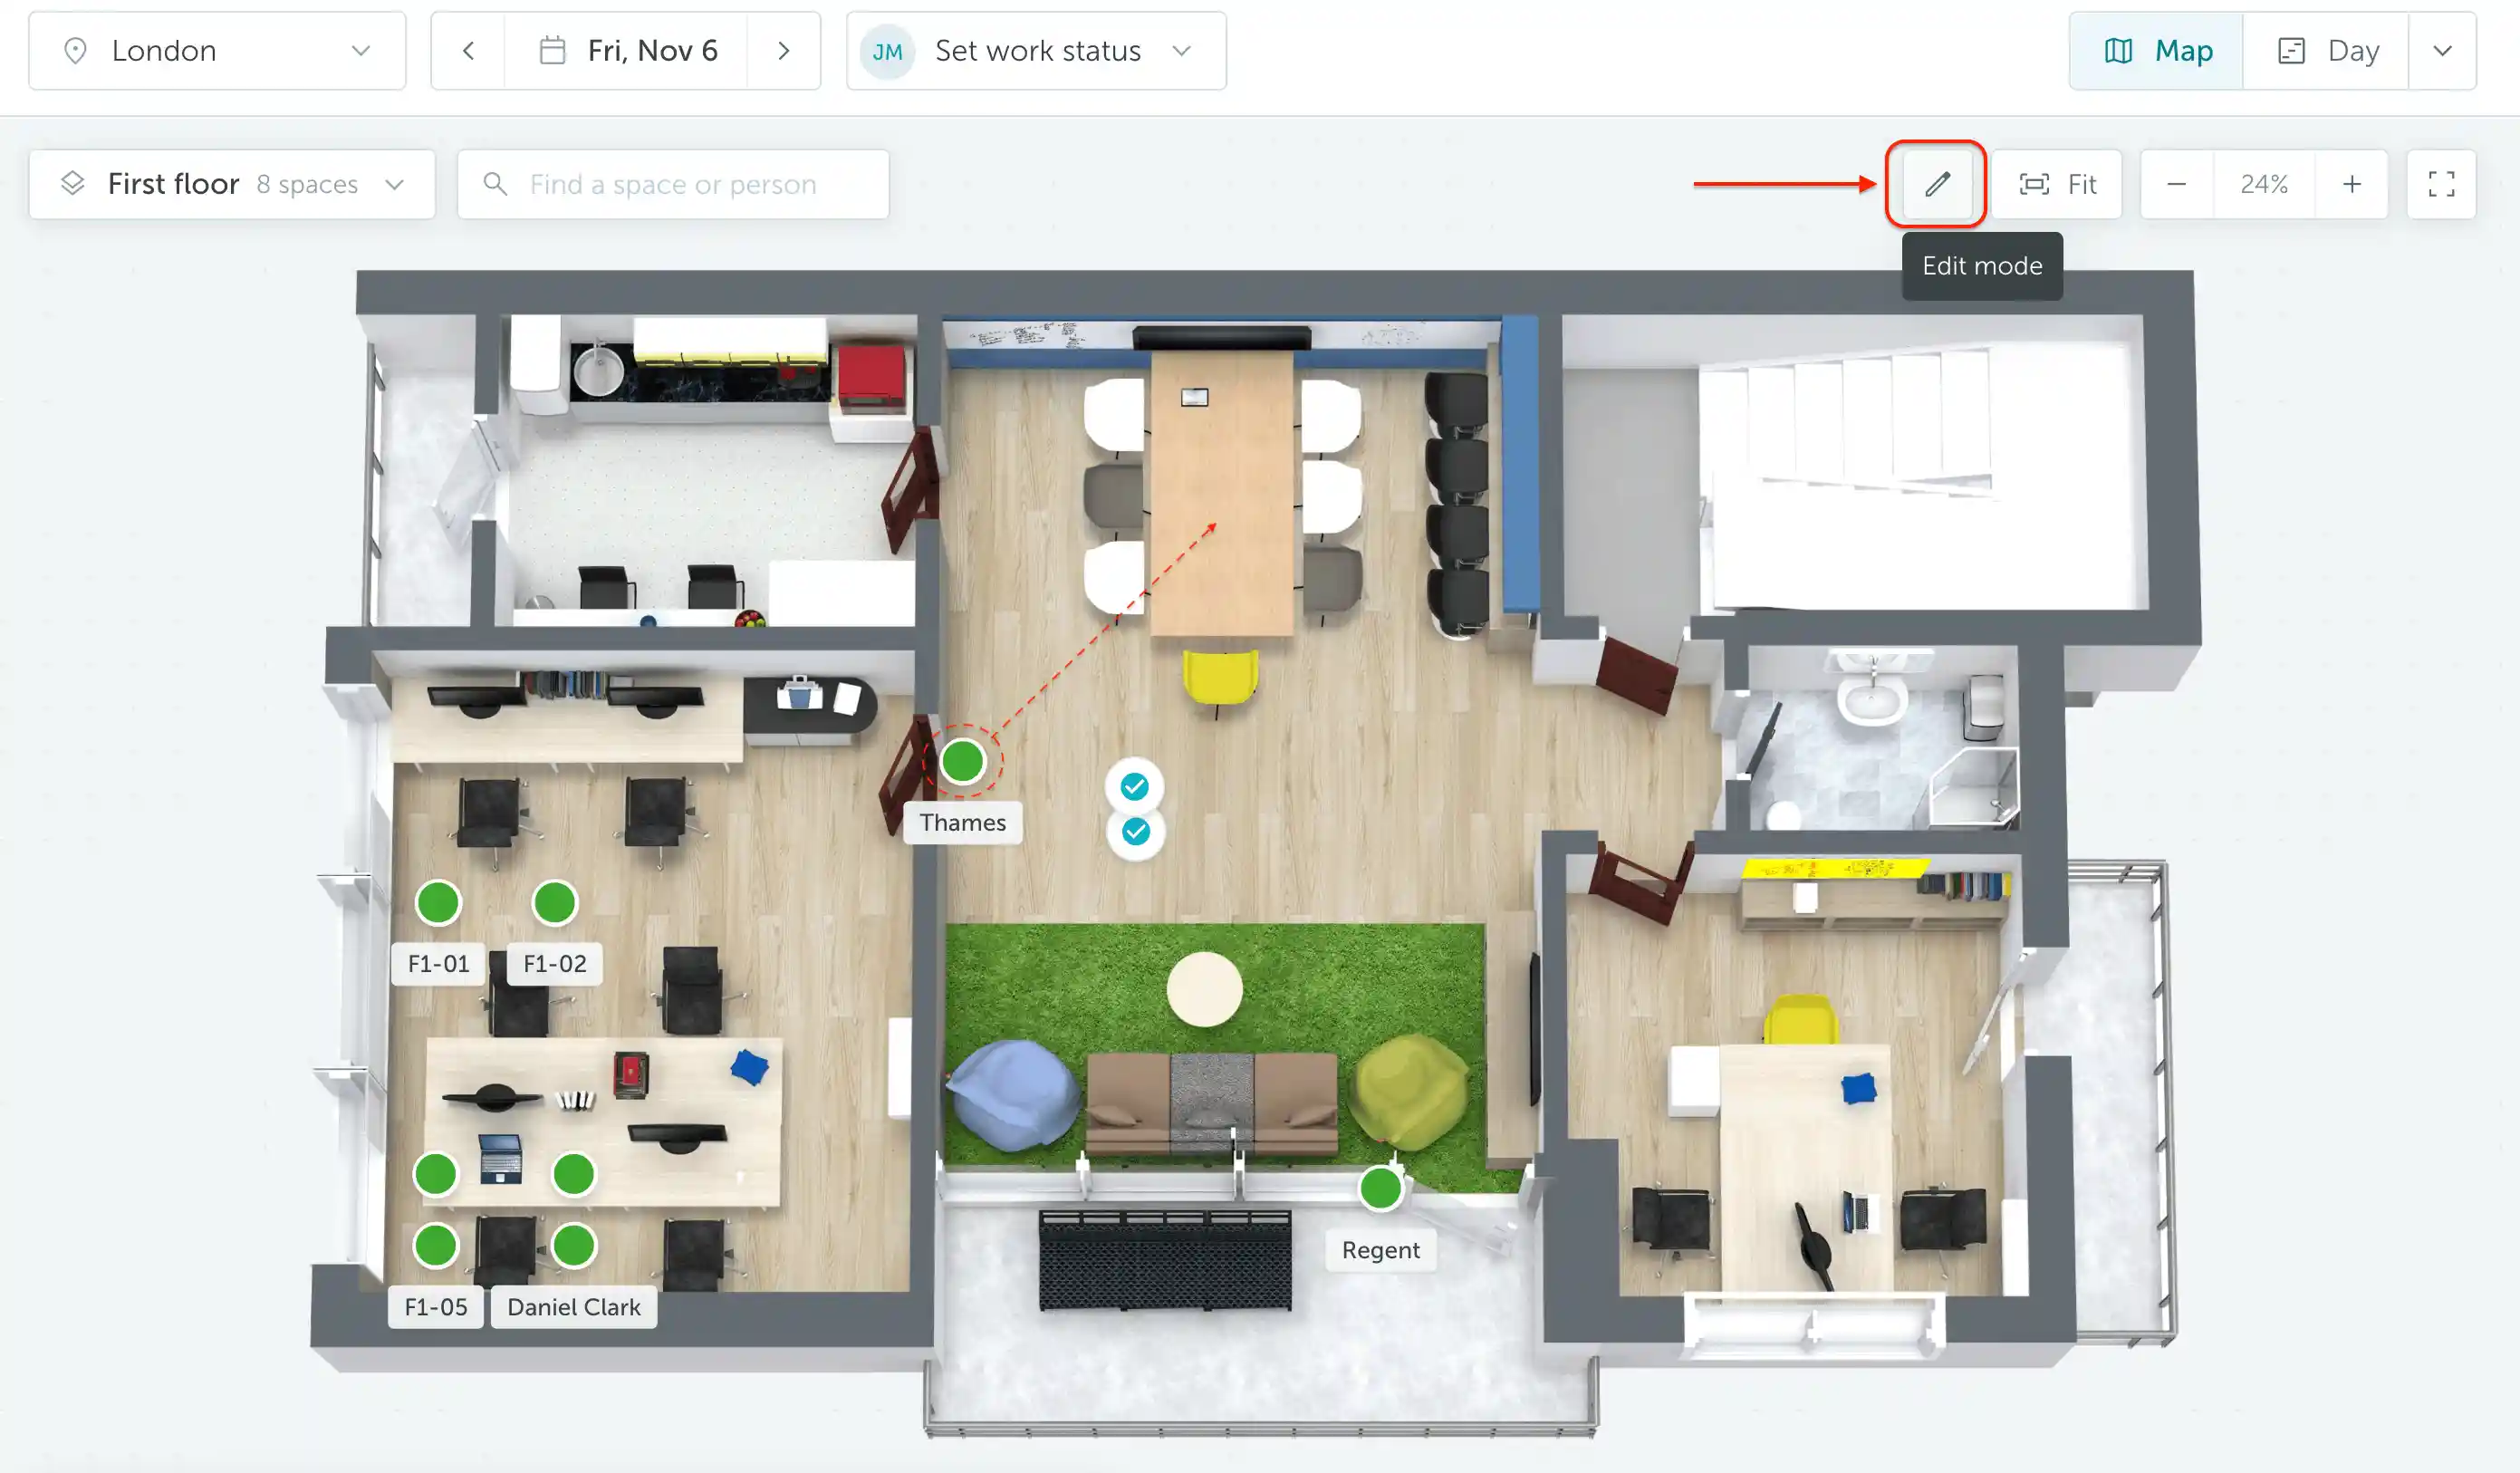
- If any space markers are out of place, click the pencil icon to enter Edit mode, select Spaces, and drag them onto the correct desks or rooms. When finished, use Done editing to return to the regular map.
The floor plan is a background image; your bookable spaces are separate markers placed over it. If the new image is larger or smaller in pixels, or the layout has changed, some markers may no longer line up. You can keep the new image and simply move the affected markers.
Move the existing markers rather than deleting and recreating the spaces just to correct their positions. For more detail, see Setting up your office and Floor plan edit mode.
Option 2: Match the original to reduce repositioning
More preparation, less manual repositioning. For small changes to a floor with many spaces, compare and adjust the image before uploading it. This can save you from moving 100 or more markers individually. This method is optional, not an upload requirement or an extra step after Option 1.
Follow these four steps in order, starting with the plan currently uploaded to your floor.
Step 1. Download the existing floor plan
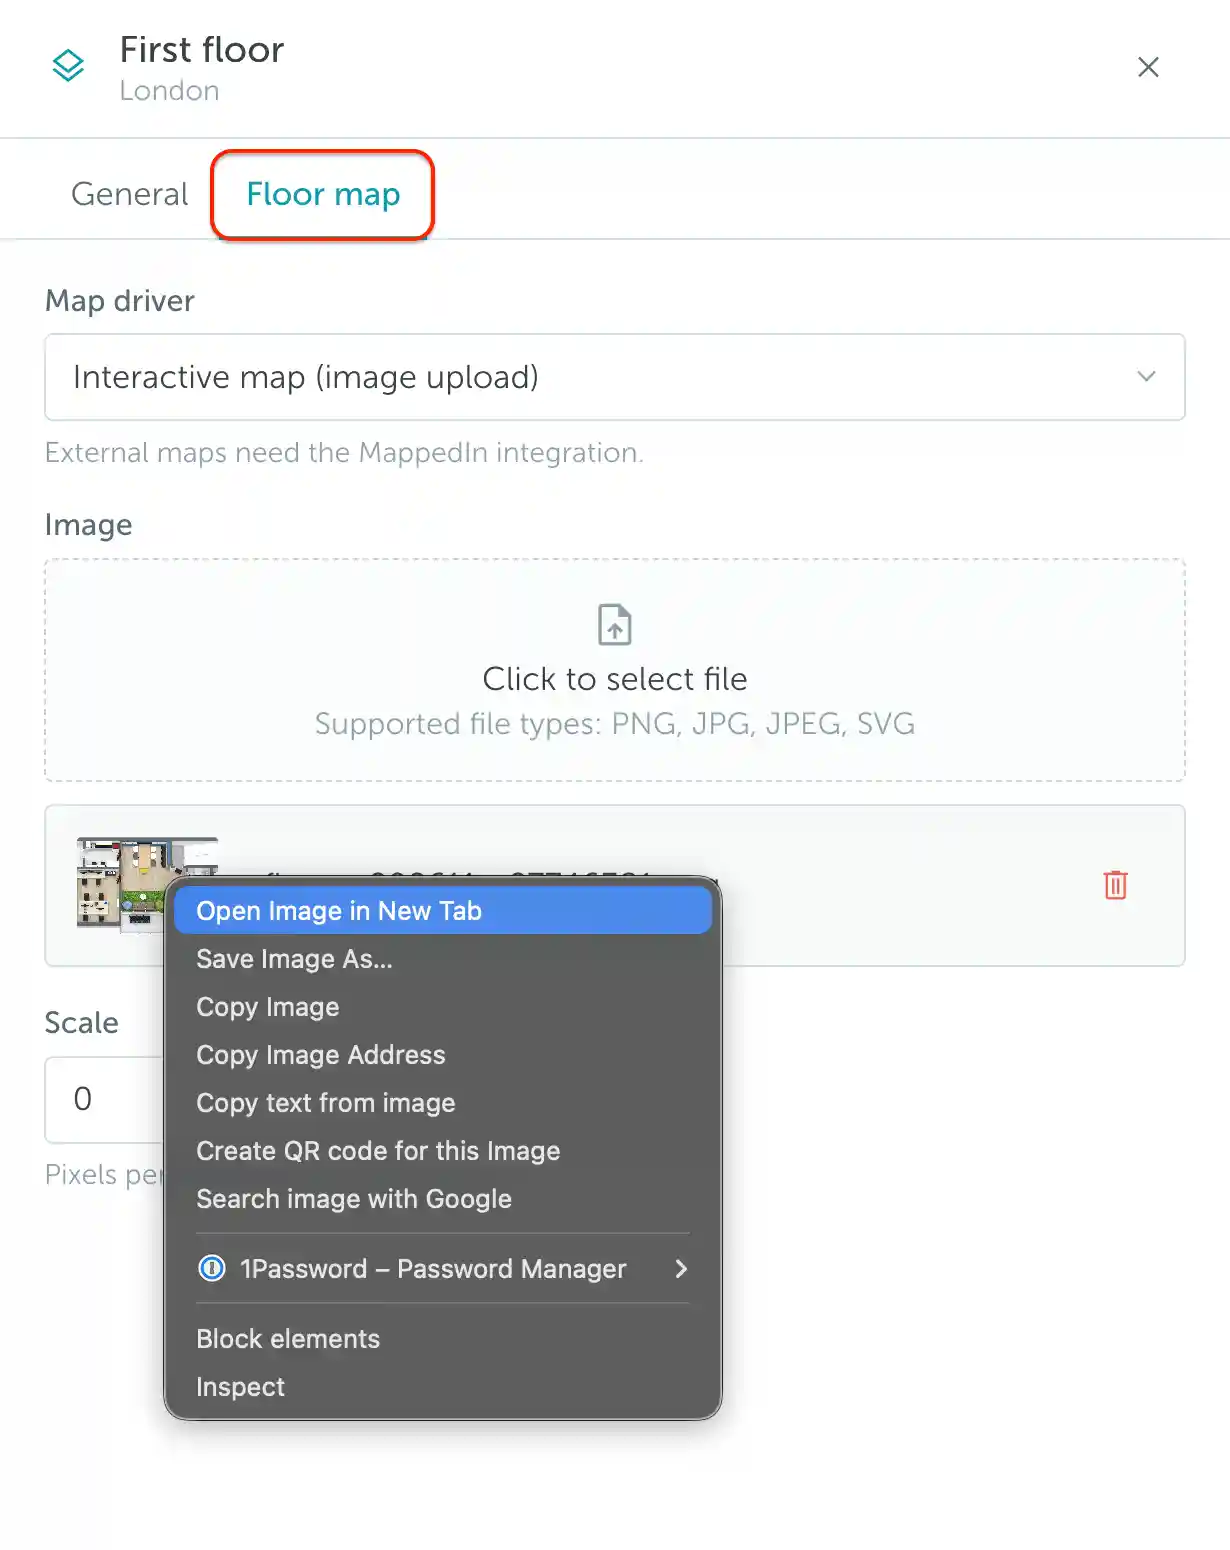
Before replacing the image, open Settings → Workplace → your floor → Edit floor → Floor map. Right-click the existing image thumbnail and select Open Image in New Tab, then save the image from that tab. You can also use Save Image As from the context menu.
Step 2. Compare both images’ pixel dimensions
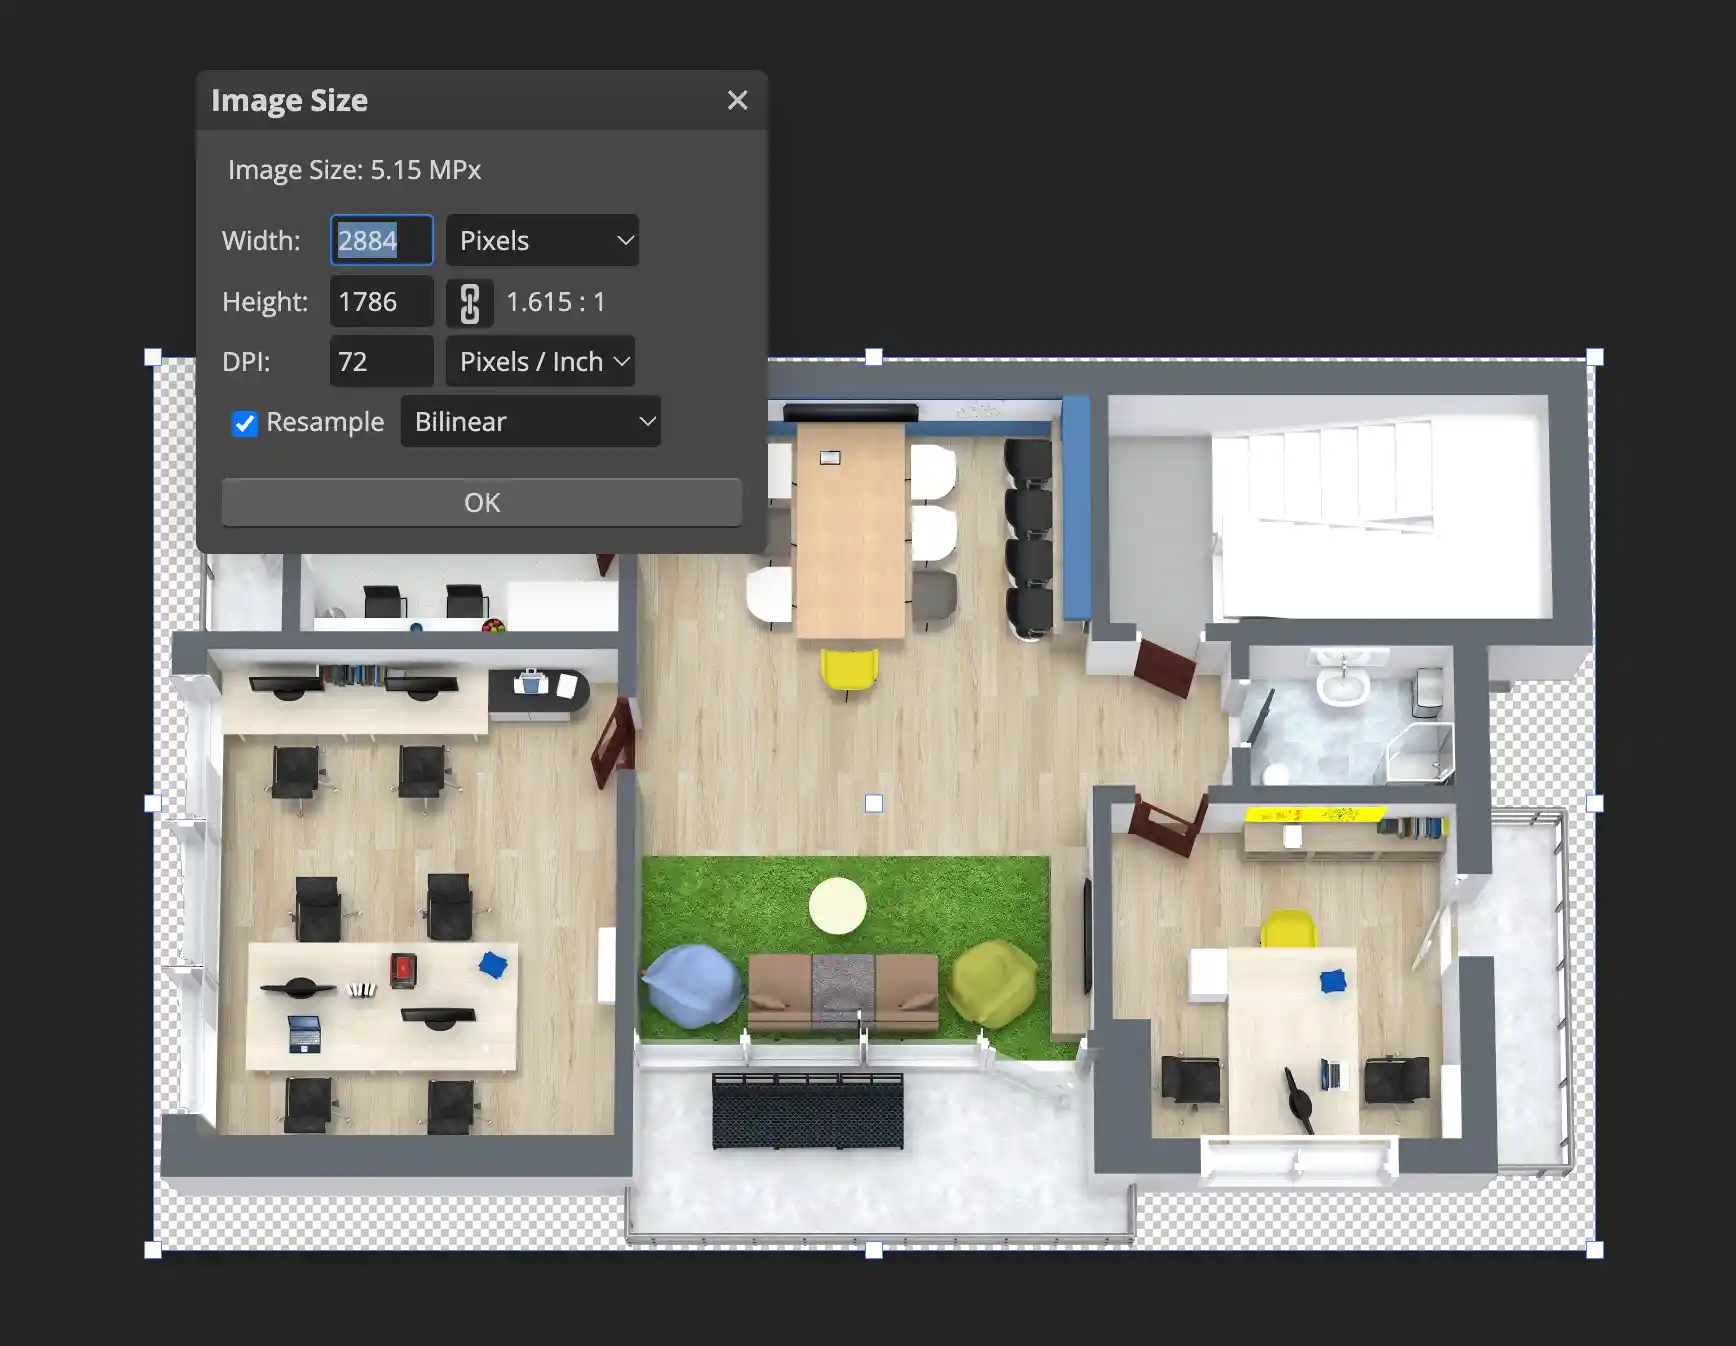
Open the downloaded plan in an image editor such as Photoshop or Photopea and check its width and height in pixels. Then check the image you want to use as its replacement. Compare the actual image files, not screenshots of the map or their displayed size in your browser.
In this example, the original plan is 2884 × 1786 pixels.
The replacement shows the same plan at 4000 × 2477 pixels. It looks similar and has the same proportions, but its pixel dimensions are different.
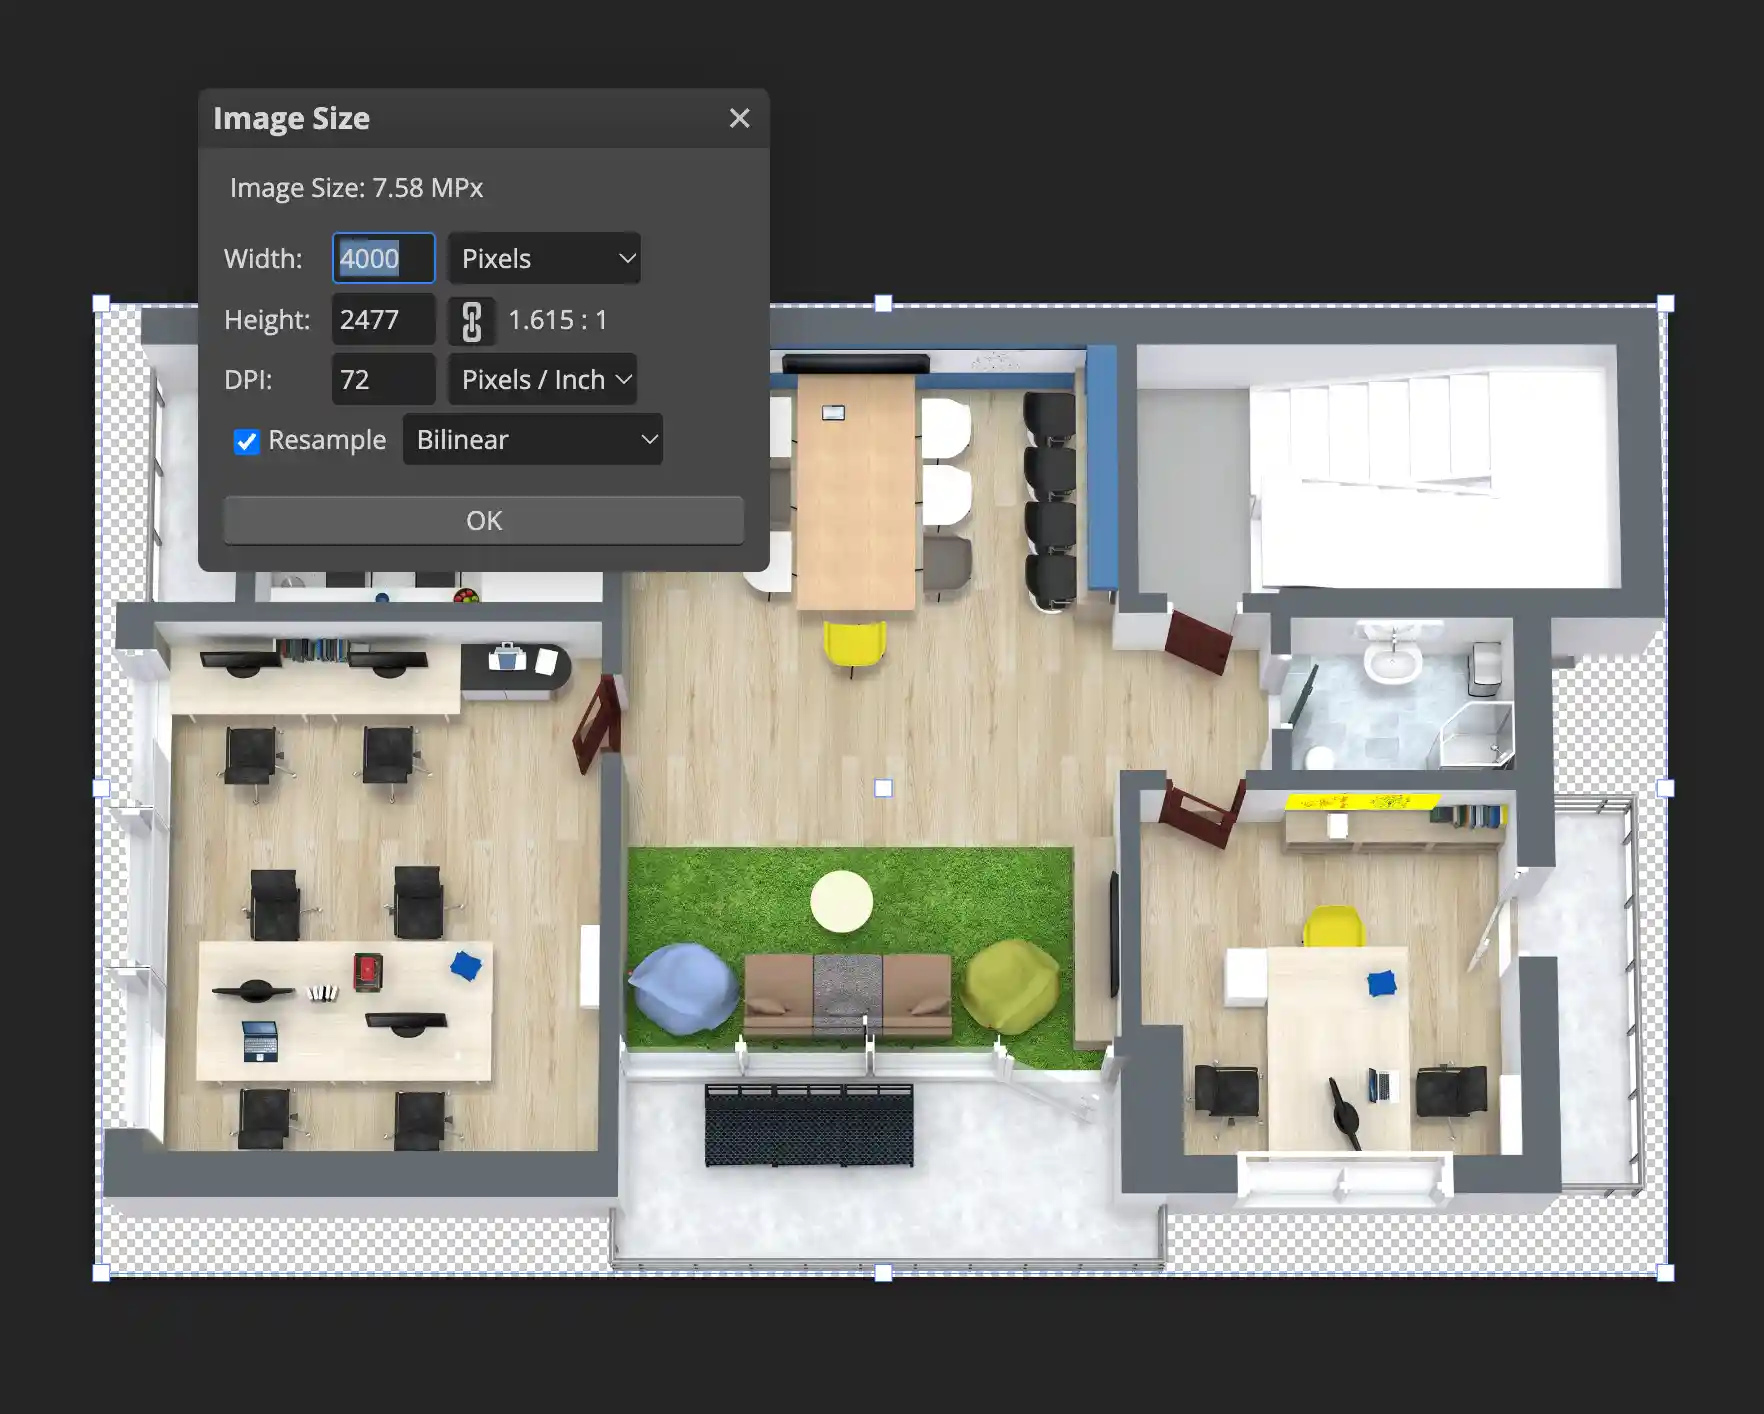
Step 3. Adjust the replacement image
In your image editor, resize the replacement to match the original width and height as closely as possible. For this example, aim for 2884 × 1786 pixels, rather than uploading the enlarged version. Keep unchanged parts of the office in the same positions within the image, then export the adjusted file.
Matching the dimensions works best when the image keeps the same framing. Cropping, adding borders, or shifting the drawing inside the canvas can still affect alignment. Desks or rooms that have actually moved will still need their markers adjusted.
Step 4. Upload and check the result
Upload the adjusted image through Edit floor → Floor map, save, then return to Workplace → Map. Check that markers still line up with their desks and rooms, and move any affected markers in Edit mode.
Uploading the larger image without adjusting it can leave markers out of place, even when the floor plan looks the same. The comparison below shows what happens when the original is replaced with the enlarged version.
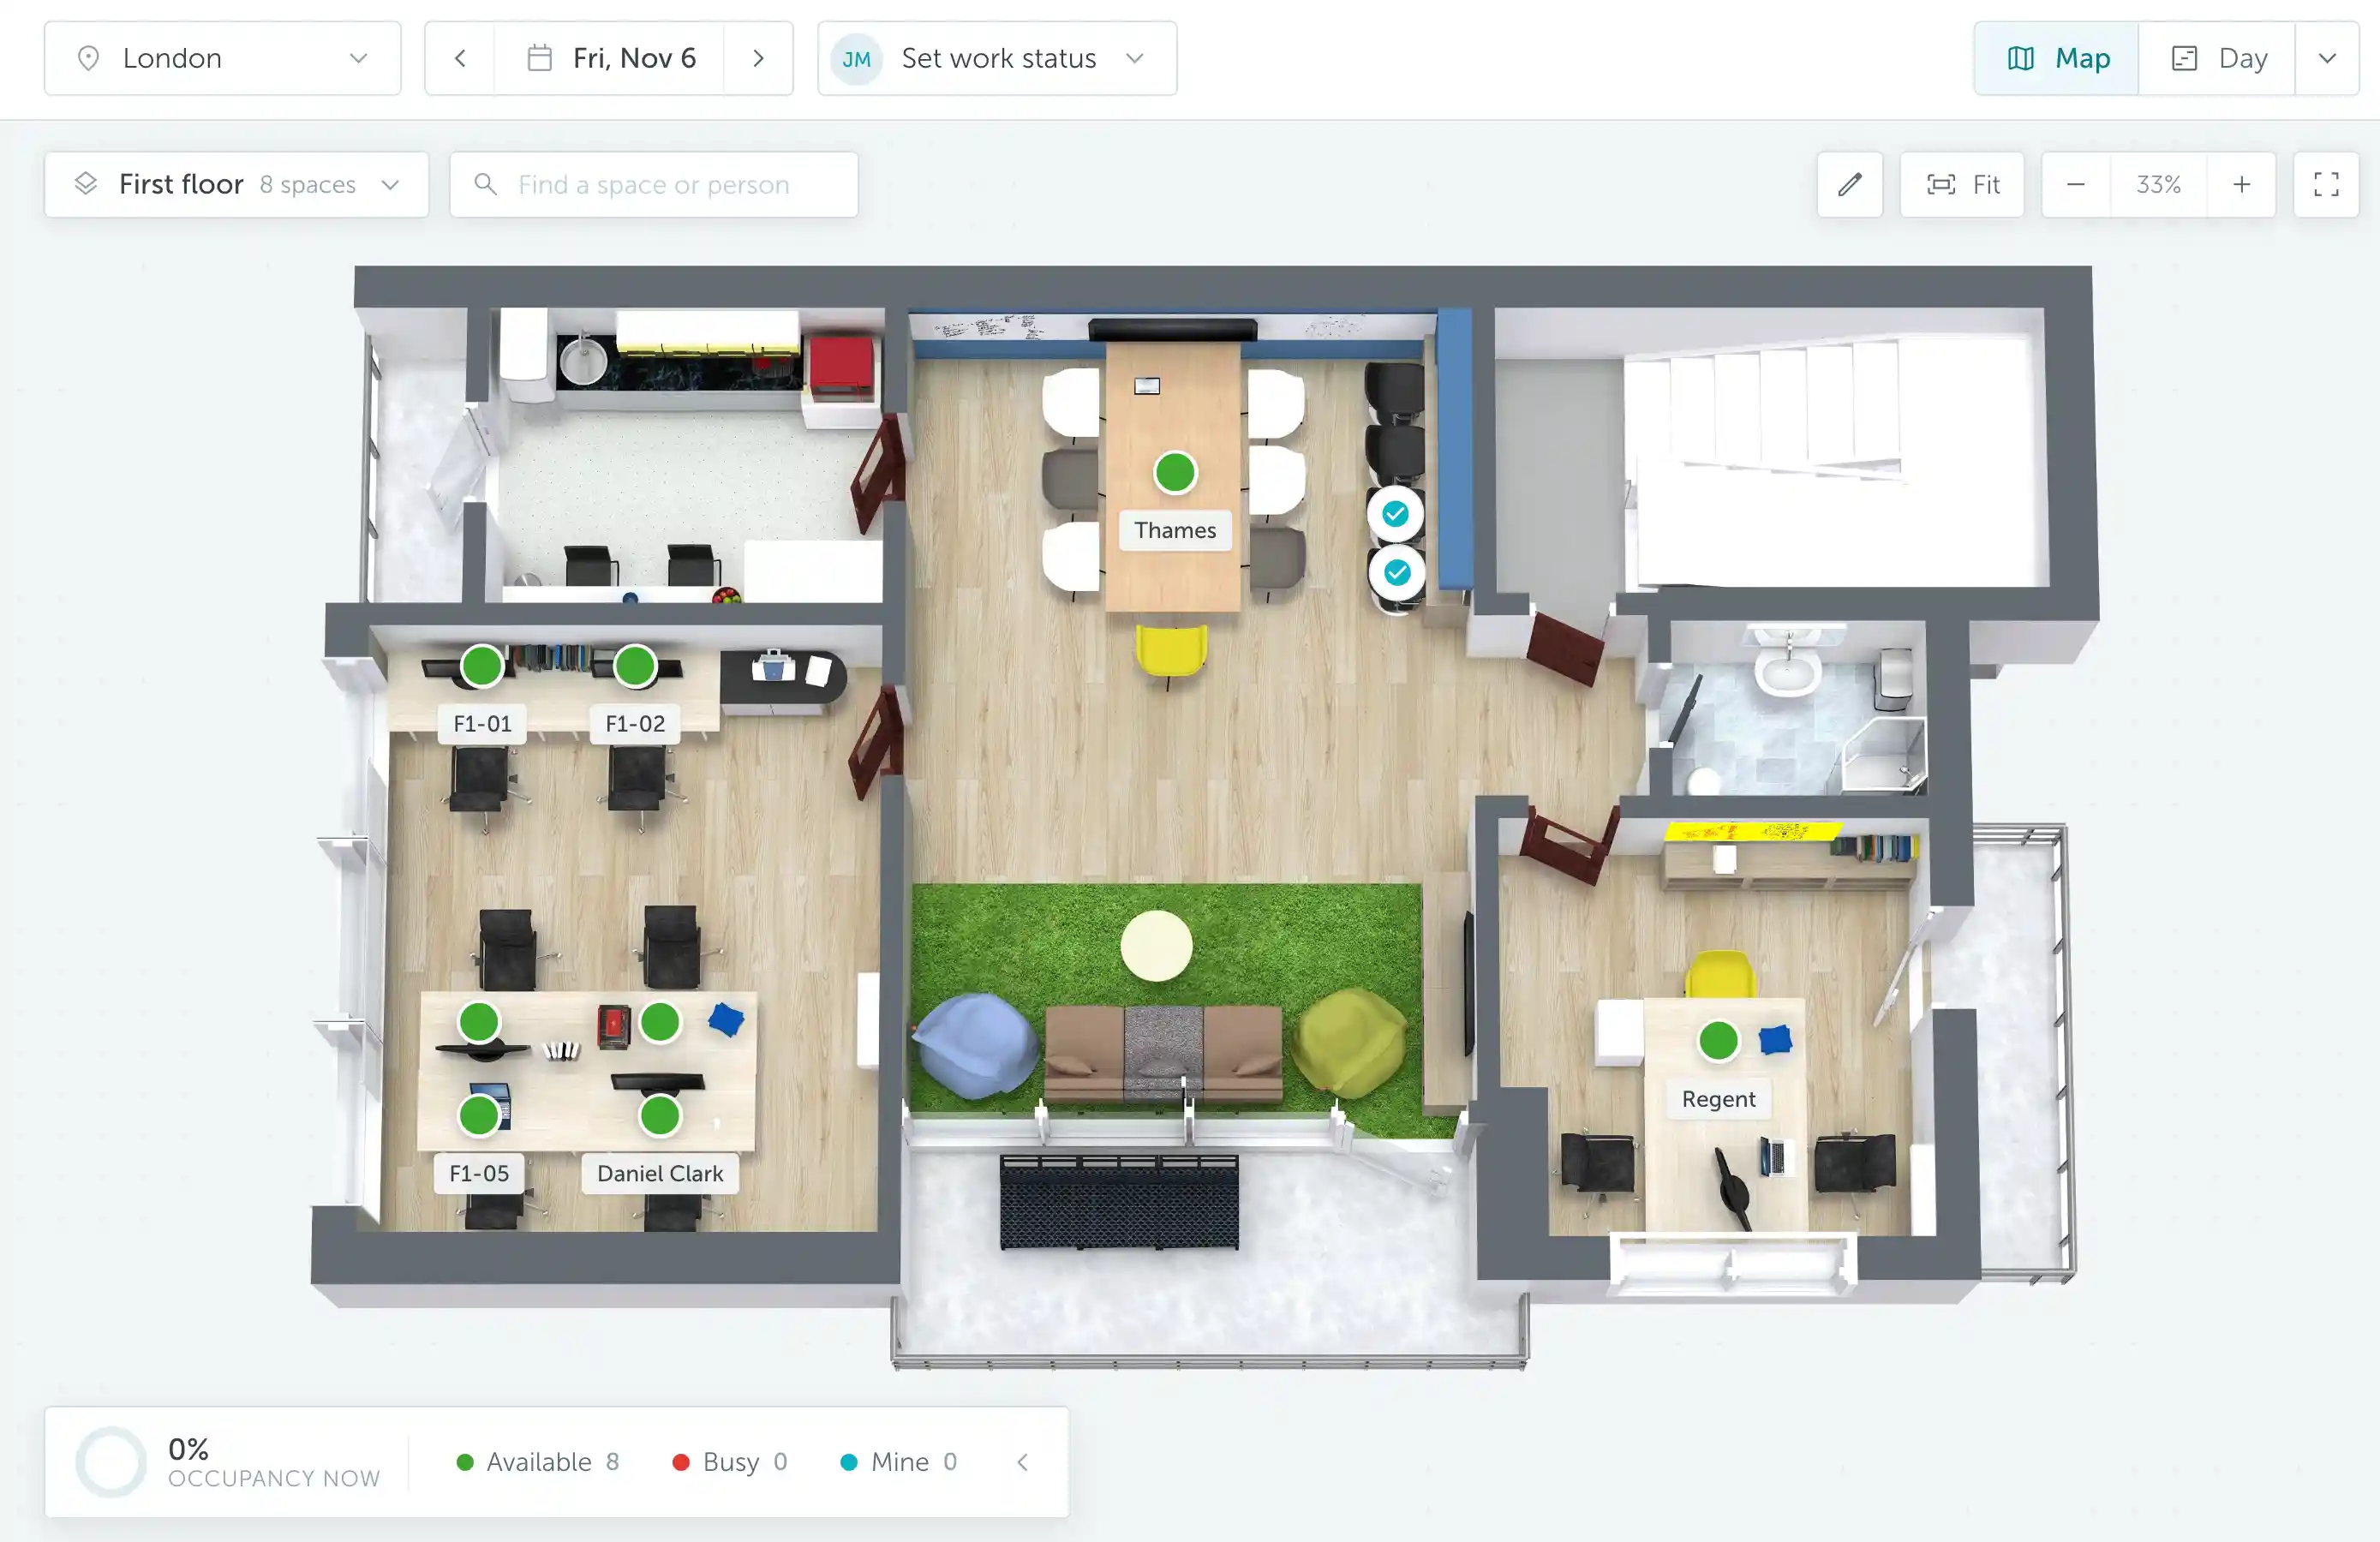
Before: the markers line up with the desks and rooms on the original plan.
After: the larger version of the same plan has been uploaded without matching its dimensions to the original. The markers are still present, but they no longer line up. For example, Thames now sits beside the meeting room rather than on its table.
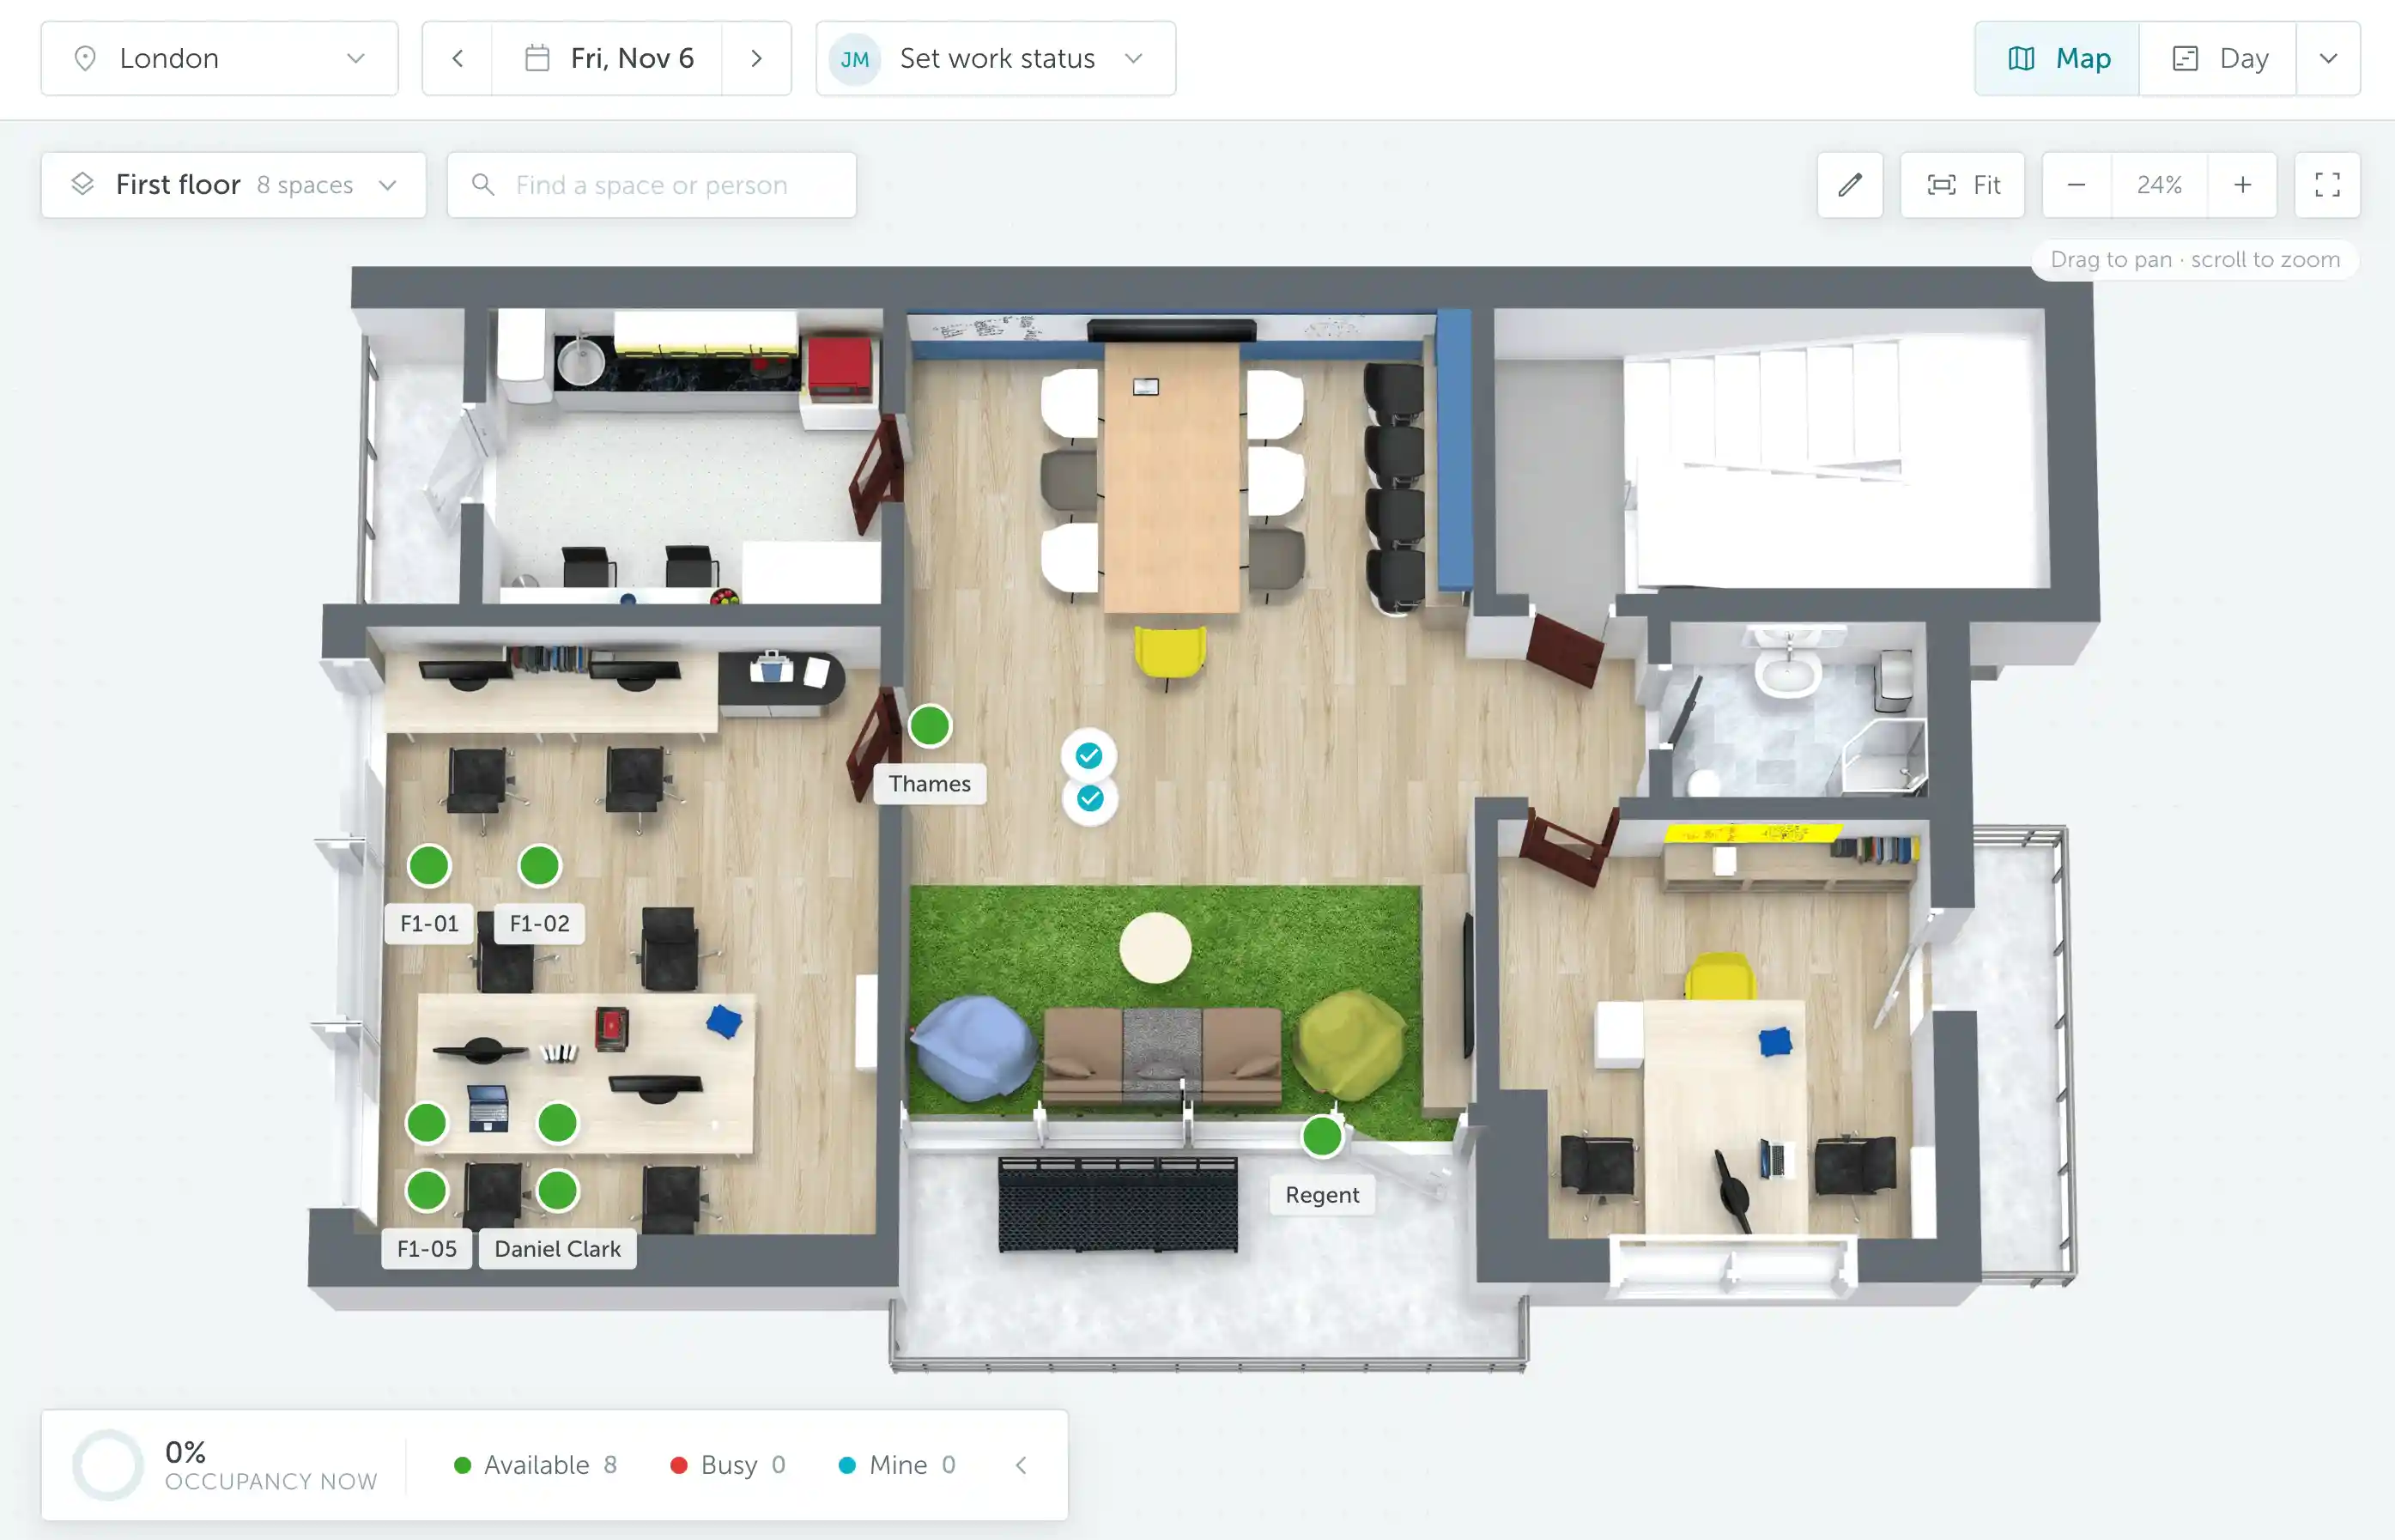
If this happens, either adjust the replacement image and upload it again, or keep it and reposition the markers in Edit mode, as described above. Always check the map after replacing the image, even when its dimensions match.
If you use Physical Distancing or compound rooms, also check the floor map's pixels-per-meter scale and the resulting distancing radius after changing the image dimensions.