Connect to Azure AD via SAML2.0
- Authenticate to Azure Portal with an Account that has Admin privileges, then go to Manage Azure Active Directory.
- Navigate to Enterprise Applications
- Click “New Application” and select “Non-gallery application”. Type a name and continue.
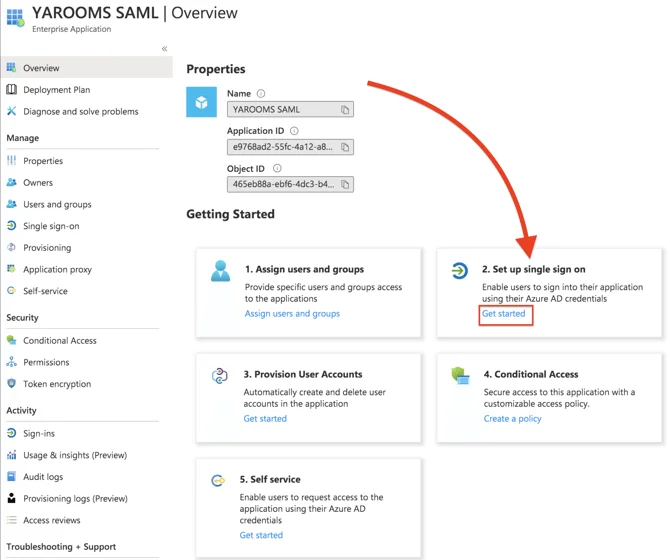
- In the application’s overview page there are 5 sections that allow for advanced settings of the newly created app.
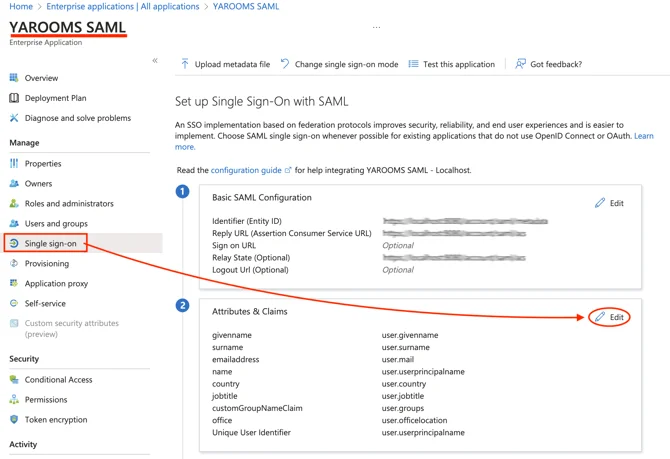
- Start by clicking on section “2. Set up single sign on” and choose SAML.
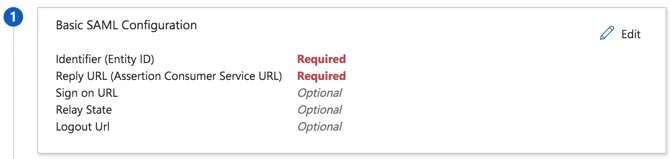
- After that, click on section “1. Basic SAML Configuration” and click on Edit.
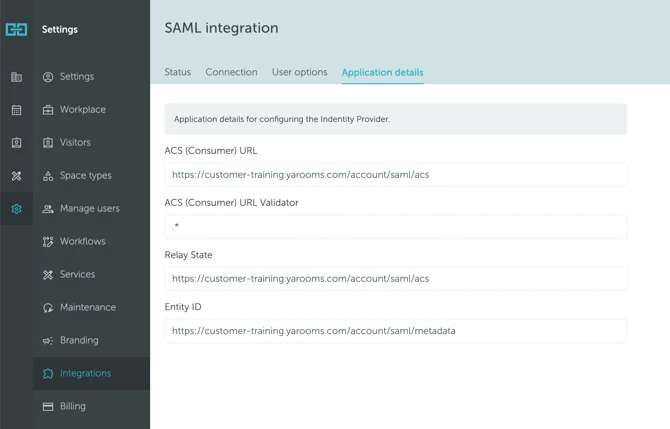
- In YAROOMS, go to Settings → Integrations → SAML 2.0 Authentication, and click on the Application Details tab.
Pair the values as follows:
- Paste ACS (Consumer) URL (from Yarooms) in Reply URL (Assertion Consumer Service URL)
- ACS (Consumer) URL Validator (Optional): This field is required only when specifically requested by your identity provider.
- Paste Relay State (from Yarooms) in Relay State
- Paste Entity ID (from Yarooms) in Identifier (Entity ID)
SAVE the SAML Configuration settings.
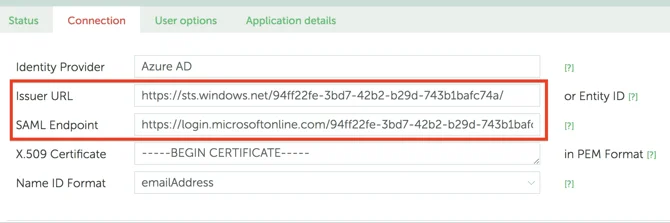
Go back to YAROOMS and click on the Connection tab.
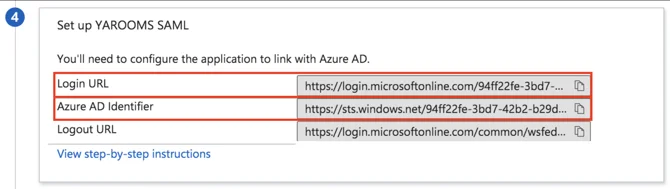
- Copy the Azure AD Identifier value and paste it in Issuer URL field.
- Copy the Login URL value and paste it in SAML Endpoint field.
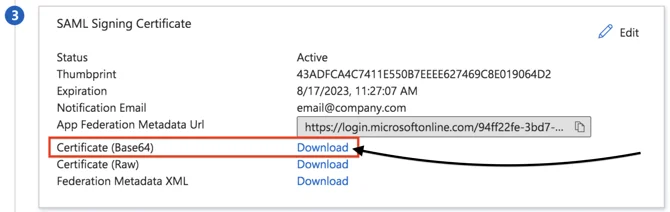
- Go back to Azure and scroll to section “3. SAML Signing Certificate”.
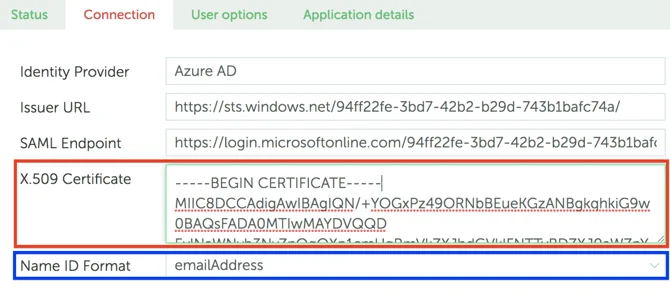
- Download the certificate in Base64 format and paste its contents in the X.509 Certificate field (in YAROOMS).
- Set the Name ID Format field to emailAddress.
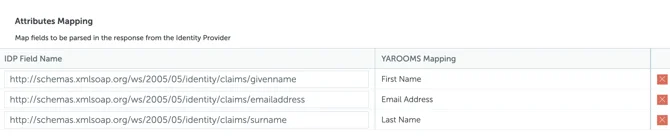
- Next, go to Azure, scroll to section “2. User Attributes & Claims” and map the fields accordingly in YAROOMS.
- Start by clicking the Edit button.
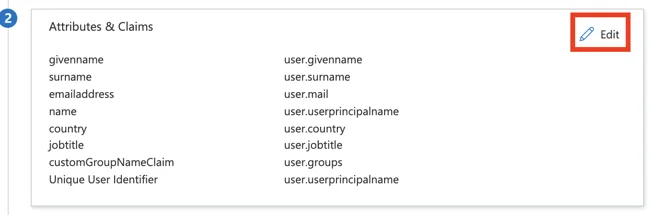
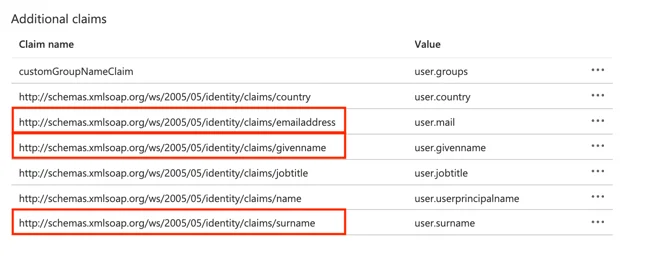
- From Additional Claims, add the correct Claim Name (not Value), to the YAROOMS Attributes Mapping section, in the IDP Field Name.
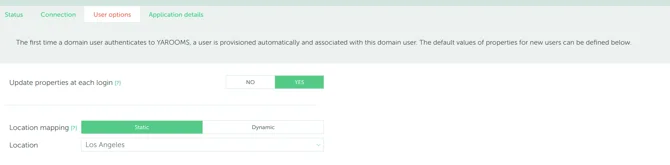
- In YAROOMS, click “Save Connection Settings” and move to “User options” tab. This page allows to select the Location, Group and Role for newly provisioned users.
- For Dynamic mapping (Location, Groups), extra claims and attributes will have to be exported from Azure in the User object.
Note: We have a default value for each dynamic mapping property. In case any mapping is missing, the user location, group, or role will fallback to the defined default value.


It is recommended not to choose Administrator or Supervisor groups for mapping, as all new users will have all the privileges of these groups.
- Click “Save User options” and move to the last tab, “Application Details”.
- In YAROOMS click “Activate SAML 2.0 Integration” and complete the integration setup.
- In Azure save the SAML configuration and complete the process.

For the new Azure Application to be properly used make sure user accounts intended to use the provisioning integration are assigned to the newly created application.
Specific Guide for Dynamic GROUP MAPPING
- Go to the Azure Portal → Manage Azure Active Directory → Enterprise applications, click on the YAROOMS application that you created previously, then on Single sign-on (from the left side menu).
- After which, click on Edit, from the “2.Attributes & Claims” section.
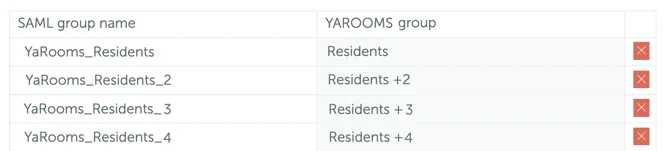
- There, you’ll see a list with all the Claims. Copy the Claim NAME (not Value) and place it in the Directory field of your YAROOMS Group Mapping page.
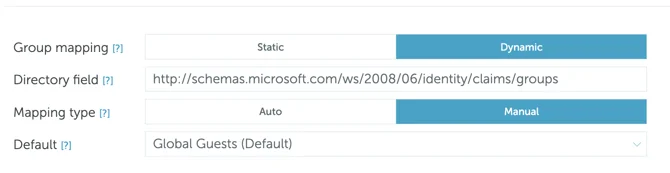
- After having done that, you will be able to add the YAROOMS groups and map them with User Groups from Azure: SAML group name (copy-paste their name from your Azure environment).