
1. What are workplace services?
In YAROOMS, workplace services refers to any kind of shared service or physical resource (from tea & coffee to chairs and monitors) that can be requested when making a booking.
When the user makes a booking and orders a service, a notification is sent to the service owner, who is responsible for providing it.
2. How to configure workplace services?
Organize your services into categories, with optional subcategories for larger offerings. Services can belong directly to a category or to one of its subcategories.
For example:
| Category | Subcategory | Example services |
|---|---|---|
| Catering | Breakfast | Breakfast Menu A, Breakfast Menu B |
| Catering | Drinks | Beer, Champagne |
| Catering | Lunch | Canapes, Beef Wellington |
| Equipment | None | AV Equipment, Chairs |
You must create at least one service category before you can add any services.
Step 1: Create service categories and subcategories
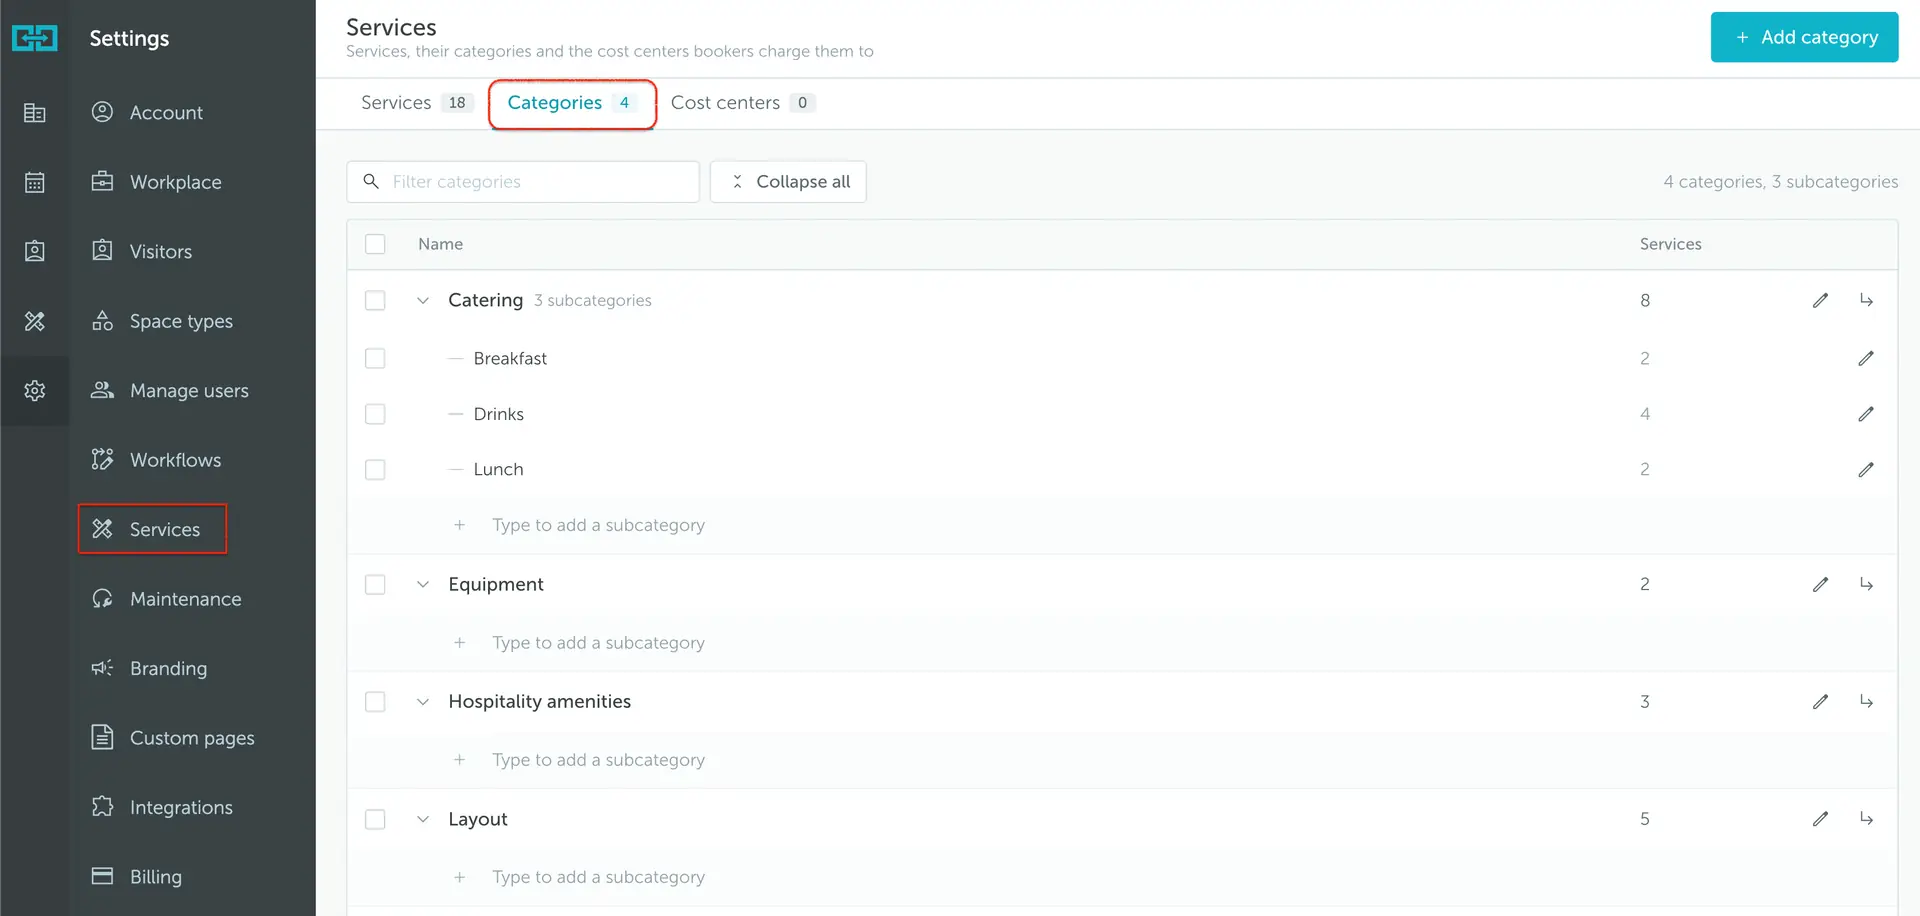
Go to Settings → Services → Categories and click Add category.
Give the category a name, such as Catering or Equipment, then save.
To organize a category further, expand it and use Type to add a subcategory. For example, Catering can contain Breakfast, Drinks, and Lunch. Use the pencil icon beside a category or subcategory to edit it.
Once your categories are set, you can start adding services.
Step 2: Add services
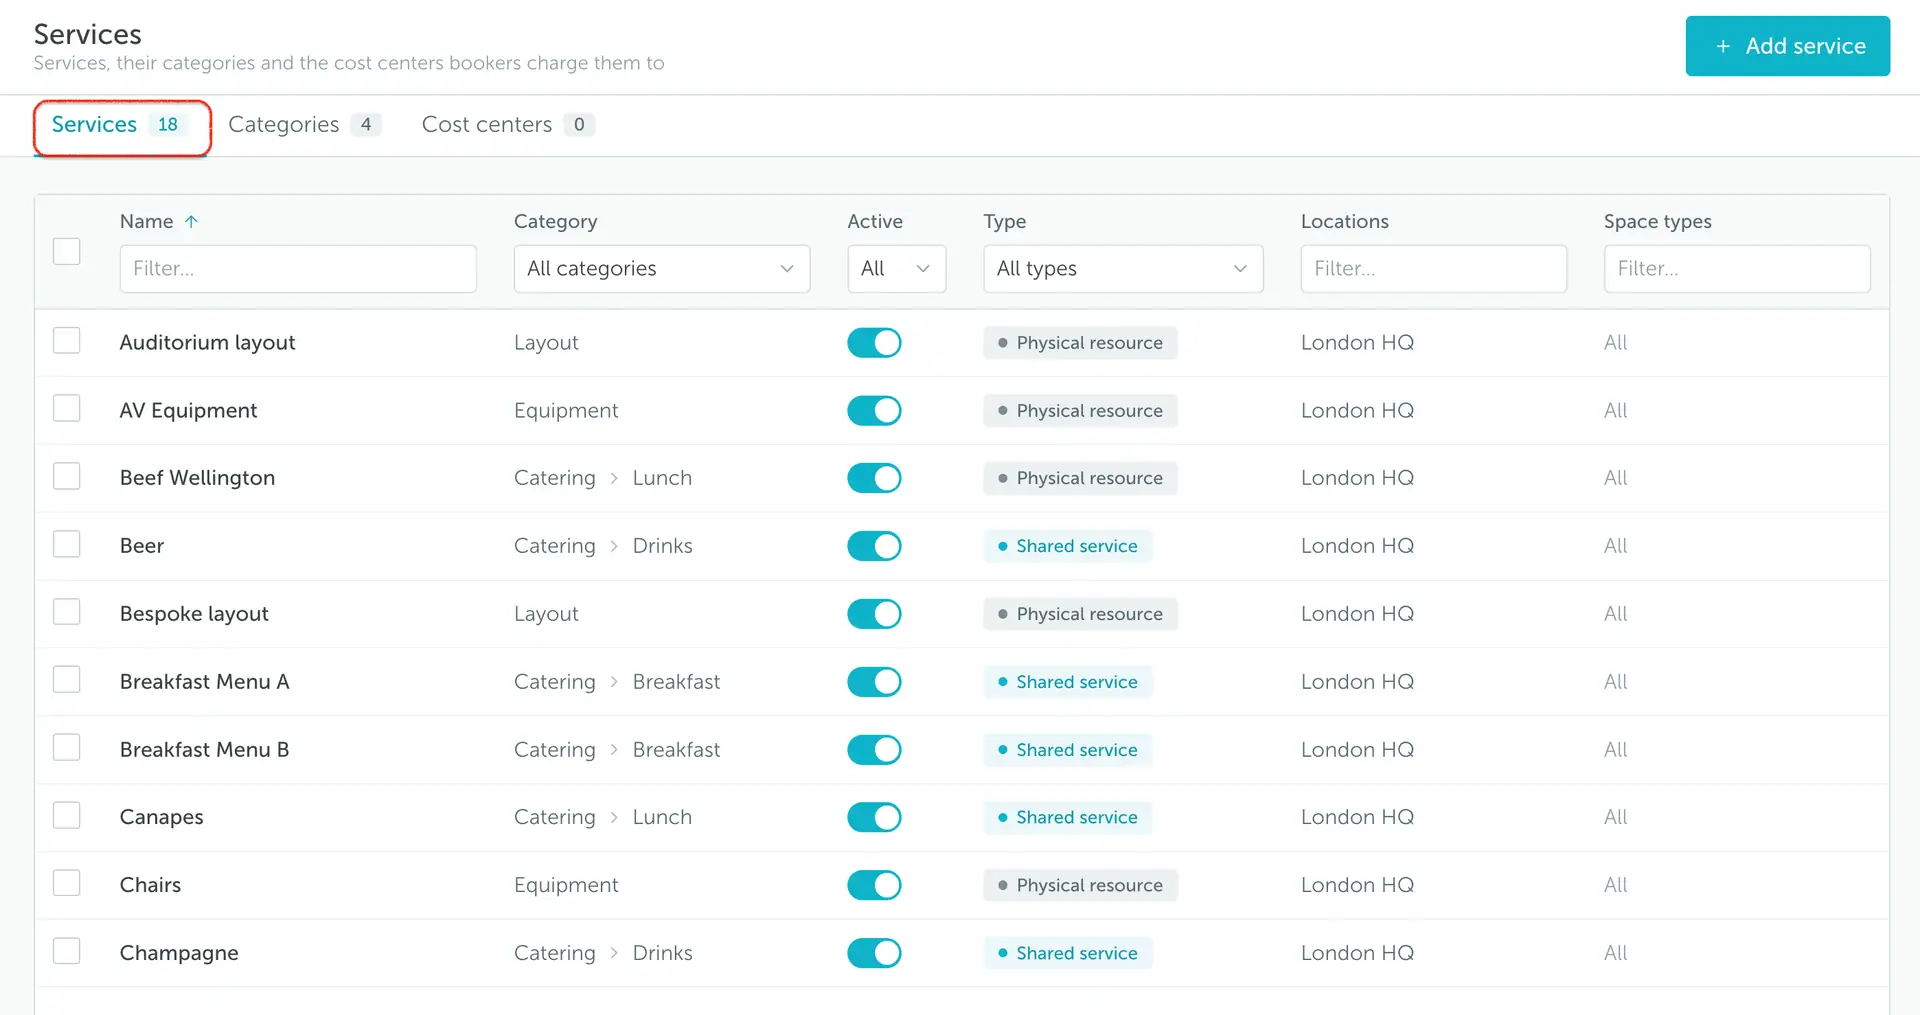
Open the Services tab and click Add service. The list shows each service’s category, status, type, locations, and space types.
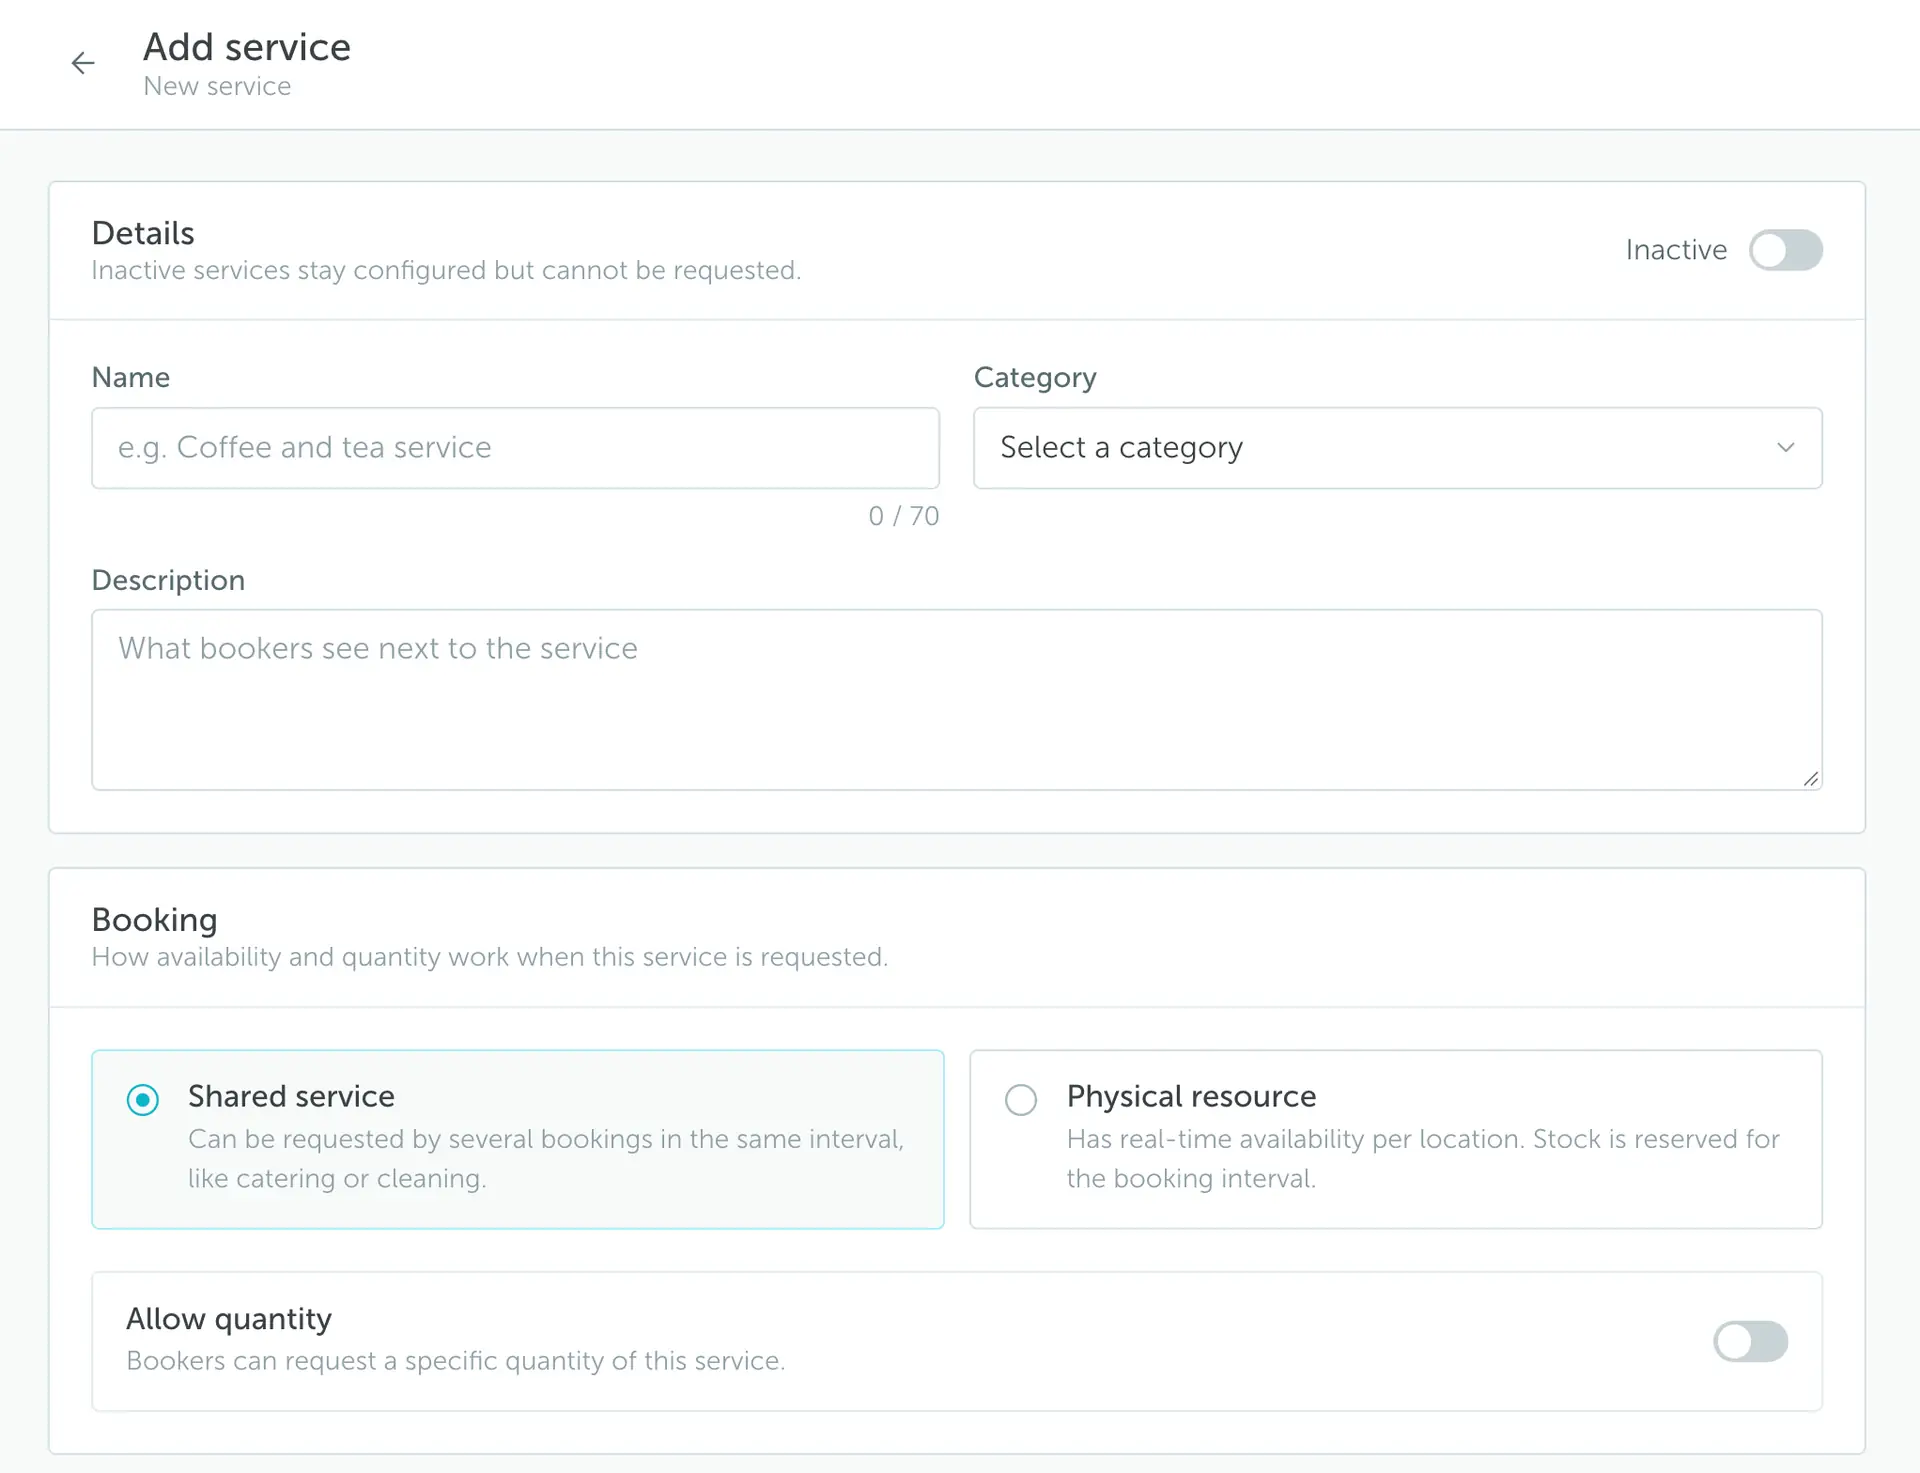
In the Details section, configure:
- Status: Activate the service when it is ready to be requested. Inactive services remain configured but cannot be requested.
- Name: Enter the name of the service (e.g. Coffee, Laptop).
- Category: Select the category or subcategory the service belongs to.
- Description (optional): Add extra details about the service.
In the Booking section, choose how availability is managed:
- Shared service: Can be requested by several bookings in the same interval, such as catering or cleaning.
- Physical resource: Has real-time availability per location. Stock is reserved for the booking interval.
- Allow quantity: turn on if users should specify the number of items needed.
Step 3: Configure access and locations
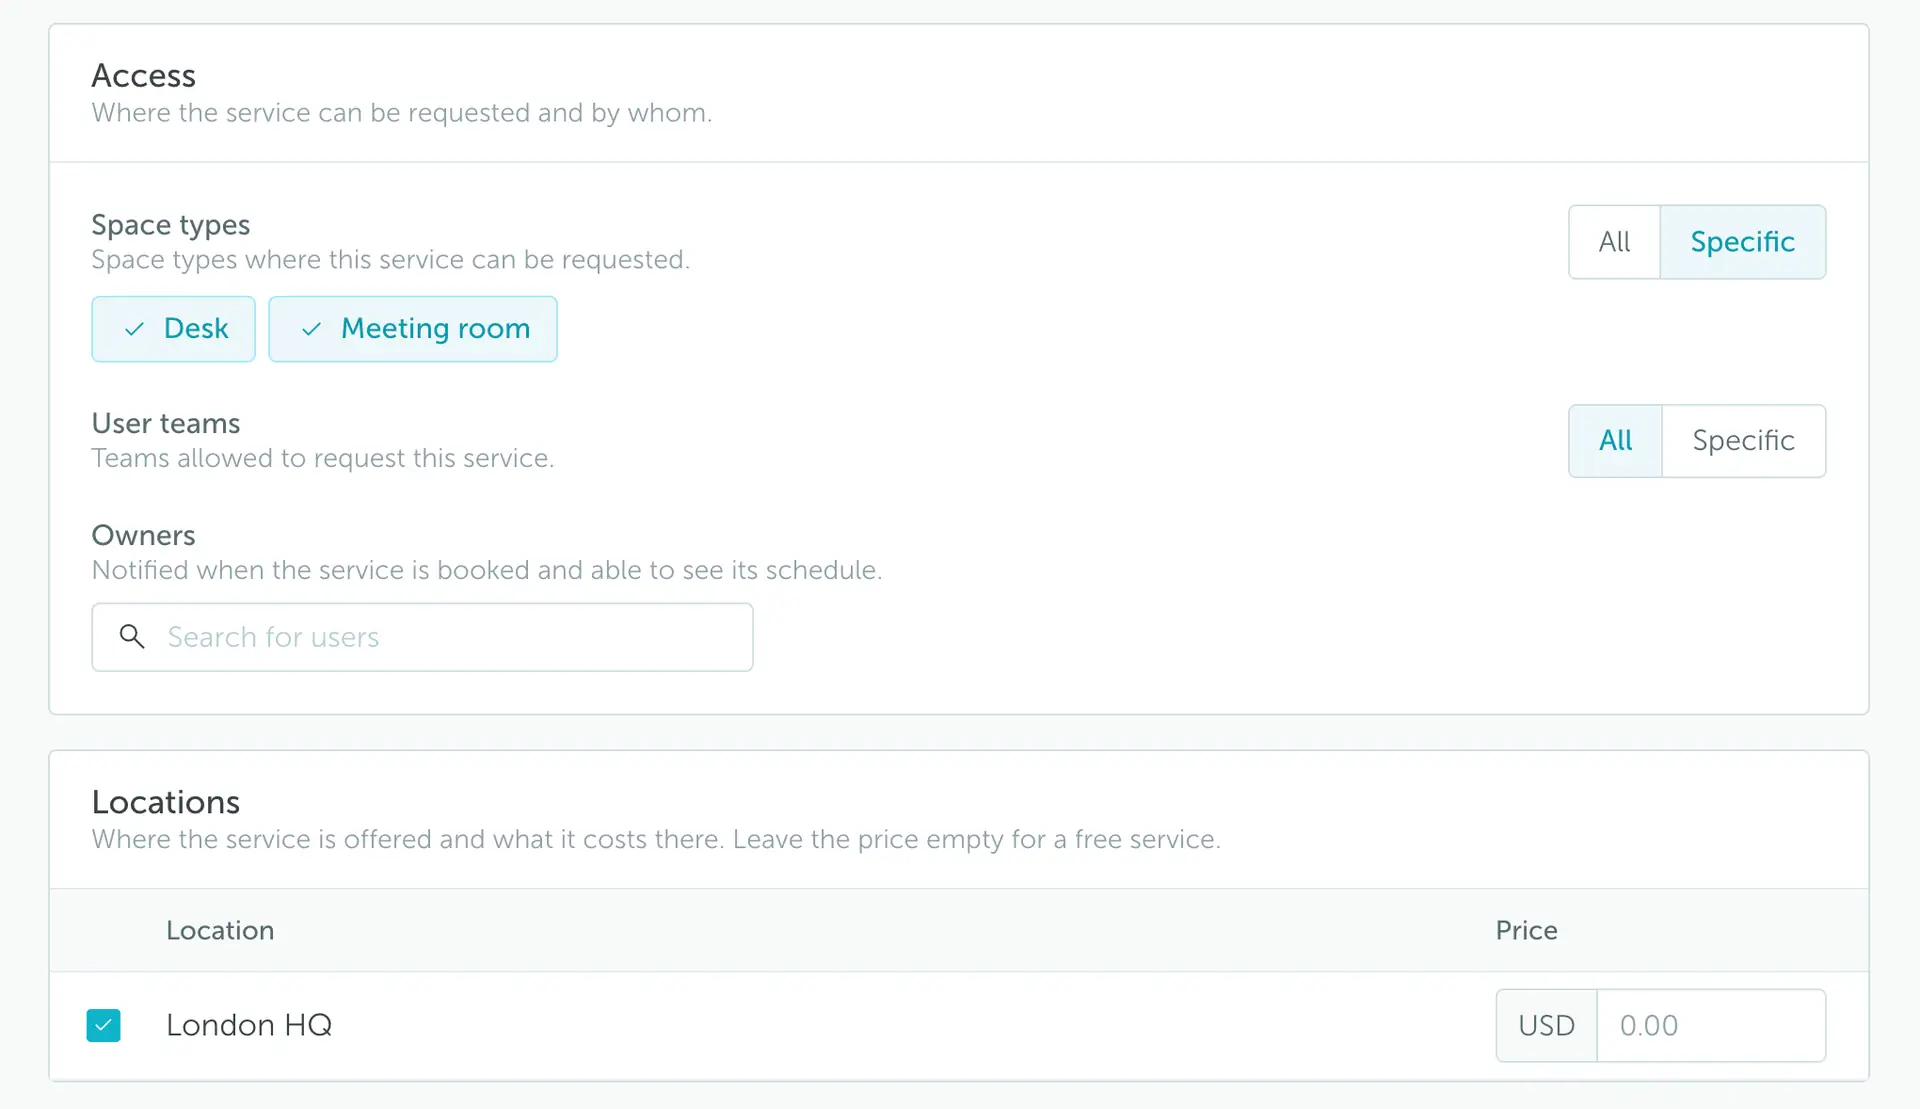
In the Access section, define:
- Space types: Where the service can be booked (e.g. meeting rooms, desks).
- User teams: Who can book the service.
- Owners: Who gets notified when the service is requested (can be one or multiple users).
In the Locations section, select where the service is offered and set its price at each location:
- Availability by location: Where the service can be booked.
- Price per location: Specify the price, or leave it empty for a free service.
- Quantity per location (for physical services): Helps prevent overbooking and tracks usage.
Save the service and repeat these steps for the rest of your offering. Employees can then request services with their bookings.
Set a service price
When creating or editing a service, use the Locations section to enter its Price for each location where it is available. The same service can have different prices at different locations. Leave the price empty for a free service.
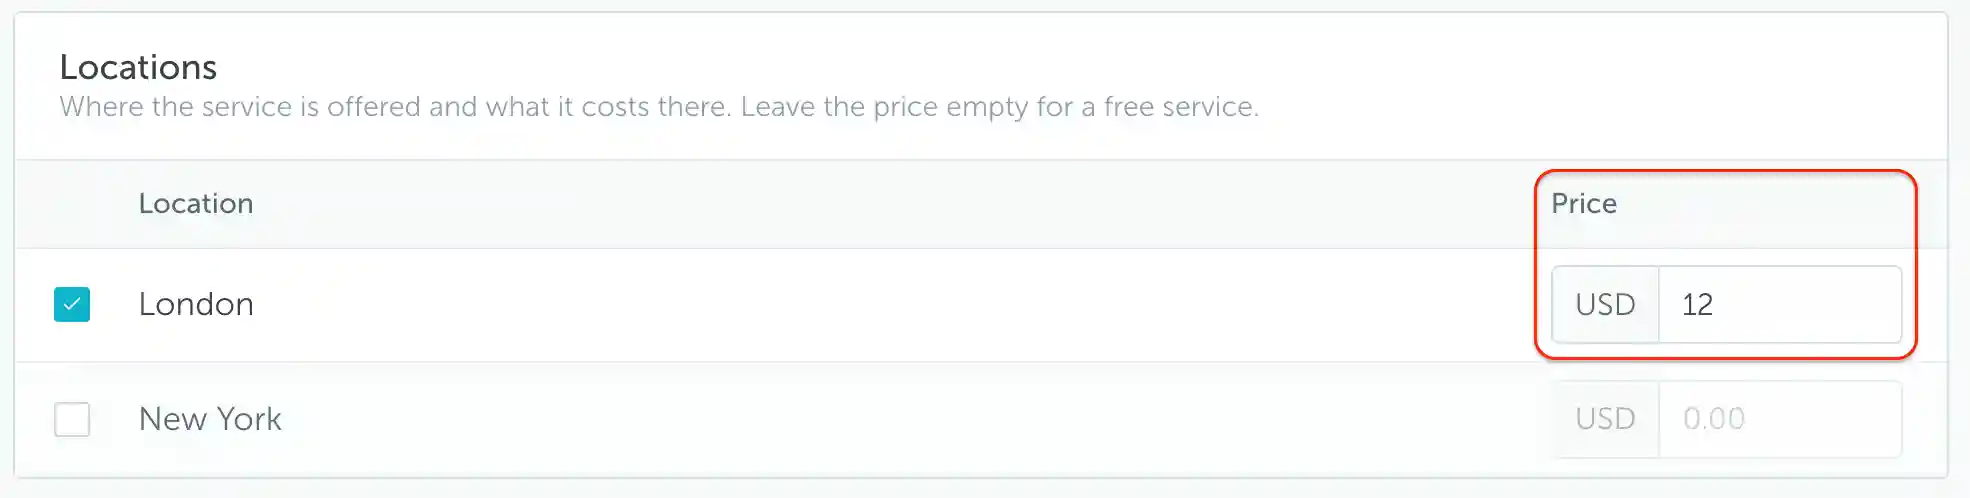
Bookers see the price when selecting services. To let them identify which department or client should bear the cost, set up cost centers as described below.
Cost centers
A cost center identifies where service costs should be allocated, such as a department or a client. Administrators create the available choices; the person making the booking selects the appropriate one when requesting services. The service itself does not determine the cost center.
Open Services → Settings → Cost centers to view the list. Use Add cost center, enter a name, and save. No further configuration is needed. Use names bookers can easily recognize, such as Sales, Finance, or a client name.
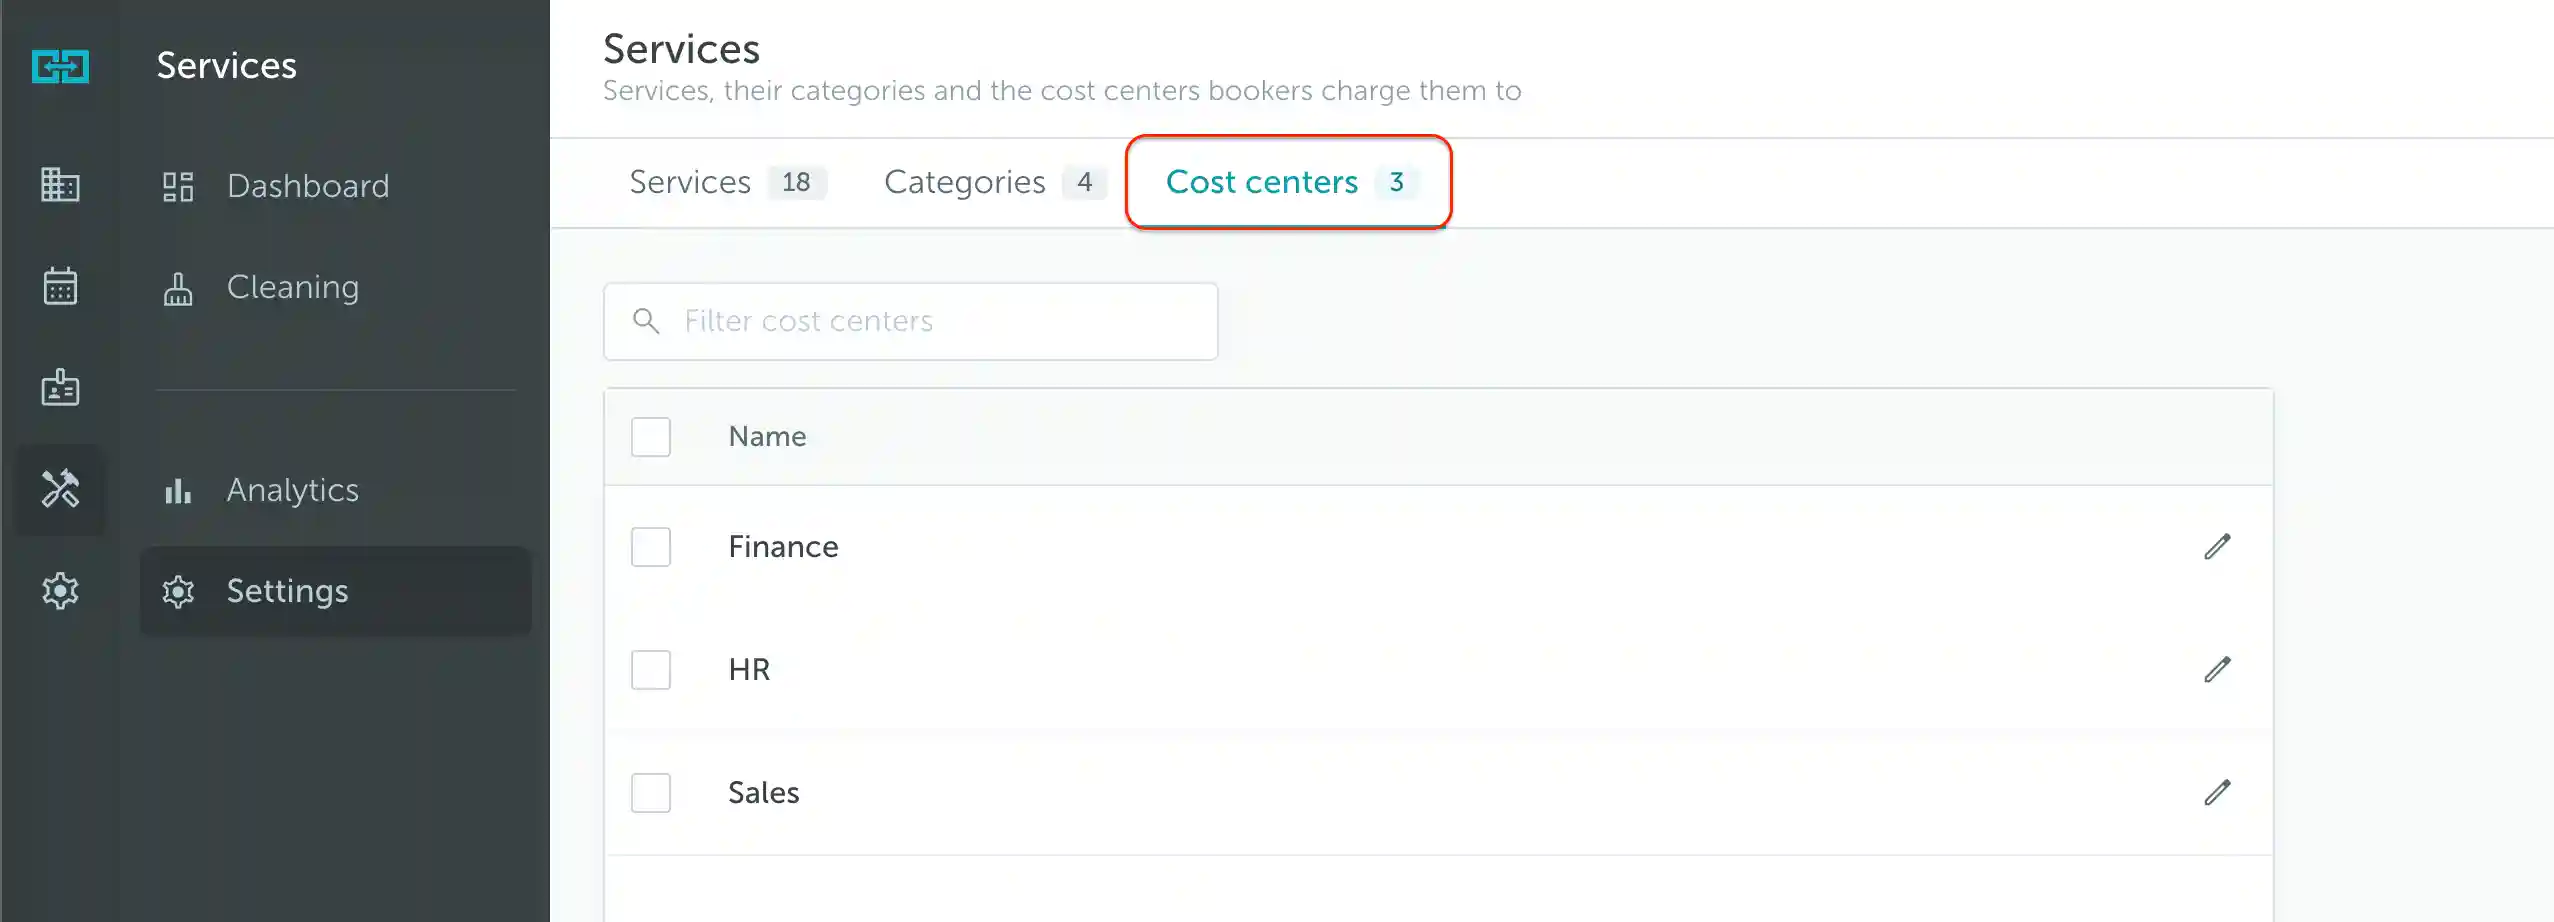
What bookers see
In Request services, the booker selects the services they need, then chooses a Cost center near the bottom of the panel before clicking Update. This records where the service costs should be allocated for internal chargeback or subsequent client billing.
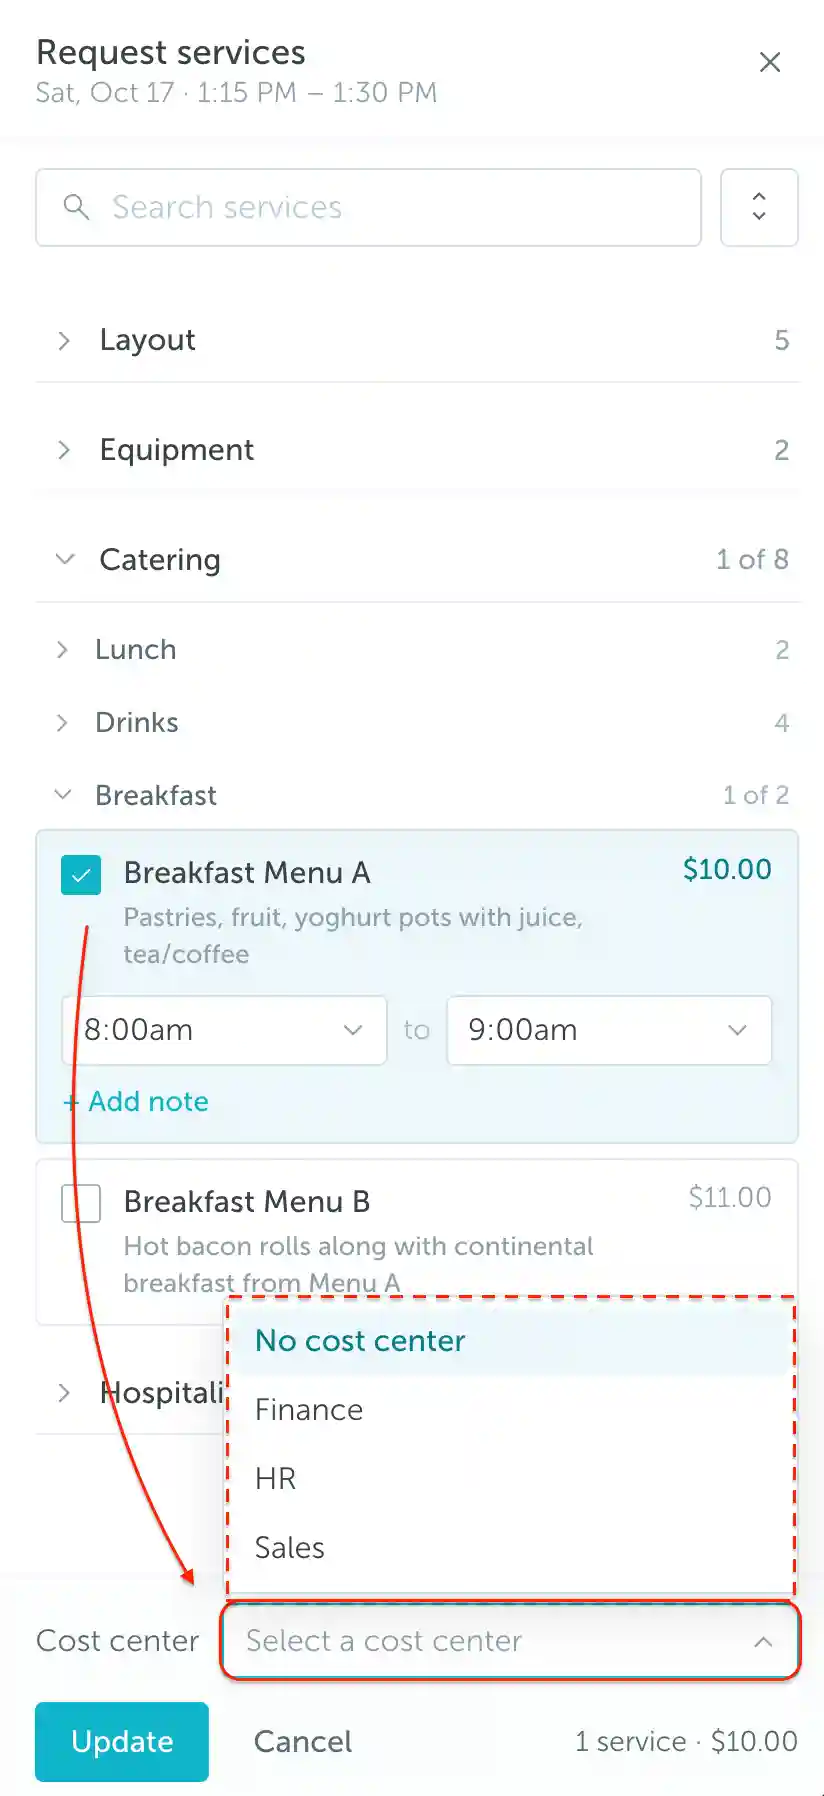
A law firm's assistant organizes an all-day client meeting with breakfast and lunch catering. They choose the cost center named for that client so the firm can later charge those costs back to the client. The same catering services could be used for an internal meeting with a department's cost center instead: the booker chooses based on who should bear the cost.
See How to Book Workplace Services for the user instructions, or Services Analytics to explore service costs by cost center.