
Jump to:
How it works
Have a desk neighborhood that should be bookable only by Marketing, or a few rooms that only selected people should use? You can control this through a space group and an access role.
Think of it as three simple pieces:
- Marketing Desks is the space group: it contains the desks you want to control.
- Access: Marketing is the access role: it gives permission to book those desks.
- Marketing is the team: giving it that role lets its members book the desks. You can also give the role directly to selected users.
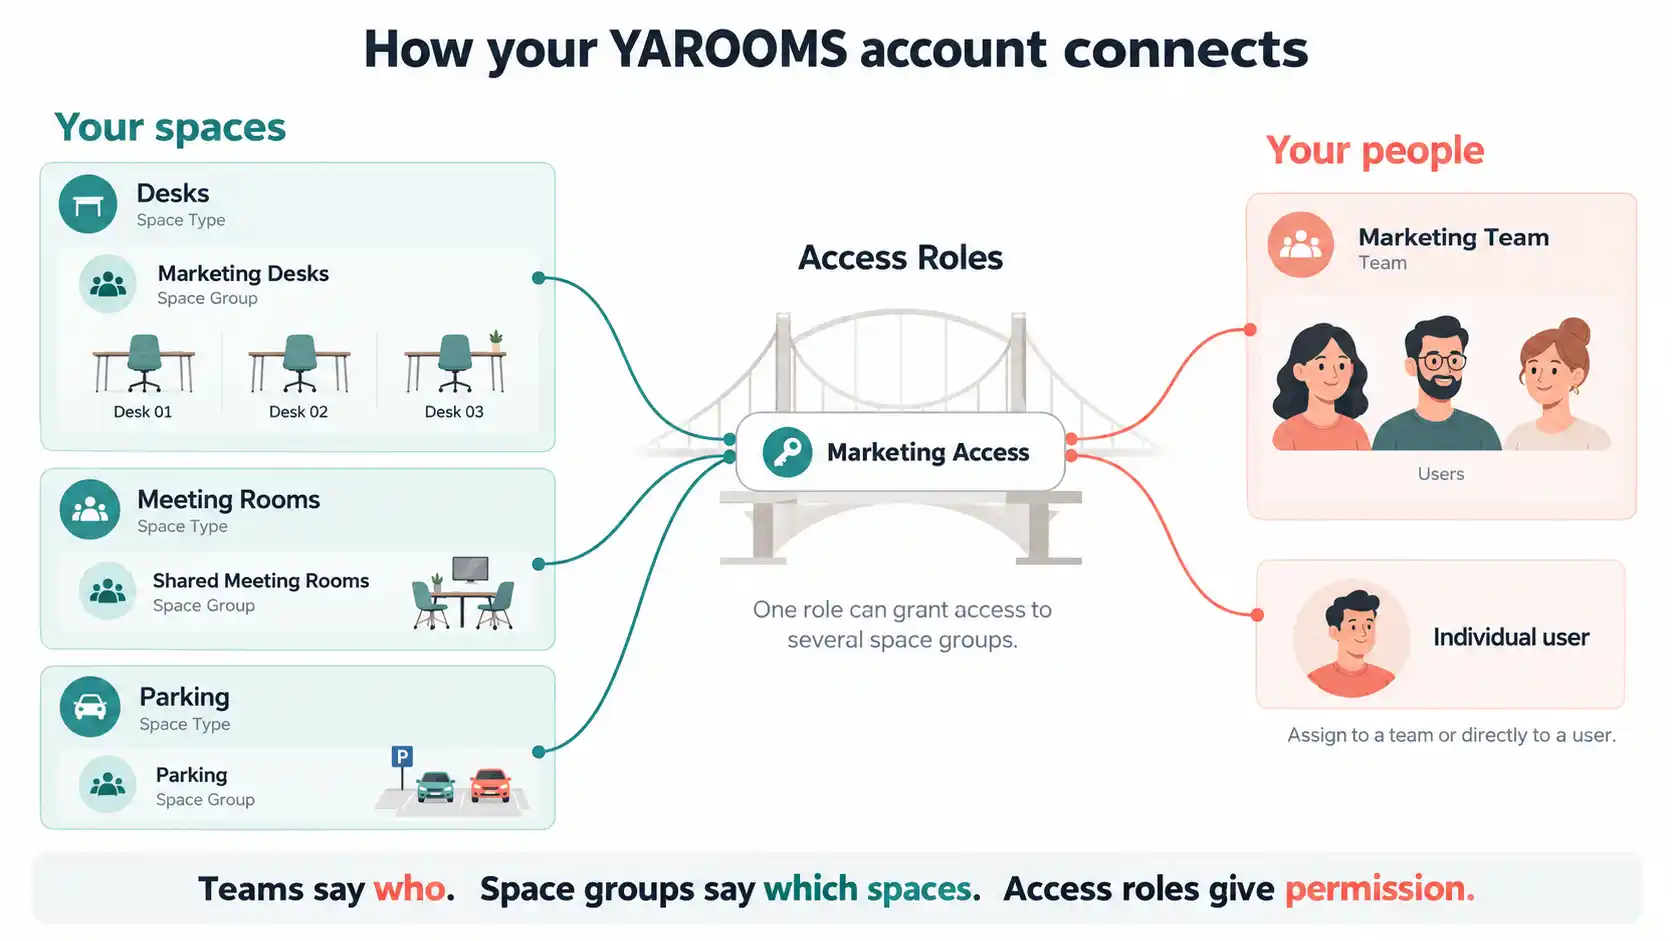
The illustration also shows that one role can include several space groups. For the example below, we will grant access only to Marketing Desks. The same process works for meeting rooms or parking spaces.
1. Create a space group
Go to Settings → Space types, open your desk type, then select Groups → Add group. Name it Marketing Desks, review its booking and check-in rules, and save.
Use your existing desk type; you do not need a new type just because a department needs separate access. If the spaces already belong to a suitable dedicated group, use that group instead. See How to create space groups for the settings.
2. Put the spaces in that group
Open Workplace → Map, select the floor, enter Edit mode, and select Spaces.
- For new desks: click where each desk should appear, choose the desk Space type, select Marketing Desks as its Space group, enter a name, and click Add space.
- For existing desks: click each marker, change its Space group to Marketing Desks, and save. There is no need to delete and recreate the desks.
Repeat for the spaces in this neighborhood, then exit Edit mode. For the map controls, see Setting up your office map.
A space belongs to one group. Moving a desk into Marketing Desks also makes it follow that group's booking and check-in rules, so check those settings before moving existing spaces.
3. Create the access role
- Go to Settings → Manage users → Roles and add a new role.
- In General, name it Access: Marketing.
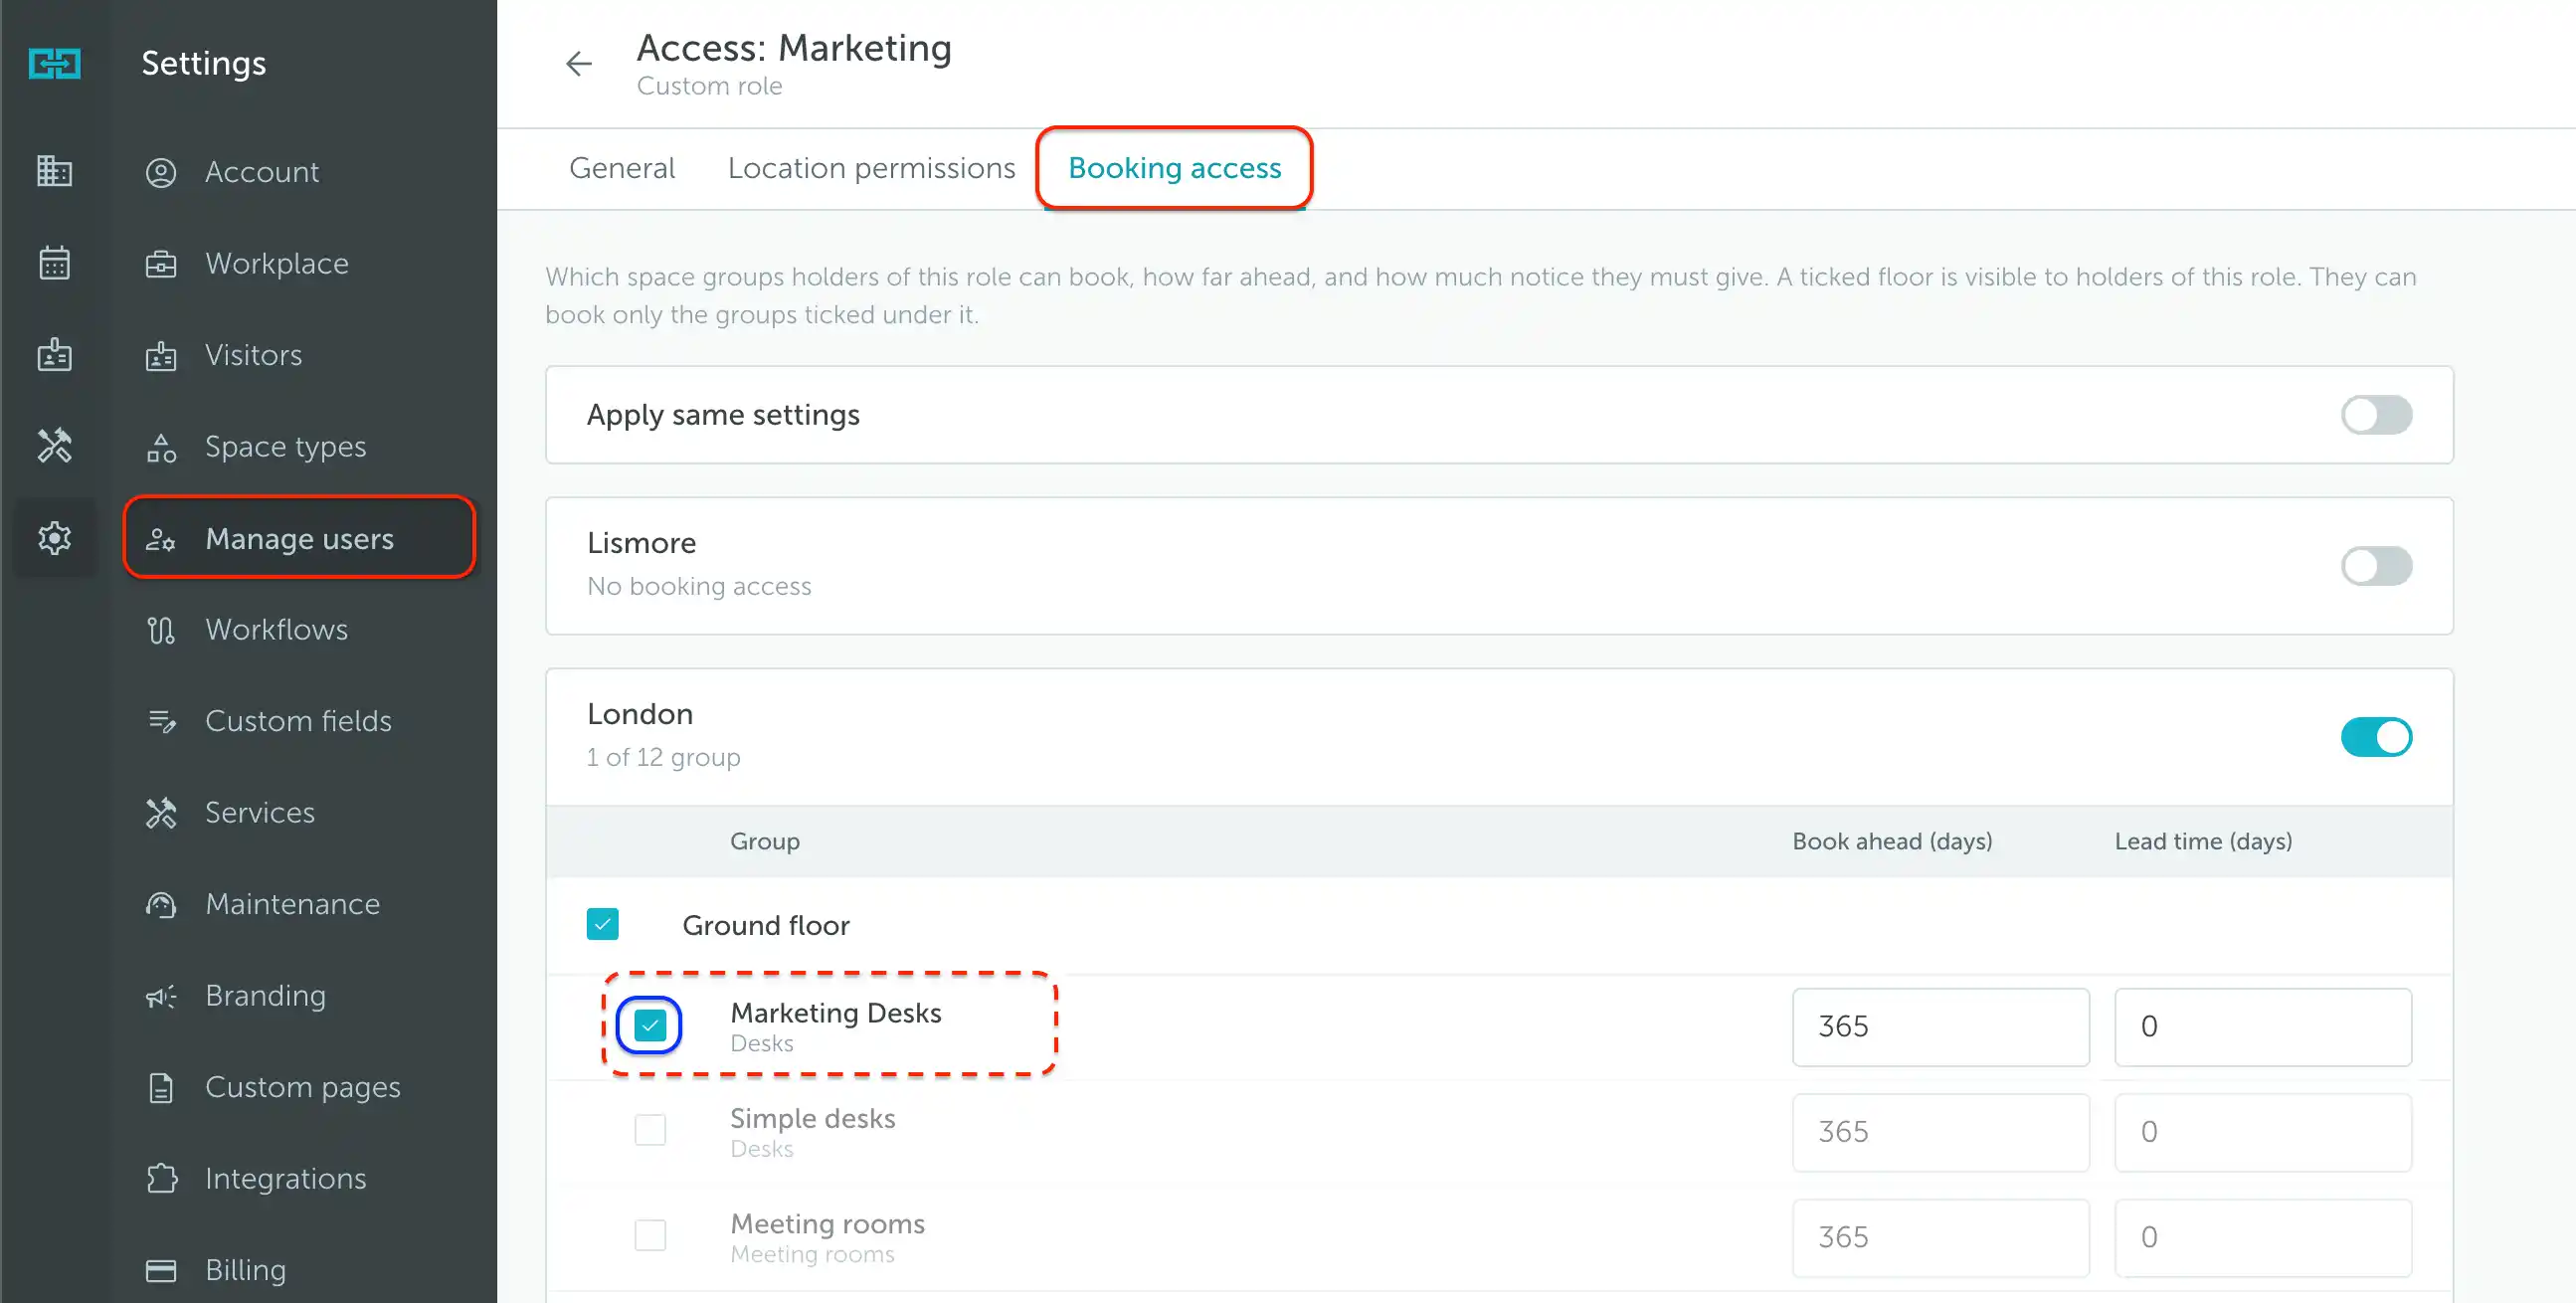
- Open Booking access, enable the relevant location, and tick the intended floor. Under that floor, select Marketing Desks and leave unrelated groups unchecked.
- Set the required Book ahead and Lead time values, then save the role.
In the example below, London is enabled and Ground floor is ticked, with only Marketing Desks selected beneath it. Ticking the floor makes it visible to holders of this role; they can book only the groups ticked under it. Simple desks and Meeting rooms remain unchecked, so this role does not grant booking access to them.
4. Give the role to the right people
For a whole team: go to Settings → Manage users → Teams, open Marketing, and select Access: Marketing under Details → Roles every member gets → Add a role. Save. Everyone in that team inherits the role. If needed, create the team first and assign its members.
For selected individuals: go to Settings → Manage users, open each user, and add Access: Marketing under Roles and access → Roles → Add a role. Save. You do not need to move those users into a different team.
You can use either method, or both when a team and a few other people need access. The user access guide includes screenshots of both assignment methods.
5. Check that access is exclusive
Giving Marketing access does not automatically remove anyone else’s existing access.
Roles add up. A user can receive access through their team or an individually assigned role. A narrower role does not cancel broader permissions from another role. The name Marketing Desks alone does not restrict bookings.
Review Booking access in other roles assigned to users who should not book these desks. Remove this group’s permission from those roles where needed, while preserving access to other spaces they still require.
Finally, test with two regular users: one who should have access and one who should not. The first should be able to book an available desk in the group; the second should not. Do not use an Administrator account to verify the restriction, because administrators have broader access.